Can Body-Sculpting Practices Encourage Joy Over Shame?

Key Takeaways

  • Understand how cultural standards and childhood messages generate a pattern of shame and self-criticism. Challenge those standards to deflate pressure to conform.
  • Choose body sculpting motivations without shame. Choose joy. Enumerate internal reasons to remain rooted.
  • Instead, use holistic metrics such as mood, confidence, and functional strength to measure progress, and measure non-scale victories with kindness, not judgment.
  • Daily habits that support mind and body, like mindful breathing, balanced movement, rest, and journaling, build resilience and emotional clarity.
  • Curate your online and social circle to minimize comparison, follow body-love accounts, and establish boundaries with individuals or material that perpetuate toxic shame.

Reclaim body sculpting as art and empowerment — wear your scars and favorite features, choose joy over judgment, celebrate the little victories and tell your story in inspiring communities.

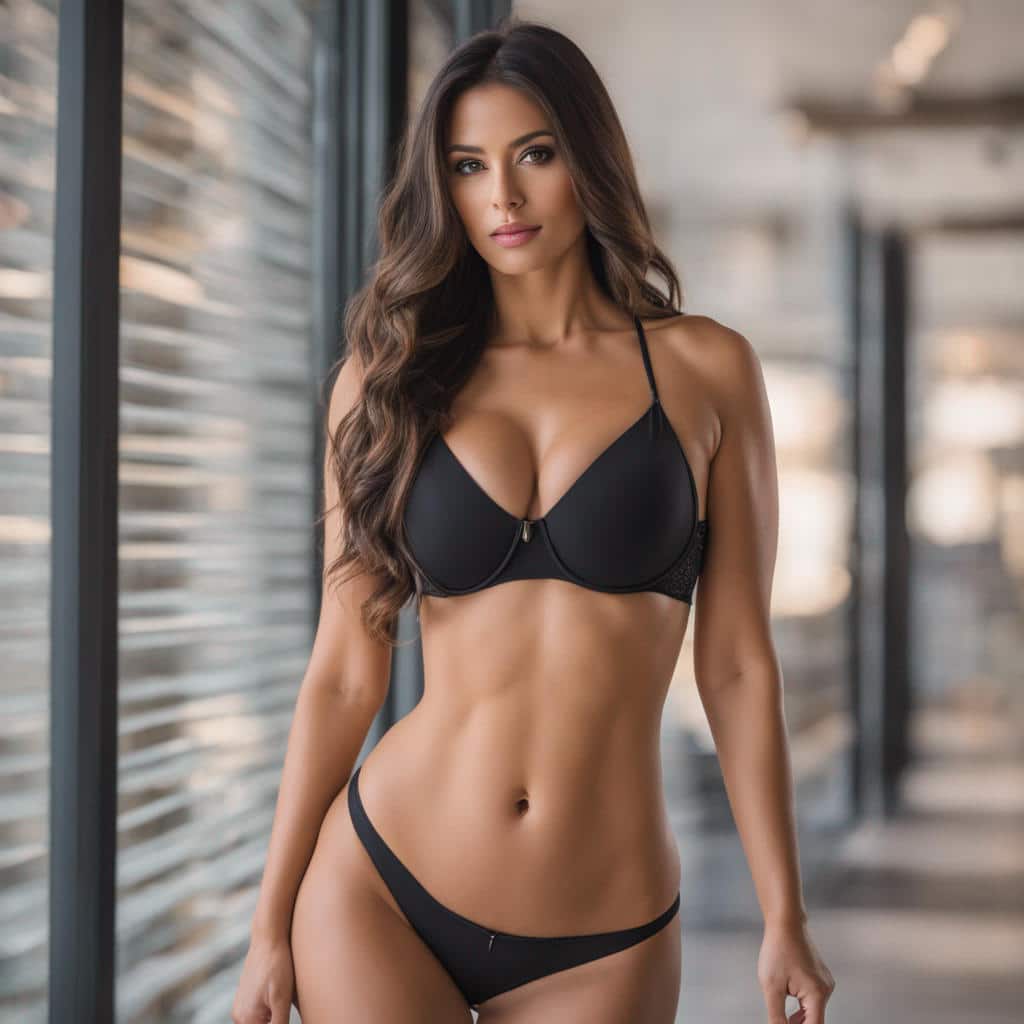
Body sculpting without shame choosing joy over judgment is a practice that focuses on safe, respectful ways to shape the body while honoring personal values.

It’s about defined targets, practical actions, and nurturing hands of experts. Her approach incorporates a mix of evidence-based treatments, mindful movement, and nutrition guidance to minimize damage and maximize confidence.

Practical choices, simple planning advice, and ways to draw boundaries for a gentler body transformation process await readers.

The Judgment Trap

The judgment trap is how relentless messages about perfect bodies and value fuel shame, self-hatred, and a constant mental dieting that prevents body acceptance. Below are concise explanations of how this trap forms and how it keeps people stuck, followed by actionable steps to shatter the cycle.

Societal Standards

  • Thinness as success or discipline
  • Youth and wrinkle-free skin as beauty
  • Flat stomachs and visible muscle definition as normal
  • Small hips, small thighs, and narrow faces as preferred
  • Clear, even skin without marks or stretch marks
  • Rapid weight loss as desirable and healthy
  • Clothing and fashion that favor one body type

Media and fashion endlessly recycle a starving look, particularly for women, establishing bogus standards that few physiques can achieve. Repetition conditions the eye to observe absence, which in turn produces a compulsion of body checking and comparison that sustains anxiety and depression.

Chronic dieting and perfectionism come next — desperate attempts to close the gap between self and ideal, which only tend to exacerbate shame when goals aren’t achieved. Social standards suggest value is a function of looks. That connection fuels self-criticism like ‘I’m not good enough unless I look like X.’

These beliefs hold people in the judgment trap and drive self-sabotaging behaviors, from rigid food rules to isolation from social life.

Cultural Lenses

Various cultures instruct different beauty guidelines, and childhood classes establish a benchmark that can span decades. Some cultures value paler skin, while others value more voluptuous bodies. These ideals influence the way individuals perceive themselves and assign value.

Shame can be embedded early through parental comments, teasing, or emotional neglect. Psychological abuse and trauma can leave us with a persistent feeling that our body is broken or dangerous. These memories make body checking and perfectionism more probable, converting normal variance into crisis.

Embracing diversity meant identifying the rules you acquired and deciding which to retain. Change your definition of beauty to encompass marks, scars, aging, and natural life changes.

Mini-steps, sharing stories within community or family for example, can alter the local norm over time.

Digital Echoes

Social platforms magnify polished ideals. Instagram and its ilk display posed, photoshopped images that promote perfectionistic tendencies and a deluded notion of what’s normal. Comparison to influencers showcasing a limited image stokes the judgment cycle.

Digital spaces are echo chambers where that negative self-talk is reflected back and amplified. Mindful attention—restricting hours of use, unfollowing shame-inducing accounts, and setting time limits on platforms—curbs exposure.

Even a mini digital detox can reduce the temptation to check or compare. Follow accounts that display real bodies, scars, stretch marks, and different ages.

Use visualization: imagine a day without body shame, notice how behavior and mood change, then practice that view in small real-life moments. Self-compassion and acceptance aren’t airy-fairy, metaphysical ideals. They’re grounded, pragmatic solutions that disrupt the judgment loop.

Choosing Your Joy

Choosing joy means prioritizing core emotions such as joy, gratitude, and simple pleasures over self-criticism and harsh judgment. It doesn’t mean denying painful emotions or convincing yourself to ‘just be happy.’ Acknowledge complexity: some people face anxiety or deep shame that makes simple advice useless.

Understand that choice is genuine, but is nested in history, culture, and inner struggle.

1. Your Motivation

Make your reasons for body sculpting self-care and health-driven. Include reasons like increased mobility, decreased joint pain, or desiring the energy to play with your kids. Reject impulses that arise from fear or external pressure.

If you want to do something to match a media stereotype, mark that down and challenge it. Think values—what energizes you and what makes you feel like yourself. Write a short list of intrinsic motivators: moving without pain, dressing for comfort, and sleeping better.

These remain constant even as external rewards change.

2. Your Process

Craft a method that works for your body and life. Start with small, repeatable steps: two strength sessions a week, short walks after meals, or 10 minutes of breath work each morning. With breath and simple meditation, you can remain present and observe any feelings arising without acting on them with judgment.

Take rest days and schedule them as you would any other step. Keep notes on how your body feels, how sleeping changes, and your mood shifts. When setbacks arrive, record them without judgment. Setbacks are information, not moral weakness.

3. Your Metrics

Define success in broad terms: mood, confidence, resilience. Include metrics such as lower anxiety scores, increased days you wear what you want, or decreased body-focused icky thoughts. Include non-scale victories: enjoying a walk in shorts, choosing a swim, or moving without fear.

Make a simple personalized table: metric, baseline, short-term goal, note—use metric units where relevant, like kilometers walked or minutes of activity. Return to the table monthly and refresh with emotion as much as figures.

4. Your Language

Say loving, objective things about your body. Swap harsh labels for neutral or grateful ones. Speak to yourself as you would a friend: factual, firm, and caring. Educate family and teens to use comparable language by demonstrating it in dialogue.

Maintain a mini-journal to capture those unkind phrases and transform them into compassionate remarks. In time, the change diminishes shame and closes the distance between how you feel and how you wish to behave.

5. Your Mentors

Look for mentors who seek to reveal real paths, not shiny perfection. Consume memoirs, real talk podcasts, and communities that share setbacks and micro-wins. Seek those who employ self-compassion, as studies associate it with reduced depression and anxiety and increased post-traumatic resilience.

Construct a community that supports you and embraces imperfection.

Redefining Sculpture

Body sculpting is not just about lines and inches. It involves emotional, mental, and spiritual health as well. It inquires into what it means to sculpt a life such that body and interior experience align. This section breaks those ideas into practical parts: how care can be whole, how strength can be useful, and how self-expression can be art.

Holistic Wellness

Start with simple daily practices that link mind and body: short meditation sessions, gentle yoga, and mindful meals that honor hunger and fullness. These habits alleviate stress, which sometimes manifests as tension, bad sleep, or weight fluctuations. Emotional eating can cloak unmet needs, and naming feelings along with a mood log provide concrete tools that reveal those patterns and help you transform them.

Develop an emotional vocabulary. By studying words for states such as anxious, restless, or depleted, it’s easier to select actions that soothe instead of numb. Self-care may be 15 minutes of movement, a warm bath twice a week, and regular check-ins with a friend or therapist. These modest measures help bolster both physical well-being and emotional equilibrium, making body work more sustainable.

Functional Strength

Focus on movement that matters in daily life: walking, carrying groceries, climbing stairs, getting up from a chair without strain. Resistance work with bands or light weights can supercharge bone health and independence. Mobility drills such as hip circles, ankle flexes, and thoracic rotations enhance balance and reduce injury.

Rest is part of training: sleep, active recovery, and planned deload weeks prevent burn-out and let gains set. Instead, measure progress by what you can do: lift a suitcase, play with the kids, and hike 5 to 10 kilometers—not solely by mirror changes. When you feel stronger, you are more bold and less afraid of getting older or experiencing a comeback.

Personal Artistry

See your body as a canvas for daily choices: clothing that fits your mood, movement that feels freeing, small grooming rituals that bring calm. Creative acts can be simple: a fifteen-minute dance to a favorite song, barefoot walks in a park, or trying a new hairstyle. Honor your marks and textures — scars, stretch marks, surgical lines — by flaunting them as badges of your narrative, not imperfections to veil.

Try journaling a sentence about what each mark means to you. Explore community practices: group dance classes, outdoor meetups, or art workshops where bodies of all shapes are present. Engaging in these practices makes care about expression rather than discipline.

AspectPracticeOutcome
EmotionalMood logs, therapy, mindful eatingLess reactivity, clearer choices
PhysicalWalking, resistance, mobility workBetter function, less pain
SpiritualRituals, nature time, creative actsDeeper meaning, less shame

The Unseen Gains

Body sculpting, as we know, often has noticeable before and afters, but it’s the unseen gains — those interior shifts — that really count. These are benefits not obvious to others: steady habits that add up, clearer self-knowledge, and a quieter relationship with judgment.

Consider the analogous effort of learning to skate. The initial motivation might be to impress or outpace others, but eventually the repetition develops balance, patience, and a hunger for short wins that extend beyond the rink.

Mental Resilience

Building grit begins with bite-sized, repeatable habits. Develop coping strategies, like labeling negative thoughts when they emerge and challenging them with reality instead of emotion.

Practice brief mindfulness meditations, even just five minutes a day, to learn how attention bounces back after distraction. This conditions the mind to rebound from self-criticism more rapidly.

Use concrete strategies for worry: set a 15-minute “worry window,” write down intrusive thoughts, then file them away for later review. Fight perfectionistic cycles by recasting failure as information—what occurred and what to experiment with next.

Over months, these habits transform reactivity. Time is a factor; a day won’t change things, but weeks and months of practice silently increase distress tolerance and decrease emotional volatility.

Emotional Clarity

Increase awareness by tracking emotions with simple logs: name the emotion, rate its intensity, and note the trigger. Separate primary affects such as grief or fury from suppressive strikes like shame or numbness.

Use a mindfulness app or short journaling to untangle big feelings. A 10-minute nightly jot makes recurring patterns leap off the page. Recognize triggers that trace back to childhood messages or cultural standards about bodies.

When triggers are known, they lose a bit of their potency. Practice grounding: deep belly breaths and feeling feet on the floor right away cut through spirals.

As the years go by, they discover that imagination—how they visualize a future self or scene—guides motivation, for good or ill, and clearer feelings direct that imagination toward growth instead of fear.

Physical Autonomy

To say claiming autonomy is to say making transparent decisions about your body that do not depend on consent. Set boundaries: decline diet talk, step away from unsolicited advice, and state needs plainly.

Use a checklist to mark milestones: small items such as choosing comfortable clothes, medium ones like setting a workout boundary, and larger ones like refusing a procedure without full consent.

Describe each milestone and the feeling tied to it. Think comfort, sensuality, and daily ease—something as simple as deciding to wear a softer fabric or do a stretch that feels good, all add up.

Habits and consistency render autonomy increasingly feasible. By repeating chosen acts, they become habit—a ritual that shields us from the gaze of external criticism and breeds appreciation for how far we’ve come.

Evolving Narratives

Evolving narratives shape how we transition from shame and self-judgment to decisions that prioritize joy, care, and agency. After all, most women experience body dissatisfaction. Eighty-five to ninety-five percent in North America felt unhappy with their bodies at some point, so the change starts with hard truths about prevalence and the powers that inform belief.

Social pressures, cultural norms, family discussions, and the passage of age all influence a narrative that is seldom straightforward. Begin by naming those forces, then reframe the personal narrative to center self-acceptance, healing, and resilience.

Rewrite your own narrative to prioritize self-acceptance, healing, and resilience instead of shame and judgment. Capture specific incidents—childhood remarks, a dieting spiral, a medical scare—and reframe them with fresh stress. Rather than saying ‘I struggled because my body didn’t fit the mold,’ say ‘I discovered boundaries and what makes me feel good.’

Use plain facts: age changes, weight and shape shifts, scars, and illness are normal parts of life. Mention any previous history of eating disorders or treatment and tangible actions in recovery. This kind of rewriting turns shame into a data point, not the plot line.

Release the sham self concocted by perfectionistic armor and cultural conditioning. List behaviors that signal a false self: constant editing of photos, avoiding social events, or apologizing for eating. Replace each with a small, clear action: one unedited photo a week, one meal eaten without negotiation, and one boundary set with a critical family member.

These are actionable ways to pull away perfection and experiment with who you are without armor. Anticipate slip-ups. Perseverance is made by getting back to the work, not by never falling.

Share your evolving story among friends or supportive communities to encourage others. Choose people who can hold nuance: peers in recovery groups, body-positive forums, or trusted friends who model openness. Give specific prompts when you start: “I’ll say what I felt when I saw this photo,” or “I need someone to hear my wins this week.

When moms fear daughters reliving painful patterns, voicing it can end generational loops. Tales told in sanctuaries can radiate and shift standards.

Periodically ponder where you are and how you’ve changed in your values, standards, and happiness. Keep a simple log: one line on how your body felt today, one line on what you did that felt kind, and one change in how you judge yourself.

Over months, trends show up: less talk about weight, more talk about function, and more ease in clothes. This record renders change tangible and navigates next moves in care and delight.

Building Your Circle

Building your circle. It gives you room to experiment, discuss anxieties, and maintain happiness rather than guilt as the focal point. It includes who to invite, how to shape the space, group habits to experiment with, and how to establish hard boundaries when necessary.

Build your circle from there with people who appreciate realness, kindness, and body positivity. Seek out friends, peers, or online communities who talk without judgment about bodies and health. Pursue professionals who offer straightforward language and quantifiable goals, like a certified trainer who measures your progress in centimeters or a dietitian who provides meal plans in metrics.

Test new connections by noting how conversations feel after a meeting: lighter, honest, and steady are good signs. If someone judges weight, clothes, or decisions, that is a red flag. Substitute that voice for folks who inquire about how you are and hear you.

Build your circle. Create an openhearted space for sharing body talk and feelings. Set simple norms for talk: listen more than advise, name feelings without fixing them, and share wins and setbacks in equal measure. Give and request specific assistance, such as a walk together, a check-in text, or swapping recipes in grams.

Employ meditation to cultivate self-awareness within the circle. Short guided meditations, between five and ten minutes, can assist members in becoming aware of shame as it emerges and opting for a kinder alternative. Remember everyone is doing their best. Say that out loud in meetings to deflate pressure and welcome gentleness.

Host group challenges, such as group walks or meditative cooking, to build community and wellness. Schedule 20 to 30 minute walks, timed and logged, to keep the habit small and manageable. Organize a weekly meal-prep hour with swapped ingredients, grams, and easy recipes.

It imparts useful skills and minimizes decision fatigue. Experiment with nature outings, a communal warm-bath night in, or artsy classes to inject joy into regimens. Joy-centric activities make transitions feel less like drudgery and more like life.

Put some boundary between yourself and those who force-feed toxic shame, criticism, or body beliefs. Name limits calmly: decline comments, leave conversations that turn shaming, and reduce contact with repeat offenders. Tell those closer to you what you need — “I need support, not diet tips!

When they push back, stand your ground and find the loving circle you deserve.

Conclusion

Body sculpting without shame choosing joy over judgment with clean intentions, sincere investigation, and consistent actions. Select providers that demonstrate results and respect. Record with pictures, easy measurements, and feelings. Let friends, coaches, or support groups buttress you – no shame. Small wins count: less pain, more ease in clothes, and a steadier mood. Turn the narrative from proving worth to seeking solace and selection.

Examples that work include a weekly walk and one targeted treatment, a plan that saves for a series of sessions, or a group that meets to share tips and wins. Experiment with one change at a time and record the actual shifts.

Discover that which delights you and walk in its direction. Make your next small step today!

Frequently Asked Questions

What is “body sculpting without shame”?

Body sculpting without shame is choosing joy over judgment. It’s about your goals, not their judgment. It encompasses physical, mental, and emotional health.

How do I choose joy over judgment during my body journey?

Tune into what makes you feel alive and fabulous. Make your goals small and attainable. Celebrate the progress, not the perfection. Find uplifting folks and ditch the comparison.

Can body sculpting be healthy without extreme diets or procedures?

Yes. Sustainable nutrition, daily movement, and rest can sculpt your body safely. Expert help from an RD or certified trainer minimizes risk.

How do I redefine what “sculpture” means for me?

Think beyond your looks. Add in strength, mobility, mental clarity, and confidence. Set measures that matter to you, such as energy levels or functional targets.

What unseen gains come from a shame-free approach?

You can achieve better mental health, sleep, confidence, and relationships. These benefits can often outlive physical transformations.

How do I handle negative comments from others?

Learn to say no and employ short, calm responses. Steer conversations away or restrict access to judgmental folks. Put your well-being first and eliminate toxic influences when you can.

How can I build a supportive circle for my journey?

Seek out friends or online communities and professionals with respectful values. Surround yourself with people who support your goals and provide positive feedback.

Why Perfection Culture Is Toxic for Real Women

Key Takeaways

  • Perfection culture generates unattainable expectations that damage mental well-being and self-esteem. Work on establishing achievable, quantifiable goals and praise progress to combat persistent stress.
  • Toxic perfectionism erodes identity and authenticity, so cultivate self-knowledge through journaling, meditation, or therapy. Make values-driven decisions to re-align with your genuine desires.
  • The physical toll of the culture of perfection is tangible, like sleep deprivation and eating disorders, so make sure you practice consistent self-care and obtain professional assistance when required.
  • Perfectionist fear of failure smothers growth and creativity, so tackle it by trying small risks, reframing errors as learning, and breaking projects into achievable steps.
  • Media and industries make money from perfection myths, so use media literacy tactics, limit exposure to toxic things, and curate feeds displaying diverse, realistic portrayals.

Community and kindness fuel the healing from perfectionism. So build or join communities that cultivate vulnerability, practice mindful self-compassion, and set healthy standards for the next generations.

Perfection culture is toxic for real women because it places unattainable expectations on looks, career, and motherhood. It connects self-worth to impeccable results and amplifies stress, anxiety, and burnout. Most women simply have more mental load and less time for shutdown or hobbies.

Social media and workplace standards further these demands with airbrushed photos and strict protocols. The body will discuss causes, effects, and actionable ways to mitigate.

The Perfection Myth

Perfection culture disguises perfection as the default for women, transforming ordinary difference into defect. It establishes impossible benchmarks, such as model bodies, perfect parenting, and successful careers hiding stress, so women compare themselves to pictures, not people. That divide drives persistent discontent, ongoing anxiety, and a feeling that nothing is ever ‘quite right’.

1. Mental Strain

Perfectionistic concerns generate chronic anxiety and mental anguish. Constant self-policing generates stress that erodes resilience and increases the likelihood of clinical depression and anxiety. Research connects perfectionism with both deep self-criticism and risk aversion, a combination that constricts life options and amplifies despair.

With chronic fatigue and emotional exhaustion soon to follow, mind on ‘not enough’, sleep is fracturing and mood regulation is fragile. Perfectionist thought stretches minor mistakes into full-blown moral disasters, intensifying despair. Absolute standards are absolute, and panic and obsessive checking can develop. Some people qualify for anxiety, panic, or OCD disorders.

Mental Health IssueCommon Link to Perfectionism
AnxietyWorry about performance, fear of judgment
DepressionSelf-criticism, feelings of worthlessness
Low self-esteemConstant comparison, sense of never measuring up
OCD/PanicRepetitive checking, catastrophic thinking

2. Identity Loss

The perfectionism wrecks the authentic self by privileging roles and surfaces over actual needs. Women learn to conceal quirks and sacrifices to conform to an idealized image, which fosters a divide between public persona and private sense. Impostor syndrome feeds off this fracture.

Even achievement rings hollow since value remains bound to immaculate effort. Values and ambitions get overwritten by externally imposed checklists, so decisions represent image maintenance not authentic drive. Losing autonomy soon comes when life is controlled to maintain a sparkling façade rather than nurture your development.

3. Physical Toll

Perfectionism stress manifests in the body. This persistent cortisol elevation wreaks havoc on our sleep, immunity, and leaves us exhausted. Many cope with extreme behaviors: binge eating, restrictive diets, or compulsive exercise as attempts to control perceived flaws.

Body dissatisfaction increases when the body is evaluated as never quite perfect enough. Sustained stress over time elevates the risk for chronic conditions and full burnout, leaving people physically depleted.

4. Stifled Growth

Perfectionist rules kill creativity and risk. The fear of error is the enemy of innovation. Performance anxiety causes you to avoid, procrastinate, or abandon projects in the face of potential failure.

Learning disappears if your objective is to be flawless rather than to get better.

5. Relationship Damage

These ideals put undue pressure on your relationships and doom others to disappointment. Demands generate resentment and emotional separation. These perfectionist ideals in parenting put unnecessary pressure on parent and child alike.

Social anxiety and isolation increase when our connections need to constantly appear perfect instead of genuine. Perfectionism is a self-defeating disorder and is intimately connected to rising rates of mental illness. Making room for imperfection can liberate room to live.

Unseen Pressures

Unbeknownst to us, perfection culture conceals a host of pressures that mold our daily decisions, our minds, and our physical forms. These pressures come from peer expectations, parental regulations, professional requirements, and internal monologues. They manifest as tiny compulsions—checking, editing, and hiding—or as bigger destructive forces, such as chronic anxiety, health problems, and crippling self-doubt.

Media

Media regurgitates ridiculous standards about bodies and faces and lives. Photos are retouched, sides are picked, and episodes are truncated for a convenient storyline of perfection. That constant stream normalizes an unattainable baseline.

Waking up and dreading what will fall apart that day is connected to this drip-drip-drip of ‘you’re-not-good-enough’ messages, which fuel anxious, perfectionist fretting.

Common harmful messages and unrealistic portrayals women encounter:

  • A flawless body equals moral worth.
  • Youth and thinness are the only acceptable beauty.
  • Busy, curated lives mean success and control.
  • Invisible labor should be seamless and joyful.
  • Quick fixes will erase deep problems.

To see these messages and, as a result, judge oneself against retouched photos, and to hide natural imperfections. Critical viewing helps by questioning who benefits, noticing editing, comparing less, and seeking diverse sources.

Industry

Fashion, beauty and wellness industries generate revenue on the back of uncertainty. Items vow firmer skin, expedited weight loss, or judicious parenting, typically positioned as instruments to fulfill an aspiration versus options. Marketing uses perfectionism as a lever.

Shame, “before-and-after” contrast, and time-limited offers push repeat buying. In workplaces, appearance and output are policed. Women encounter greater pressure to be groomed, emotional labor experts, and stars, all simultaneously.

That pressure drives overwork, sleep loss, and burnout. Neurodivergent people and folks with something like PCOS experience this invisible stress when industries dismiss different requirements.

IndustryHow it fuels perfectionismEffects
FashionPromotes narrow sizes, seasonal “must-haves”Body dissatisfaction, constant consumption
BeautyAds promise flawlessness through productsLow self-esteem, repeated treatments
WellnessFramed as moral duty to optimize lifeGuilt, endless self-improvement costs
CorporateEmphasis on polished image and nonstop productivityBurnout, imposter feelings, social withdrawal

Society

We do tend to treat perfection as evidence of value. Cultural regulations shove women to be compliant, well-organized, and self-sacrificing. In other cultures, such as in regions of India, kids are taught to be silent and deferential, which can calcify into grown-up perfectionist acquiescence.

Expectations stack: be the ideal mother, the perfect partner, and the high-performing worker, all at once.

  1. Motherhood: Sacrifice time, feel guilty if you rest, and present a calm household image. Fatigue lurks behind posed smiles.
  2. Career: Compete without complaining, clock flawless performance, and absorb emotional work from colleagues.
  3. Partnership: Be attractive, supportive, and conflict-averse while maintaining career and family roles.

These accruing demands generate hidden tensions that manifest physically, such as IBS and insomnia, as well as mentally, including GAD, persistent guilt, and isolation.

Intersectional Impact

Perfection culture doesn’t impact all women equally. Race, class, sexuality, and ability all alter the ways in which stress is experienced and how damage manifests. Minority women frequently bear an additional burden. They encounter not only social demands at large, but to combat stereotypes and demonstrate ability in spaces that never made room for them.

For example, a Black woman at work may believe she has to be impeccable to dodge bias while grappling with confidence-eroding microaggressions. That piled-up expectation increases stress and diminishes self-esteem in the long run.

Perfectionism combines with social pressures to generate its own special weight. Studies discover that around a quarter of females score high in perfectionism compared to 15% of males, which highlights gendered trajectories of self-trouble. When gender intersects with class, the stress compounds.

Working-class women might believe they have to outwork their colleagues to gain access to equivalent opportunities, but they must also conform to expectations around makeup and motherhood. A nurse and ‘sandwich generation’ caregiver who is simultaneously parenting young children and aging parents may become burned out in her attempts to satisfy a professional benchmark, a family member’s needs, and society’s expectation of being the perfect mother and looking beautiful.

That mix makes it more difficult to relax, seek assistance, or tolerate anything less than ideal. The disparity in access to mental health care and supportive resources is uneven and that discrepancy exacerbates the damage. Marginalized women, in particular, often face challenges like cost, lack of culturally competent providers, stigma, and not having time off work.

These obstacles imply that perfectionism-associated anxiety, depression, eating disorders, and postpartum depression frequently remain unaddressed. Interestingly, it’s studies like these that demonstrate the intersectional impact of high perfectionism on the lives of mothers with postpartum depression. Thirty-four percent of depressed mothers had high perfectionism, compared to eleven percent of non-depressed postpartum women.

Minority women may not receive customized care that recognizes cultural pressures or the intersection of racism and perfectionism. Social media and public culture amplify these dynamics. Platforms serve up ceaselessly curated snapshots of achievement and attractiveness that rarely represent different body types, financial circumstances, or disabilities.

This highly curated feed can make ordinary struggles appear to be personal failings. For women already contending with intersectional burdens—racial prejudice, financial constraints, or autoimmune diseases—the divide between media ideals and offline reality can exacerbate guilt and erode confidence.

Fighting perfectionism means recognizing the limitations of single-axis analysis and creating scaffolding for a society that acknowledges how race, class, sexuality, and ability inform experience. In practice, that translates to culturally competent therapy access, workplace policies enabling flexible care, and public campaigns that reflect diverse, messy lives.

The Authenticity Paradox

The authenticity paradox describes the tension between pursuing perfection and desiring to be a human, messy, imperfect individual. The pursuit of perfection offers the illusion of mastery and the lure of social status. It engenders an unending, hollow pursuit that fuels insecurity and self-loathing. Individuals live for an idealized self, which means they craft themselves around an image and present a carefully disguised, shiny object to the world, covering up insecurity, error and vulnerability.

It is that divide between public facade and private truth that is the essence of the paradox’s tension. Perfectionistic drives sabotage authentic self-expression and integrity. When value is connected to result, recognition, or flattery, decisions lean toward acceptance instead of reality. Other-focused perfectionism wonders, ‘Will they like me?’ Hustle-based perfectionism responds with relentless action and output as evidence of worth.

Perception-driven perfectionism tracks how you are perceived and polishes every pixel. All shapes constrain action, all shapes stifle wonder, and all shapes hush candid voice. For instance, a woman who flips her ideas in meetings to sidestep friction loses voice and trust in herself. That pattern, over time, teaches avoidance and inauthenticity.

It’s obvious the psychological toll. Research connects perfection striving with elevated levels of anxiety, depression, and trauma responses. Maintaining a fragile standard causes failures to seem apocalyptic. The mind consequently favors short-term security, such as people-pleasing, overwork, and hiding, to long-term expansion. Abandoning the approval vortex mitigates these dangers.

When we pick feedback for what we can learn instead of for validation, it diminishes the power of external praise and creates room for genuine tastes and values to emerge. There are tangible rewards for embracing imperfection. Self-compassion reduces shame and bolsters resilience. Small, steady shifts build a truer self: name one harsh inner rule and test it with a low-stakes action, share a partial draft with a colleague, and set a work boundary and notice the result.

These actions combat cognitive biases such as all-or-nothing thinking and mind-reading. Over time, they rewire beliefs about worth and ability. Mindful self-reflection resolves the paradox because it helps people observe patterns rather than judge them. Easy rituals—journaling on what triggers your perfection, pausing before you edit a snap, or enumerating values distinct from accomplishments—render these fissures visible.

Authors and researchers, including Brené Brown, point to vulnerability as a tool: showing limits invites real connection and reduces the need for a flawless cover. Indulge in little trials of being flawed and see what seems more genuine and less costly.

Reclaiming Reality

To reclaim reality is to release the demand for perfection and create space for actual life in all of its screw-ups, splotches, and development. Start by naming the problem: perfectionism shows up as self-oriented rules, pressure from others, or feeling judged by society.

Socially prescribed perfectionism, when people feel they must meet others’ standards, is often the most pernicious and most strongly linked with media ideals.

Self-Compassion

Be kind to yourself when plans go awry or standards slide. Take obstacles as universal, not as evidence of inadequacy. Use short compassion breaks: pause, breathe three times, place a hand over your heart, and say a kind phrase to yourself.

They relieve stress and disrupt the inner critic. Mindful self-compassion exercises teach you to observe painful thoughts without being overwhelmed. Attempt to identify emotions—“that was disappointing”—then include some common humanity—“a lot of people experience this.

It moves thought from abstraction to engagement. Forgiveness for blunders is a muscle; work it daily by picking one minor flaw to tolerate and get over. Construct a psychology that prizes sustained attention, not perfect performance.

Substituting ‘I prefer’ for ‘I must’ deflates iron hand diktats. Create dialectical statements that hold two truths: “I want to improve, and I am okay now.” These steps fight cognitive biases and keep objectives grounded.

Media Literacy

Learn to read media critically and identify perfection messages. Ask: who benefits from this image? What got edited out? How stereo is the perfect? A simple checklist helps identify perfectionistic themes:

  1. Unrealistic body or lifestyle images,
  2. Words like “flawless” or “perfect” used loosely,
  3. Absence of demonstrated endeavor or collapse,
  4. Encouragement of quick fixes,
  5. Monetized solutions promising transformation.

Each details what to watch for and why it matters. Curate your feeds to prioritize real voices and diverse bodies, and unfollow any accounts that spark comparison.

Talk about media in groups or with friends to make critique normal and to avoid the comparison trap. Awareness dissolves peer pressure and deflates curated perfection.

Community Support

Discover communities that appreciate truth and authentic narratives. Participate in forums, local meetups, or therapy groups where individuals discuss their struggles and provide realistic advice. Sharing wins and failures builds trust.

  • Reduces shame by normalizing struggle
  • Provides practical ideas for coping strategies
  • Offers accountability without judgment
  • Expands views beyond one narrow standard

In community, shame melts and self-flagellation dissolves. Professional assistance such as cognitive therapy or compassion-focused therapy can direct deeper transformation, confront twisted cognition, and reinstate healthy operation.

Future Generations

Perfection culture influences how youth experience achievement, value, and danger. Evidence shows perfectionism is rising. College students today report more perfectionistic tendencies than peers in the 1990s or early 2000s. Top students tend to drift into perfectionism.

Socially prescribed perfectionism, feeling like others expect you to be perfect, has increased, increasing stress and anxiety. These patterns connect to depression, anxiety, eating disorders, and even suicidal ideation. How grown-ups react in the moment will influence wellbeing and decision-making over the coming decades.

Modeling healthy ambition, self-compassion, and realistic expectations is important. When adults share how they set limits, accept mistakes, and revise goals, young people receive a blueprint for balanced ambition. Concrete examples might involve demonstrating how to break down a big goal into small steps, celebrating effort not just results, and framing failure as learning experiences.

A manager who acknowledges a misstep and shares what they learned says a lot more than an impeccable façade. Parents and teachers who commend grit and process diminish the implicit value of flawless.

These open discussions around perfectionism, mental health, and the detrimental effects of impossible standards lessen shame and isolation. Talk about specific pressures: grades, body image, or curated social media personas. Speak specifically — say you’re ‘feeling pressured to be perfect,’ not vague cautions — so listeners identify the issue.

Prompt inquiries and provide outlets, such as counseling or peer groups. In classrooms, short lessons that ask students to share a moment they stumbled and what it taught them can normalize imperfection and chip away at the myth that error equals ineptness.

Something should be taught in schools — mindfulness, resilience, and media literacy — from early ages. Through mindfulness, young people can observe judgemental self-talk without getting carried away by it. It can bring some of the grit to the surface, but it’s not the grit itself.

Media literacy reveals how social platforms selectively edit and stage moments, making viewers less critical of images. Schools can provide short units — five to ten lessons — that combine practice, discussion, and light homework to make these skills habitual rather than aspirational.

Disrupt the pattern by having women raise their voices and reveal their authentic selves. When women post imperfect stories publicly, they erode the curated fantasy. Some concrete actions include mentoring young folks, advocating for policies that lower high-stakes pressure, and cultivating healthy workplaces that emphasize balance.

They shift standards, not merely vocabulary.

Conclusion

Perfection culture imposes these limiting guidelines on women. It sucks the life out of your energy, it damages your health, and it obstructs authentic development. Clear examples show the cost: a mother skipping sleep to hit an ideal image, a young professional hiding needs to seem flawless, and a teen editing every photo to gain likes. Every decision takes time, confidence, and peace.

Shift to small acts that matter. Set a single sharp aim, sleep more, shout out boundaries, and choose genuine connection over manufactured applause. Schools, workplaces, and media can support slow sauce by appreciating craft, attention, and honesty rather than shine. These actions alleviate stresses immediately and forge gentler standards for the following cohort.

Just one shift this week and notice how it feels.

Frequently Asked Questions

What is “perfection culture” and why is it harmful to real women?

Perfection culture requires you to look perfect, parent perfect, work perfect and live perfect. It breeds stress, burnout and self-doubt. For women, it restricts genuine existence and health by turning natural human difference into defect.

How does perfection culture affect mental health?

It fuels anxiety, depression, and shame. This perpetual comparison and fear of judgment undermine resilience and make asking for assistance more difficult. Little everyday demands compound into ongoing strain.

Who is most affected by perfection culture?

Women of all ages are impacted, but there are differences in race, class, disability, and gender identity. Marginalized women experience even more intense scrutiny and have access to fewer resources, compounding the damage.

Can authenticity help counter perfection culture?

Yes. Going real is less stressful and good for relationships. Displaying authentic experiences sets achievable standards and encourages more genuine and encouraging communities.

How can workplaces reduce perfection culture pressures?

Promote practical objectives, open timelines, and honest criticism. Destigmatize error and care. Leadership demonstrating feasible balance makes a tangible impact.

What can parents do to protect future generations?

Model self-compassion, share imperfect moments, and value effort over pristine results. Teach them critical media literacy so they will be able to question the impossible standards.

When should someone seek professional help because of perfection culture?

Get professional assistance if perfectionism is leading to chronic anxiety, depression, or is getting in the way of your work or relationships. A mental health professional can provide you with empirically validated techniques like CBT.

Am I a Good Candidate for Liposuction? Find Out If You Qualify

Key Takeaways

  • Make sure you are close to your optimal body weight and have maintained it for some months before looking into liposuction. It is a body contouring procedure, not a weight loss solution.
  • Seek localized, pinchable, subcutaneous fat that does not respond to diet and exercise. Avoid surgery if fat is diffuse or mainly visceral.
  • Have good skin elasticity and tone in target areas as loose or sagging skin may not retract well once fat is removed.
  • Complete a full health evaluation including medical history, current medications, lifestyle habits, and necessary diagnostic tests to identify risks and optimize healing.
  • Determine your mental readiness by clarifying your motivations, screening for a healthy body image, and preparing a trusted support system for your recovery.
  • Talk about age and hormones with your surgeon during consultation, and come equipped with questions, paperwork, and a diagnostic checklist to help guide planning and manage expectations.

How to tell if you’re a good candidate for liposuction is a matter of health, goals, and realistic expectations. Good candidates are adults who are near a stable weight, have firm skin, localized pockets of fat, and no serious medical problems that could increase the risk of surgery.

Good mental health and clear motives for body sculpting count. A consultation with a board-certified plastic surgeon, including medical history, physical exam, and discussion of outcomes, confirms suitability and next steps.

Candidacy Checklist

These specific criteria assist you and a surgeon in determining whether liposuction is a good fit. These are the key things to check below, with actionable specifics and examples to help you evaluate.

1. Body Weight

Ideal candidates are typically within 30% of their ideal body weight and have maintained it for at least six months. Liposuction is not a weight-loss method; it is a contouring tool for people near their target weight.

For instance, a person who is 10 to 15 kg above goal and has attempted diet and exercise might still be a candidate if the excess is localized. However, someone with obesity or a lot of weight to lose is a bad candidate.

Big weight swings post-op can skew results, so steady pre-op weight is key. Try to remain at a stable weight through reasonable diet and exercise for a few months prior to scheduling surgery.

2. Fat Deposits

Ideal candidates possess localized, pinchable fat that you can’t seem to get rid of through dieting or exercise. Typical focus zones are the stomach area, love handles, both inner and outer thigh, upper arms and under the chin.

If the fat is diffuse or largely visceral (deep around organs), liposuction will not assist. Visceral fat requires metabolic change, not suction.

Test by pinching the area: if fat is soft and mobile rather than deep and firm, it is more likely to respond. Create a checklist of exact areas you desire treated and present it at your consultation.

3. Skin Quality

Tight, resilient skin increases the likelihood that the skin will conform after fat extraction. Elastin skin is usually found in younger patients or with minimal sun damage.

If skin is loose or sagging or demonstrates widespread stretch marks, the results may be limited and you may require skin tightening procedures in addition to liposuction.

For example, an individual with large stretch marks on the lower abdomen may still achieve contour enhancement but may require an abdominoplasty for optimal results. Test tone and elasticity in each destination then choose.

4. General Health

Candidates should be free of serious medical conditions that impair healing. Good blood pressure and sugar control are critical. Uncontrolled hypertension or diabetes increases the risks.

Individuals with bleeding disorders, active infection or compromised immunity are typically excluded. Be candid regarding medical history, medications and smoking.

Smoking hinders healing. A healthy lifestyle, pre- and post-surgery, aids in recovery and helps results endure.

5. Realistic Goals

Liposuction sculpts form, not pounds. Anticipate gradual progress as swelling subsides over weeks to months. Don’t anticipate perfection or dramatic transformation.

Instead, set attainable goals such as decreasing waist circumference by an inch or contouring the thighs. Specific, achievable goals assist surgeons in scheduling treatment and establishing realistic expectations.

Your Health Profile

A complete health screening is a prerequisite before contemplating liposuction. This consists of a physical exam, blood work, and past medical records review so the surgeon can chart out risks and establish reasonable expectations.

Liposuction is a body contouring method, not a weight-loss solution. You will get the best results when you are within 5 to 7 kg of your ideal weight and have isolated areas of fat.

List any prior procedures in the area of interest, particularly within the previous 6 months, as the FDA recommends a safe removal limit of approximately 5 kg in one sitting.

Medical History

Reveal any chronic illnesses like diabetes, heart disease, clotting disorders, autoimmune diseases, and hypertension. These alter anesthetic strategies and can hinder healing.

For instance, uncontrolled diabetes increases infection risk and may slow healing. Prior surgeries count. Scar tissue from previous surgeries can change tissue planes and influence the behavior of fat to liposuction.

If you reacted to anesthesia in the past, that history has to be provided. Previous anesthesia problems usually need to be discussed with an anesthesiologist and can affect candidacy.

List allergies to drugs, adhesives, or latex and note family history of bleeding disorders or anesthesia complications. Compile a clear timeline of dates of procedures, complications, and hospitalizations so the team can assess surgical risk quickly and accurately.

Lifestyle Habits

Non-smoking is strongly recommended. Smoking increases the risk of wound complications and compromised skin healing, so cessation at least a few weeks prior to and after surgery is common advice.

Exercise and good nutrition will facilitate recovery and maintain results. A nice ‘muscle corset’ around the treated areas will enhance the contour.

Overuse of alcohol or recreational drugs increases bleeding and infection risk and can interfere with medications administered during surgery. Track daily habits for two to four weeks—sleep, diet, exercise, caffeine and alcohol intake—so you and your surgeon can identify habits to tweak.

Caffeine should be avoided for at least 48 hours before the procedure as it can increase heart rate and blood pressure.

Current Medications

List all medications, including prescription medications, over-the-counter drugs, vitamins and herbal supplements. Blood thinners, certain anti-inflammatories and some supplements, like high-dose fish oil or ginkgo, increase bleeding risk and might need to be temporarily paused.

Some medicines impact anesthesia or wound healing, while others interfere with antibiotics or pain medications administered in the perioperative period. Any adjustments should be done under physician supervision.

Do not stop drugs suddenly without discussing it with the prescribing clinician.

Medication nameDoseReasonNotes for surgical team
Example: Aspirin81 mg dailyHeart healthMay need to stop 7–10 days before surgery

The Mental Readiness

Being mentally ready is more than desiring a new physique. It includes why you desire liposuction, your current body perception, and if you can endure post-op recovery and results. This portion breaks those components down so you can evaluate preparedness clearly and objectively.

Your Motivation

Determine your own, personal motivation for surgery. Write them down: are you seeking better fit in clothes, reducing stubborn fat after diet and exercise, or correcting an asymmetry? If the answer connects to self-care and long-range ambitions, that indicates good motivation.

Don’t get surgery due to peer pressure from partners, friends, or cultural fads. If a decision is mostly external voices, stall. Outside pressure increases the danger of regret and bad psychological recovery post-surgery.

Ensure aspirations are about personal growth, not pursuing a standard defined by others. Liposuction must complement a life of nutrition and exercise. Realize that results develop over weeks to months, so you’re not going to nail it immediately.

Maintain a brief motivations list. Use it in consultations to vet your goal with what a surgeon proposes.

Body Image

Start by measuring satisfaction: which areas bother you, how often, and how much would change matter in daily life? Be specific. If worries are specific and pragmatic, surgery can assist. If unhappiness is pervasive or related to low self-esteem, try therapy first.

Watch for signs of body dysmorphic disorder: constant mirror checking, severe distress about minor flaws, or belief that surgery will fix deep emotional issues. Surgery is not a treatment for mental illness. You need a stable mind.

Strive for good body consciousness pre- and post-surgery. Try realistic self-talk and measure progress in non-appearance terms such as energy level and how comfortable your clothes feel.

Think candidly about objectives. Remember, liposuction shapes lines and it won’t address every insecurity. It’s not universal.

Support System

Healing is about nursing your body and stabilizing your mind. Line up friends or family to assist with driving, tasks, and wound care during that initial week or two. Anticipate swelling, bruising, and pain for days to weeks. Having a ‘buddy’ to check up on you is less stressful.

Emotional support matters: someone to listen, help manage expectations, and encourage rest. Organize actual assistance, as you need to steer clear of heavy lifting and strenuous exercise for a minimum of 4 to 6 weeks.

Key people to include:

  • Companion or family member daily care and transport
  • A friend who can stay overnight if needed
  • Someone to help with childcare or pet care
  • A colleague to cover work during initial recovery
  • A healthcare contact for questions or complications

Age and Skin

Age is a clear factor in how skin reacts to liposuction. As you age, skin elasticity and the body’s ability to heal diminish, impacting the skin’s ability to contract after fat removal and your recovery speed. Liposuction is available at a very broad age.

Some patients are under 20, and approximately 3,000 patients aged 19 and younger underwent the procedure in 2023. Almost 50% of procedures were done on people ages 40 to 54. These treatments can still be administered to adults 55 and older; however, there are elevated surgical and anesthesia risks.

These should be considered in the context of age-related factors, overall health, skin quality, and anticipated recovery.

Skin Elasticity

Good skin elasticity signifies that the skin can bounce back and mold to the new body contours once the underlying fat is extracted. To test elasticity, pinch and lift the skin and then release it. Good elasticity is indicated by skin that is smooth in surface texture, with few deep creases, and that ‘pinches’ firm and thick.

Poor elasticity presents as thin, crepey skin, deep lines and a slow return after a pinch, which increases the risk of visible sagging or loose folds after surgery. Bad elasticity is why there’s a greater chance other procedures, such as skin excision or a lift, may be necessary to look smooth.

Remember that post-liposuction skin numbness and temporary discoloration may subside within two weeks or so. Final skin contour is largely contingent on elasticity.

Hormonal Factors

Hormones affect where fat deposits and how the body retains tissue, so transitions from pregnancy, menopause or endocrine alterations can impact candidacy. Pregnancy can change abdominal skin and muscle tone.

Give your tissues and weight time to normalize after having children and breastfeeding prior to surgery. Menopause frequently equates to decreased estrogen levels, which can thin out skin and decrease elasticity. This may result in alternate effects when compared to younger patients.

Stabilize hormone-related changes before surgery when possible. Achieve a steady weight, consult an endocrinologist if needed, and treat any active hormone disorders.

Checklist — Hormonal factors to monitor before surgery:

  • Recent pregnancy or breastfeeding within the past 12 months.
  • Menstrual or menopausal status and sudden weight shifts.
  • Current hormone therapies or treatments.
  • Symptoms of thyroid or other endocrine dysfunction.
  • Planned medication changes that affect fluid retention or healing.

The Consultation Blueprint

A consultation blueprint is how clinicians determine if liposuction is right for patients. It structures the pre-surgical process, makes certain the procedure is well considered and planned, and helps inform expectations about results, risks, and recovery.

Diagnostic Tests

Preoperative testing starts with blood work, which includes complete blood count, coagulation profile, basic metabolic panel, and type-and-screen when indicated. For chronic patients, include HbA1c for diabetic control and cardiac risk tests, such as ECG or troponin, when history indicates.

Imaging is not mandatory but might entail ultrasound for vascular mapping or to exclude deep venous thrombosis in high-risk individuals. Body composition testing can assist in quantifying fat versus lean mass, and bioelectrical impedance or DEXA scans provide objective data when desired.

These tests detect issues that increase surgical risk, such as anemia, coagulopathy, uncontrolled glucose, or hidden vascular issues, and inform if surgery should be postponed. Create a checklist of necessary labs and imaging, with areas to check completion and dates.

Fat Assessment

Physical exam is central: the surgeon measures the thickness of the subcutaneous layer, pinches tissue, evaluates skin quality and laxity, and notes fat pockets that resist diet and exercise. Calipers offer fast in-the-field measurement, ultrasound reveals depth and layers, and DEXA or MRI can display distribution in greater detail.

This tells you if fat is predominantly subcutaneous, which is liposuction-friendly, or visceral, which liposuction can’t touch. For instance, an abdomen with a soft pinchable layer of 2 to 4 centimeters and good skin elasticity is a better candidate than one having a thin subcutaneous layer but large visceral mass.

Liposuction is most effective for localized areas such as flanks, inner thighs, or bra rolls. Here is a comparison of all the common fat-measuring techniques.

MethodWhat it measuresStrengthsLimits
Skin-fold calipersSubcutaneous thicknessLow cost, quickOperator dependent
UltrasoundLayer depth, pocketsNoninvasive, real-timeRequires skill, time
DEXAWhole-body fat distributionAccurate, quantitativeCost, limited availability
MRIDetailed tissue imagingHigh detail, separates layersExpensive, not routine

Surgical History

Consult any previous surgeries with an emphasis on planned areas of treatment. Prior abdominal surgery, liposuction, or other body-contouring procedures alter anatomy and increase risk for adhesions.

Record any history of infection, delayed wound healing, bleeding disorders, or anesthetic reactions. Check for scars and feel for scar tissue which may impact cannula transit and fluid dynamics.

Record all treatments, times, and issues in the chart and use pictures as treatment reference points. Explain how scars or previous implants impact your technique, anticipated outcomes, and the healing process.

Unsuitable Candidates

Not everyone who wants body contouring is a good fit for liposuction. This section describes common disqualifiers and explains why they matter so readers can judge suitability before consulting a surgeon.

Those who are very fat or obese generally shouldn’t have liposuction. The process eliminates localized fat, not large-volume weight. Surgeons generally want people to be within 10 to 20 percent of their ideal weight before they operate, since it is less risky and leads to better outcomes.

If someone is carrying too much fat in a general sense, a bariatric or weight-loss regimen is the superior initial approach. About: Bad candidates For instance, someone with a BMI over 35 generally experiences elevated complication rates and less predictable aesthetic results following liposuction.

Medical conditions that increase surgical risk can make a person ineligible. Uncontrolled diabetes raises infection and bad healing dangers. Heart disease and severe respiratory disease are anesthesia issues. Bleeding disorders or blood thinners increase the risk of hematoma and blood loss.

Patients need to tell us about all their illnesses and medicines. A few conditions can be managed and potential recipients re-evaluated, but active, uncontrolled disease is a common reason not to proceed.

Smoking and bad wound healing are pragmatic obstacles. Smoking constricts blood flow to skin and tissue, impeding proper healing and increasing the risk of necrosis and infection. Many surgeons will ask you to stop smoking a few weeks before and after the operation.

A history of poor wound healing, keloids, or recurrent infections makes results less reliable and can cause doctors to recommend against liposuction.

Skin quality is important for visible results. Bad skin elasticity, generally from age, massive weight loss, or sun damage can result in the skin not shrinking back after fat removal. This can leave loose, sagging skin that has to be dealt with separately with things like skin excision.

Individuals seeking treatment for lax skin as opposed to fat pockets should be advised towards other options.

Psychological and expectation reasons knock out other candidates. Unrealistic goals, such as wanting to see dramatic weight loss or being guaranteed a particular body shape, lead to unhappiness. Body dysmorphic disorder and other untreated psychiatric conditions raise the danger that surgery won’t get at the core of the issues.

Surgeons sometimes evaluate their mental preparedness and clarity of achievable outcomes before they consent to operate.

Other sensible exclusions are being pregnant or breastfeeding, some medications that affect clotting or healing, and previous surgeries that change anatomy. Prior abdominal surgery such as a C-section or hernia repair can alter tissue planes and impact the safety or approach for abdominal liposuction.

Any of these can be either temporary or permanent obstacles based on personal evaluation.

Conclusion

Liposuction suits individuals seeking targeted fat removal, stable health, and defined objectives. Good candidates maintain a stable weight, eat right, exercise regularly, and possess firm skin in the treated area. A cool head assists. Distinct motives and authentic expectations count. Health checks and a targeted consult with an experienced surgeon seal safety and contour plans. Scenarios include a person with love-handle fat after a steady diet, a new parent who kept weight off for six months, or a runner with a stubborn inner-thigh bulge. Each displays characteristics clinics seek. If your profile tracks with the checklist and you’re feeling steady, schedule a consultation. Locate a board-certified surgeon, inquire about risks and recovery, and choose your own adventure.

Frequently Asked Questions

What basic health conditions make me a good candidate for liposuction?

They’re good candidates if they are near optimal weight, non-smokers, and have no uncontrolled diabetes, heart, or bleeding disorders. Even stable chronic conditions that are managed by your doctor will be able to have surgery after clearance.

How does my skin quality affect liposuction results?

Tight, elastic skin hugs better after fat removal. Poor elasticity can cause sagging and require additional procedures like skin tightening for the best outcomes.

Is liposuction a solution for weight loss?

No. Liposuction is designed to remove those hard to get rid of fat pockets, not to help you lose weight. It is ideal for sculpting once diet and exercise have stalled.

What mental and emotional readiness should I have?

You should have realistic expectations, be motivated for recovery, and understand risks. Emotional stability and clear reasons for surgery are key to contentment.

How does age influence candidacy for liposuction?

Age alone isn’t a disqualifier. Older adults may have thinner skin and slower healing, which can affect results. A surgeon will evaluate skin tone and health rather than age alone.

What happens during a consultation that determines candidacy?

Surgeons go over medical history, examine fat pockets and skin quality, discuss your aspirations, and describe risks. They might order tests and medical clearance if necessary.

Who is a poor candidate for liposuction?

Anyone who is severely obese, has an active infection or uncontrolled medical condition, is pregnant or planning pregnancy in the near future, and anyone with unrealistic expectations is not an ideal candidate.

Will Fat Transfer Deliver the Natural Proportions You Want in Breast and Faceaugmentation?

Key Takeaways

  • Fat transfer takes your own harvested fat to eliminate excessive deposits and give natural volume to the face, breasts, and buttocks, resulting in body contouring and restored proportions with a reduced risk of allergic reaction.
  • Our proportionality principle emphasizes balanced, subtle changes specific to each individual’s anatomy, which creates a more harmonious and natural contour as opposed to overwhelming enlargement.
  • Candidates require sufficient donor fat, stable weight, good health, and realistic expectations. A personalized approach will determine planned volumes and technique.
  • Longevity depends on fat survival with typical resorption of thirty to fifty percent. Meticulous harvesting, processing, and postoperative care along with a stable lifestyle improve durable results.
  • Newer techniques like microfat and nanofat, refined cannulas and better purification boost graft viability, minimize donor trauma and enable targeted natural-looking results.
  • Its applications span aesthetic contouring and facial rejuvenation to breast shaping, buttock augmentation, and reconstructive corrections. Patients are encouraged to photograph changes and follow recovery directions to monitor outcomes.

Fat transfer and the return of natural proportions is a cosmetic technique that transfers a patient’s own fat to bring back balanced proportions. It harvests fat from one location, such as the tummy or thighs, and inserts it into areas where there is volume loss to produce more contoured, youthful curves.

Recovery time is patient specific and often consists of minimal downtime. The remainder of this post details techniques, complications, and realistic results to help you make an informed choice.

Understanding Fat Transfer

Fat transfer is a surgical procedure that transfers a patient’s own fat from one part of their body to another in order to restore volume, reshape contours, or counteract age-related loss. It pairs targeted extraction with strategic reimplantation, so one area receives a reduction and another receives naturally enhanced volume.

It utilizes autologous fat, meaning the patient’s own tissue, along with defined steps to harvest, process, and graft the fat, resulting in stable, durable outcomes.

Define fat transfer procedure as the process of harvesting excess fat from donor areas like the abdomen or thighs via liposuction and reinjecting it into areas needing enhancement.

Fat transfer always starts with liposuction to harvest fat from donor zones like the abdomen, flanks, or thighs. Mini cannulas and low-suction techniques minimize trauma to fat cells. Harvested fat is prepared for grafting and injected into target areas via small incisions.

Typical graft sites are the face, breasts, and buttocks, where the fat fills hollows and brings back balance. For instance, fat from your tummy can smooth out facial folds or provide delicate volume to the cheeks without implants.

Highlight fat grafting’s dual benefit: body contouring through fat removal and natural volume enhancement in target sites such as breasts, face, or buttocks.

This two-pronged attack provides contour and volume. It reshapes one area and adds natural volume at another by transferring fat from the donor site. For patients who desire minimal scarring and a more natural feel, fat grafting can be a preferred option to artificial implants.

For example, butt augmentation with fat can simultaneously lift and smooth the silhouette while slimming the waist if liposuction is applied to the flanks.

Emphasize the use of autologous fat (patient’s own fat) for improved biocompatibility and reduced risk of allergic reactions compared to synthetic implants or fillers.

As autologous fat is fully biocompatible, allergic reactions and rejection are rare. It looks and acts like native tissue, providing softer, more natural contours. With facial work, fat can be a semi-permanent filler that melds with local tissues.

That makes it handy for forehead hollowing, temporal and supraorbital hollowing, tear troughs, lip thinning, and deep rhytides.

Outline the three main stages: fat extraction, purification process to isolate viable fat cells, and precise fat injection into recipient areas for natural-looking results.

Extraction employs gentle liposuction. Purification eliminates blood, oil, and debris, typically by sedimentation, filtration, or centrifugation. Coleman’s technique, centrifuging at approximately 3,000 rpms for 1 to 3 minutes, is still the most common approach to concentrate living fat into a middle layer, with oils on top and fluid below.

Processed fat is then injected in small aliquots and layered to maximize contact with recipient tissue. Surgeons often overcorrect a bit to account for resorption that can be up to 80 percent.

Post-op care involves minimal icing to control ecchymosis without causing deleterious vasoconstriction that endangers graft loss.

The Proportionality Principle

The proportionality principle frames fat transfer as a measured exchange: graft tissue (G) must match the vascular capacity of the recipient site (R) to form a viable graft–recipient complex. Dubbed by Khouri et al. In 2017 as the stoichiometry of fat grafting, it inquires what volume of fat a certain site can absorb while continuing to receive enough blood to survive.

This directs the volume of fat to transfer, emphasizes sufficient perfusion, and seeks to minimize graft loss by maintaining a safe graft-to-recipient ratio.

1. Body Contouring

Directed liposuction removes hard-to-lose fat from the waist, flanks, or thighs to optimize the silhouette. Eliminating surplus fat provides graft material and sculpts areas that diet or exercise won’t. Harvested fat is purified and then injected into volume-deficient sites.

Small, layered deposits create natural curves while maintaining each fat parcel near a blood supply. This customized method helps to fix imbalances and sculpt form more than just working out can. To track changes, create a before-and-after list: baseline measurements, target volumes removed, grafted volumes per site, and follow-up survival estimates.

2. Facial Harmony

Facial fat grafting replaces volume lost to aging, weight loss or genetics and seeks to achieve subtle rejuvenation instead of a new you. Surgeons aim for compartments—cheeks, nasolabial folds, tear troughs—so individual zones receive precisely the right graft size proportional to its vascular bed.

Fat can smooth deep lines and enhance skin texture and can be combined with resurfacing or lifting procedures. Outcomes frequently endure more than dermal fillers as the accomplished fat turns into living tissue. There is a little allergy danger while graft take differs by recipient site and approach.

3. Breast Shaping

Fat transfer for breasts uses purified autologous fat instead of synthetic implants for minor volume gain and contouring. Ideal for modest enhancement, asymmetry correction, or subtle contouring, it sidesteps implant rupture and capsular contracture and results in a natural tissue sensation.

Results are contingent on fat survival and graft take, and the patient’s body type and available donor fat limit potential size. Meticulous layering and honoring the proportionality principle assist transferred fat with sufficient blood to survive.

4. Buttock Augmentation

The Brazilian butt lift redistributes fat from donor zones to the buttocks, adding volume and lift and slimming other areas. This two-fold action enhances the seriousness of your entire proportions without any extraneous substance.

Proportionality principle There is no limit to custom shaping via exact placement of the grafts. The secret is in technique and ensuring every graft parcel has vasculature access. The right respect for proportionality keeps fat loss to a minimum and enhances the long-term look.

5. Corrective Uses

Fat grafting addresses contour irregularities, scars and deformities following surgery and supports breast reconstruction after mastectomy. It can fix implant-related issues by substituting volume with soft, living tissue.

The proportionality principle guides safe volumes so the graft integrates and survives, providing a natural tissue source for cosmetic and reconstructive needs.

Candidacy and Anatomy

Autologous fat grafting is a multi-step process that starts with an overview of the recipient and donor sites, transitions to fat harvest and processing, and ends with meticulous reinjection.

This section covers who is a good candidate for fat transfer and which anatomy matters when considering volume and technique. Good candidates have sufficient donor fat, stable health, and reasonable expectations.

Adequate donor fat refers to quantifiable deposits that can be extracted safely without resulting in contour issues, usually from the stomach, flanks, or thighs. Medical stability means no uncontrolled diabetes, active infections, or clotting problems. Reasonable expectations include embracing that some of the transferred fat will perish and that staged top-ups may be required.

Patients who have historically resorbed most or all grafted fat are bad candidates for repeat injection. Those who have typically lost up to around 20% respond well to future “top-up” sessions.

Anatomy determines where and how much fat to inject. Skin quality plays a significant role in how a filled area will appear. Loose, very thin skin may not retract over additional volume, but thick, elastic skin adjusts well.

The tissue already there counts. Breast tissue volume and positioning, or facial bone and soft-tissue proportion, define the objective. Facial planning must account for deep fat compartments. These include the medial and lateral sub-orbicularis oculi fat pads, the sub-orbicularis oris pad, deep medial and lateral cheek pads, and the buccal fat pad.

Being familiar with these units guides injection site selection, volume goals, and cannula size and layering decisions. By necessity, it has to be personal. A practical exam and visualization when necessary allowed the surgeon to approximate the volume of lipoaspirate and forecast the quantity likely to persist.

Standard long-term survival is anywhere from 50 to 70 percent of transferred fat, with most reports noting 60 to 80 percent survival and the rest absorbed early. It is wise to anticipate 20 to 40 percent early loss. Surgeons frequently overcorrect within safe limits to compensate for resorption.

In some instances, scheduled second sessions offer fine tuning.

Checklist to evaluate candidacy and plan treatment:

  • Donor fat availability: quantify likely harvest volume and donor site impact.
  • Health status: Review chronic disease, smoking, medications, and clotting risk.
  • Weight stability and planned changes: Stable weight for months reduces unpredictable resorption. Planned significant weight loss postpones or cancels out surgery.
  • Skin quality and elasticity: assess for the ability to accommodate added volume.
  • Local anatomy: map existing tissue, bone support, and specific deep fat pads for facial work.
  • Previous graft history: Note past resorption patterns to predict future outcomes.
  • Expectations and follow-up: confirm willingness for staged care and possible top-up sessions.

The Longevity Factor

Fat transfer outcomes depend on fat survival. Not all injected fat lives long term. Studies report wide ranges: on average 30% to 70% of transferred fat survives, with long-term figures often cited as 50% to 70%. Other reports, however, show resorption from 20% to 80%, so redo’s are frequent if a certain volume or symmetry is desired. Much of the early loss happens quickly. The rest of the fat is reabsorbed by the body in the first six weeks. Since grafts require time to settle, the end result can take weeks or months to manifest.

Clinical steps and technique mold results. Meticulous fat processing, including soft, low-pressure harvesting, gentle washing or centrifuge protocols, and avoidance of harsh handling, preserves cell viability. Precise injection technique matters too. Small, layered aliquots placed in many planes improve contact with recipient tissue and blood supply. Overpacking pocket or bolus injections increases pressure and blocks perfusion, which enhances absorption.

Minimizing strain on addressed areas as they heal through activity restrictions, compression garment instructions, and sleep positioning promotes graft take. Secondary strategies can boost stickiness. Cell-enrichment approaches, such as SVF or adipose-derived stem cells, have encouraging data. In a multicenter RCT, SVF-enriched grafts reached approximately 74.5% survival at six weeks and 71.3% at 24 weeks. Autologous adipose matrix (AAM) showed benefit.

A multicenter study demonstrated 75% volume retention at six months with high patient satisfaction across face, hand, and body. These methods increase expense and complexity, and not every clinic implements them. Lifestyle and biology impact graft longevity. Continued weight gain can enlarge surviving grafts, while weight loss can shrink them, often unpredictably. Aging and hormonal changes, such as pregnancy or menopause, cause fat to redistribute and can have an effect on grafted volume.

Smoking, bad nutrition, and untreated medical problems decrease healing ability and decrease survival. Counsel patients about realistic maintenance: stable weight, good glycemic control, and smoking cessation improve odds. Recovery comes in somewhat predictable stages. Below, we follow standard markers and volume shifts over a few months.

PhaseTimeframeTypical findings
Initial swelling and hematoma0–2 weeksMarked swelling; true graft volume masked
Early resorption2–6 weeksSignificant loss as nonviable fat absorbed
Fat settling and vascular ingrowth6–12 weeksVolume stabilizes as grafts revascularize
Final volume stabilization3–6+ monthsTrue contour emerges; some variability remains

Innovations in Technique

Fat transfer has evolved from a rudimentary filler to a highly technical toolbox for restoring natural proportions. New graft types, better harvest, refined placement, and tech tools all seek to enhance fat survival and make results look and feel more natural. Here are technical innovations and how they alter results.

Microfat and Nanofat Injections for Better Graft Viability

Microfat and nanofat allowed surgeons to tailor particle size to tissue requirements. Microfat injects small parcels of adipose to add volume in the cheeks, temples, or hands, while nanofat is further emulsified for skin quality and superficial planes. Smaller chunks allow each fatty chunk more immediate blood access, which increases graft take.

Examples: microfat for lip and cheek filling gives shape and soft contour; nanofat applied to thin eyelid skin can improve texture and pigment over time. Stem cell enhancement is occasionally utilized, where regenerative cells are added to grafts to assist tissue repair and retention in the long term. This remains an investigational territory and varies widely between practices.

Curved Cannulas, Meticulous Harvesting, and Purification

Harvest begins with meticulous plans and tumescent fluid. Tumescent solution inflates the area being treated, so fat cells plump and exit with less bleeding and injury. Pioneering technique enhancements include curved liposuction cannulas that allow the surgeon to follow natural contours and access pockets while minimizing tissue damage.

SafeTure has developed patented innovations in technique, including gentle suction settings and low negative pressure to protect adipocytes. Once harvested, state-of-the-art purification—centrifuge, filtration, or washing—eliminates blood, oil, and debris. For example, cleaner grafts demonstrate increased survival in recent work.

Examples include centrifugal steps at set speeds that keep cells intact and filtration systems that reduce free oil that can inhibit graft take.

Precision Placement by Tissue Plane and Fat Space Targeting

Where you put the fat is in the right plane, then it matters. For example, injecting microfat in deep subcutaneous tissue as opposed to superficially changes integration and survival. Precision fat grafting involves small aliquots deposited on many passes, generating a scaffold of minuscule grafts that interconnect with host capillaries.

Aiming at more precise fat spaces—perioral fat pads, infraorbital hollows, or submalar compartments—provides more consistent contour and prevents lumpiness. 3D imaging assists in mapping out the volumes and angles, so surgeons map out precise volumes and entry points for symmetry.

Less Trauma, Faster Recovery, and Safer Outcomes

New local procedure minimizes donor site injury and accelerates healing. Minimally invasive harvest sites, minuscule access incisions and perfected cannulas reduce downtime. Lower complication rates result from superior technique and processing.

Continuing research examines cell survival and combination therapies, such as fat and PRP or light therapy, to increase survival. 3D imaging and adjuncts help make grafting even more precise and patient-specific.

Beyond Symmetry

Fat transfer procedures are about more than symmetry. They want to bring back real shape and natural beauty that suits the body. Rather than insisting on a cookie-cutter appearance, fat grafting restores volume where tissue is sparse, blends borders and restores proportions that feel natural to the patient.

For instance, fixing a post-pregnancy ‘shallow’ breast contour can mean adding a modest amount of volume to one to make it the same size as the other, not making both breasts significantly larger.

Psychological boons tend to accompany physical transformation. When the lines appear organic and symmetrical, a number of clients experience decreased self-awareness and more consistent body image. Small wins matter: improving a subtle asymmetry can make clothing fit better and reduce daily checking in mirrors.

Research indicates the recovery period is crucial for your mood as well. Swelling and bruising are common but tend to dissipate in weeks, with most experiencing a difference within a week. Well-defined expectations regarding initial swelling and partial fat reabsorption prevent frustration and fuel consistent confidence momentum.

Fat grafting is not just polyvalent. Surgeons can utilize it to fix breast asymmetry, cocoon scarred surfaces, sculpt jawlines, or inject subtle volume into hands and buttocks. By using the patient’s own fat, the result feels and looks like part of the body.

This natural integration is tough to replicate with implants. Microcannulas and meticulous layering of tiny fat parcels increase the likelihood that grafts survive. Advanced harvest and placement methods preserve the cells and assist in sculpting delicate contours instead of producing harsh, obvious volume.

Expected outcomes and risks: The body can reabsorb between 20% and 50% of transferred fat. Clinical data shows about a third to half of fat is reabsorbed in the initial six months. Approximately 1 in 4 (27.8%) patients can therefore expect asymmetry or undercorrection requiring a touch-up.

With appropriate aftercare and staging, the long-term survival can be significantly improved. Up to 90% of transplanted cells may survive in ideal conditions, providing permanent, natural outcomes. Defined care instructions include no pressure on graft sites, adhering to activity restrictions, and coming to your follow-up to allow the grafts to take.

Measure advance to find heart in transformation. Snap photos from set angles and record dates. A straightforward table recording swelling, bruising, firmness, and visible contour assists in tracking patterns and determining if revision is necessary.

A similar index of photos at one week, one month, three months, and six months demonstrates the early swelling and later settling and sets expectations for the typical timeline.

Conclusion

Fat transfer brings back natural proportions, which is why it works so well. Since the technique uses your own tissue, the outcome frequently appears and feels natural. Careful planning keeps proportions in check. Good candidates have stable weight and specific objectives. Surgeons employing gentle harvest, meticulous grafting and layered placement increase the likelihood of permanent volume. Anticipate a bit of transformation over months as tissue settles and the body adjusts. New tools and better techniques reduce downtime and increase predictability. The way I think of fat transfer is as a way to return or enhance form, not to engineer drastic transformation. Check surgeon results, inquire about longevity, and plan reasonable follow-up. So, you’re ready to take a look. Book a consult or ask questions to learn more.

Frequently Asked Questions

What is fat transfer and how does it restore natural proportions?

Fat transfer takes your own fat from one place to another. It brings back volume and curves with a natural feel. With your tissue, there is less rejection risk and you can enhance body proportions in a subtle and predictable way.

Who is a good candidate for fat transfer?

Ideal candidates are healthy adults with sufficient donor fat and achievable expectations. The best candidate desires subtle, natural looking volume, not dramatic size increases. A consult with a board-certified surgeon verifies candidacy.

How long do fat transfer results last?

Some of this transferred fat is here to stay. Anticipate that 50 to 80 percent of the volume will last long term. Swelling can obscure real results for 3 to 6 months. Lifestyle, technique, and post-op care impact longevity.

What are the main risks and recovery expectations?

Risks include bruising, contour irregularities, infection, and partial fat loss. Recovery is typically mild to moderate with a few days to a few weeks of downtime. Your surgeon will describe concrete post-care to minimize risks.

How does proportionality guide fat transfer planning?

Proportionality, balancing size, shape, and symmetry, is a tool plastic surgeons use. We think about body proportions, bone structure, and aesthetic goals to position fat in places where it achieves balanced, natural results.

What technical innovations improve outcomes today?

State-of-the-art techniques such as gentle harvest, refined processing, and micro-droplet placement enhance outcomes. Imaging and 3D planning anticipate results. These methods boost graft survival and create smoother contours.

Can fat transfer be combined with other procedures?

Yes. It complements liposuction, breast or buttock contouring, and even facelift procedures. When safely planned with your surgeon, combining procedures can help optimize overall proportion and minimize total recovery time.

Feeling Like Yourself Again After Liposuction: Recovery Timeline, Emotional Well-Being, and Practical Tips

Key Takeaways

  • Liposuction recovery has specific phases and timelines of feeling like yourself again.
  • Physical symptoms such as swelling, bruising, numbness, and small scars are expected. Embrace compression garments, hydration, nutrition, and gentle care to minimize pain and optimize tissue healing.
  • There is an emotional roller-coaster, the highs and lows. Monitor mood fluctuations, reach out if you need support, and reward minor mental victories to help acclimate to your new body.
  • EASE BACK INTO MOTION and adjust your daily lifestyle and wardrobe for long-term results, not fast results.
  • Be ready for not-so-glamorous truths like temporary lumps, numb skin, and undergarment burnout. Reach out to your doctor if weird symptoms linger.
  • Manage expectations: Early results aren’t final results. Take photos and notes to document progress. Focus on feeling good, not perfection.

Feeling like yourself again after liposuction can be a gradual process. The post-operative period can introduce fluctuations in swelling, sensation and mobility that stabilize over weeks to months. Defined timelines, attainable goals and easy movement assist in monitoring your progress.

Scarring and contour shifts are common but typically subside with good care. Below you’ll find practical tips, common milestones, and when to call your doctor for consistent recovery.

The Recovery Timeline

Recovery Timeline The timeline below provides you with a general outline of the phases following liposuction and what you can expect during each. Healing is different for every age, health, treatment area, and surgical technique, so use this as a guideline and listen to your surgeon.

PhaseTimeframeKey milestones
First Week0–7 daysRest, peak swelling and bruising, pain control, compression worn, incision care
First Month2–4 weeksGradual activity increase, swelling begins to fall, bruises fade, continue compression
Three Months~12 weeksNoticeable shape change, most daily activities resume with approval, skin texture assessed
Six Months~6 monthsNear-final contour, scars soften and remodel, lifestyle habits support results
One Year~12 monthsFinal results stable, long-term follow-up, set future wellness goals

1. First Week

Initial healing typically requires one to two weeks post-surgery. Anticipate significant swelling and bruising. These typically reach their height during the initial days and gradually subside.

Pain will subside each day with prescribed meds and rest. Wear compression garments round the clock as instructed to reduce swelling and assist the skin in laying closer to new contours.

Take care to keep all incision sites clean and dry. Use gentle soap and a clean towel, and don’t soak the wounds. Keep an eye out for fever, spreading redness, or strange discharge. These are indications to get in touch with your clinic.

2. First Month

Swelling and bruising begin to resolve a few weeks after surgery, though some residual swelling can persist. At 1 week, many patients already observe early transformations but still feel engorged.

Gradually reintroduce light activities such as short walks, desk work, and gentle domestic tasks. No heavy lifting or vigorous exercise until cleared.

Keep compression garments as directed; they usually help with the final shape. Maintain a recovery timeline with pictures to monitor your progress and identify anything that stays sore, hard, or uneven that you can mention during follow-up appointments.

3. Three Months

By six weeks, most swelling and bruising should have subsided, and results become more defined. At three months, you will notice dramatic changes in body shape.

Most normal activities are permitted with your doctor’s OK. Check the skin surface; some areas can still be firm or uneven as fat pockets settle.

Emotional responses can vary: some adjust quickly to the change, while others need time to accept new proportions. Consult your provider if you’re concerned about contour irregularities or numbness that persists.

4. Six Months

It may take a full six months to see the final results. Anticipate almost final body contour and skin adjusting.

Scars may appear thicker or pinker at six to eight weeks but should now be much softer and paler. Liposuction scars are typically small and well camouflaged.

Keep good habits such as a healthy diet and exercise to support your results. Peer into before and after photos to applaud advances and adjust habits.

Physical Healing

Liposuction physical healing comes in stages and is different for each individual. Anticipate early tenderness and bruising that can be disguised with swelling. Your body initiates a domino effect of inflammation, fluid reabsorption and tissue remodeling that can last weeks to months.

Initial treatment is all about controlling symptoms, avoiding complications and promoting tissue healing so that you feel like yourself again in due course.

Swelling

Don’t be surprised if you get swelling. In the initial days and weeks, the treated areas may appear larger or asymmetrical as fluid and inflammation conceal underlying change. Noticeable enhancement may require weeks or even months.

Use cold compresses in the short term to reduce inflammation and elevate the affected areas when possible to assist fluid draining away. Compression garments should be worn around the clock. Compression not only aids in reducing swelling but supports the tissues as they heal and can mold the area as scar tissue develops.

Track swelling reduction over time by photographing the area weekly and noting measurements, providing a visual record of progress toward the final result, which frequently sharpens over a period of months, sometimes even six.

Bruising

Acknowledge bruising as an inevitable, transient consequence. Minor to moderate bruising is common after liposuction and will discolor as it fades over days to weeks. Stay away from blood thinners, which can include some over-the-counter pain medications and supplements, unless otherwise approved by your surgeon.

Use gentle cold packs early to decrease bruising and to localize blood. Track bruising with photos and notes. It should follow the pattern of fading from dark purple to yellow-green before disappearing.

If bruising gets worse or new, large areas occur, contact your provider.

Numbness

Expect momentary numbness in affected regions. Nerve endings are irritated in the process and feeling usually comes back slowly over weeks or months. Do not expose numb areas to extreme temperatures, as lessened sensation can cause burns or cold injury without apparent discomfort.

Watch for strange sensations, such as tingling, pins-and-needles, or persistent numbness, and if these don’t gradually get better, report them. Most patients recover normal sensation, but uncommon persistent numbness requires clinical evaluation.

Scars

Anticipate little scars at incision sites. These are typically brief and located in inconspicuous places. Follow scar care recommendations to minimize appearance. Keep incisions clean, avoid soaking until healed, and use silicone gels or sheets if advised.

Keep scars out of the sun or they will darken! Apply wide-spectrum sunblock or protect it. Regular care, sleep of seven to nine hours, hydration, nutrition, light walks or yoga, and a slow ramp-up all facilitate physical healing and sustainable outcomes.

Emotional Journey

Liposuction recovery encompasses both physical healing and an emotional journey that is different for everyone. Most will experience mood swings associated with aches, swelling, and a transforming figure. The initial weeks can be intense.

The emotional roller coaster tends to give you its wildest rides very early and then taper down over six to twelve weeks for most. Research finds as many as 30% of patients experience a degree of postoperative depression, yet less than half of those who are down at first continue to be so at six months. Keeping track of these shifts makes them clearer and more controllable.

Post-Op Blues

Identify post-op blues as a typical reaction. Mood swings, anxiety, and short bouts of depression are common when the body is healing and day-to-day activities shift.

Give it time, let the emotions subside and the body reveal final results. Emotional adaptation can be slower than the physical. Any swelling or asymmetry can cast suspicion on the process even when recovery is proceeding quickly.

Provide restorative activities such as brief walks, stretching, soothing music, or easy hobbies to lift the mood. These thoughtful acts of kindness help lift spirits and calm stress hormones.

Lean on friends, family, or groups when the emotions weigh you down. If mood swings or depression persist or begin interfering with daily tasks, consult a mental health professional, as persistent symptoms can indicate a more serious problem.

Body Dysmorphia

Know that body image issues can return post-surgery. Some of us celebrate our changes quickly and others can see only the flaw.

Be compassionate and gentle with your reflection. Trust that the body has to settle and that early results are not the final shape.

Restrict comparison to online fantasies. Unrealistic standards can stoke disappointment. Just pick practical role models and subscribe to some credible blogs.

Focus on gradual acceptance. Mark small improvements and note functional gains like ease of movement or clothing fit rather than obsessing over perfect symmetry.

Support Systems

Know one or two trusted people to call when you’re feeling down. A quick chat breaks isolation and tempers mood swings.

Discuss healing with those who can relate, whether it’s fellow members in a support group or buddies in an online forum, for no-nonsense advice and emotional validation.

Say yes to meals, errands, or babysitting offered during those first few days. Functional assistance reduces tension and facilitates recuperation from emotional wounds.

Build a calm home environment. Soft lighting, comfortable seating, and a simple routine help create a safe space for healing.

Mental Milestones

Celebrate small victories like a day without pain, a longer walk, and a clear journal entry. These achievements signal forward momentum and high spirits.

Make achievable goals, such as walking 20 minutes or writing three sentences, that allow you to see tangible progress.

Describe your experience with surgery — How have you changed since having surgery, such as more confidence, energy, and self-care?

Employ journaling to record moods, triggers, and snippets of recovery notes. It can uncover trends and underscore development across weeks and months.

Lifestyle Integration

Lifestyle Integration: Reshaping daily habits post-liposuction to lock in results and rediscover yourself. With small, consistent changes across nutrition, movement, clothing, and habits, recovery is smoother and results last.

Nutrition

  1. Protein supports tissue repair and immune function. Shoot for lean proteins such as chicken, fish, beans, dairy, and plant-based proteins, aiming for 1.2 to 1.6 grams per kilogram of body weight in the initial recovery phase.
  2. Healthy fats: Omega‑3s reduce inflammation and aid healing. Incorporate fatty fish, flaxseed, walnuts, and small quantities of olive oil.
  3. Vitamins and minerals: Vitamin C and zinc help wound repair. Vitamin D fuels immune health. B vitamins support energy. Take whole foods and talk about supplements with your provider.
  4. Fiber and whole grains support digestion and keep you full, which helps with weight maintenance. Go with oats, brown rice, quinoa, beans, and vegetables.
  5. Fluids and electrolytes: Hydration supports tissue repair and circulation. Consume water on a regular basis with oral rehydration if sweating profusely.

Keep hydrated for tissue repair and to reduce swelling. Keep sipping water throughout the day. Steer clear of processed foods that are high in sodium and added sugars because these can make you more inflamed and hinder your recovery.

Sample meal plan: breakfast—Greek yogurt, berries, and oats; lunch—grilled salmon, quinoa, mixed greens; snack—apple with almond butter; dinner—stir-fried vegetables with tofu and brown rice.

Movement

Ease into it and ramp up slow to avoid relapses. Early ambulation enhances circulation and decreases the risk of clots. No heavy lifting or high-impact workouts for a few weeks until your surgeon clears you.

Include stretches and low-impact exercise like walking, swimming, yoga, or tai chi. They offer physical conditioning and mental serenity and minimize anxiety. Monitor your activity with a basic log or wearables to avoid pushing yourself too hard and to reach at least 150 minutes of moderate activity per week when approved to do so. Incremental movement maintains gains and generates momentum.

Wardrobe

  • Compression clothing is suggested by your practitioner during the initial weeks.
  • Loose, front‑opening tops to avoid overhead dressing.
  • High‑waist, soft fabric bottoms to support midsection.
  • Slip‑on shoes to avoid bending.
  • Seamless underwear to reduce irritation.

Move into fitted clothes as the swelling goes down and treat yourself to new wardrobe updates that accentuate your new shape. Set up recovery clothes in a stress-free zone to minimize effort when getting dressed. Intelligent dressing can help you feel at home and a bit more yourself.

Habits

  • Daily checklist: sleep 7 to 9 hours, hydrate, protein at each meal, 10 to 20 minutes of gentle movement, 5 to 10 minutes of mindfulness or deep breathing.
  • Break old habits: limit late-night eating, reduce alcohol, and avoid smoking.
  • Schedule self‑checks: weekly photos, mood notes, and weight tracking.
  • Add mood-boosting mantras and self-care rituals.

Incorporating physical, emotional, and mental health practices into your lifestyle develops sustainable self-esteem and supports resilience.

The Unspoken Realities

Liposuction recovery has obvious steps and not-so-obvious ones. Expect the body to change on several levels at once: tissue, nerves, and emotions. The following subheadings dissect common, usually unmentioned difficulties and provide straightforward advice on handling them.

Body Lumps

All the things they don’t tell you about liposuction, like temporary lumps or firmness, which are part of healing. Little nodules here and there where fat was suctioned out and where fluid and scar tissue settle. Over time a lot of these anomalies smooth out as swelling reduces and your body reabsorbs fluid.

Soft, patient massage can assist. Obey your surgeon’s timing and technique to prevent damage. If massage is recommended, utilize slow, even strokes and prevent deep pressure in freshly closed wounds. Track changes: take photos every one to two weeks and note improvements.

If lumps persist for more than three to six months or worsen, ask for a clinical check as persistent irregularities occasionally require targeted treatment such as steroid injection or minor revision.

Skin Sensation

Something to note is that it’s normal to feel tingling, itching, or numbness as the nerves regrow. The feelings are transient, and nerves regrow at a snail’s pace, measured sometimes in millimeters per month. Don’t scratch or rub irritated skin because this can cause breaks or infection.

Apply simple, fragrance-free moisturizers to calm the itching and support your skin’s barrier. A cool compress can help with short flare-ups. Maintain a bare-bones journal of sensation changes, including the date, location, and type of feeling, so you can convey trends to your clinician.

If numbness or burning is severe or associated with redness, escalating pain, or fever, get it evaluated to exclude infection or nerve injury.

Garment Fatigue

Wearing compression garments for weeks on end can chafe even the most patient of us. Frustration is natural, particularly when security and routine seem tight. Alternate with a minimum of two or three permitted garments to help wash and minimize skin irritation.

Schedule sensible intervals when your surgeon allows. Brief stretches without compression while reclined can boost comfort without compromising results. Use distraction tactics: short walks, light projects, or social video calls to shift focus from discomfort.

Remind yourself why you chose the procedure, and watch emotional shifts. Studies show about one-third of patients lack confidence in recovery and up to 30% may have depressive symptoms post-op. One in five later regret surgery, so keep support—friends, therapist, support groups—close at hand.

Most feel better by six months. Approximately 80% in one study experienced a decrease in depressive symptoms at that point. Monitor your physical and emotional healing and seek assistance early when surprises appear.

Managing Expectations

Recovery after liposuction takes time. Initial alterations can appear hopeful or equivocal. Knowing what to expect avoids letdown and fosters a more consistent healing process. Below are concrete directives to guide objectives, timing, and reframing progress as healing persists.

Initial Results

Noticeable change tends to start once swelling and bruising subside, typically within weeks. Initial contours may appear, but they are not permanent as fluid moves and tissue settles. Don’t be too harsh in the first weeks. Mood swings are typical and often peak early, with most patients feeling better by six to twelve weeks.

Snap photos at consistent angles and light and scribble short notes about pain, energy, and mood. Such tracking assists you in contrasting these early impressions to what comes later and mitigates hasty judgments. Anticipate ambivalence when bruises and swelling obscure form. That sensation is natural and typical.

A mental prep checklist for the weeks leading up to surgery might involve setting realistic time expectations, arranging home support, planning light activities, and deciding how you’ll track progress. Simple breathing, short yoga, or a five-minute mindfulness routine a day can reduce stress and steady mood throughout that first month.

Final Outcome

MetricBeforeAfter (approx. 6 months)
Visible contourPre-surgery shapeRefined as swelling resolves
Bruising/swellingN/AMostly resolved
Skin retractionVariableImproved as tissue settles
SymmetryNatural variationSmall asymmetries normal

View pre-surgery and up to 6 months photos for perspective. As many as 30% of patients may encounter anxiety or depression post-surgery. Monitoring physical and emotional symptoms alike allows you to identify issues early and get support. Embrace that little imbalances are okay.

Aim for overall satisfaction. Better fit in clothing, improved proportion, and comfort with body movement often matter more than perfect symmetry.

Body Contours

Contour refinements surface gradually as swelling subsides and skin readjusts. Over weeks to months, you will see more definition and a truer silhouette. Maintain a regimen of light exercise, nutritious meals, and proper hydration to keep results in check. Strength training and posture work can highlight the new form.

Enjoy and highlight the new silhouette in practical ways: choose clothes with cleaner lines, try different waist positions, or use tailored pieces that complement the new proportions. Manage expectations and celebrate small victories like being able to move easier or feel more confident walking around.

Don’t be afraid to revisit your goals throughout and scale them as healing demands. This regular recalibration will help stave off unrealistic expectations and maintain steady satisfaction.

Conclusion

Recovery from liposuction takes strides. Swelling subsides, bruising diminishes, and scars mature. Energy returns slowly, then steadier. Mood shifts, too. Other days weigh heavy. Some days just feel off. Small wins matter: a walk without pain, a shirt that fits right, or a mirror moment that feels calm.

Set simple goals: rest, steady movement, and good sleep. Consult your care team regarding any strange pains or mood dips. Be open with friends or a counselor if body image feels difficult. Use new clothes, photos, or light exercise to reset your self-image.

If you want more tips or a recovery plan customized to you, request a checklist or a brief guide.

Frequently Asked Questions

How long does it usually take to feel like myself after liposuction?

You will generally feel physically like yourself again somewhere around four to six weeks. Full swelling and final contours can take three to six months. Emotional recovery varies and can take longer.

When will swelling stop and my results look natural?

Swelling usually subsides considerably by four to six weeks. Final natural contours typically emerge between three to six months as remaining swelling abates and tissues settle.

Can emotional ups and downs after liposuction be normal?

Yes. Mood changes, impatience, or anxiety are common. They tend to subside as discomfort, swelling, and bruising diminish. Professional support is important if feelings are severe or persistent.

How soon can I return to work and normal activities?

Light activity and desk work are usually possible within a few days. Strenuous exercise should be postponed for four to six weeks or until your surgeon clears you. Follow your surgeon’s personalized plan.

Will liposuction permanently change my body shape?

Liposuction fat cells that are removed never come back. Residual fat may expand after weight gain. Maintaining results requires a balanced diet and regular exercise.

What complications should I watch for during recovery?

Be alert to heavy bleeding, rising pain, fever, intense redness, or strange discharge. Call your surgeon immediately if any of these arise. Early treatment minimizes risks.

How can I speed up feeling like myself again?

Follow post-op instructions: wear compression garments, rest, hydrate, and attend follow-ups. Slowly increase activity as directed. Tell your surgeon if anything has changed.

Why it’s okay to want your pre-baby body back and how to do it safely

Key Takeaways

  • Wanting your pre baby body back is a perfectly acceptable reaction to the drastic physical and emotional upheaval of pregnancy and childbirth and doesn’t diminish how much you adore your beautiful bundle of joy or how fantastic of a parent you are.
  • Prioritize postpartum health by opting for balanced nutrition, gentle and functional movement, and regular checkups instead of quick fixes. Set small, achievable fitness goals to regain strength and confidence.
  • Reclaiming slices of your pre-baby identity makes you feel more like you. So employ introspection, comfort in the familiar, and empowering apparel to crosswalk between the old you and the new you.
  • Minimize exposure to media and social comparisons that push unrealistic “snapback” expectations. Employ filters and boundaries to safeguard your self-image and concentrate on your individual healing.
  • Anticipate diverse and slow healing periods, typical body changes such as stretch marks or pelvic floor concerns, and hormonal fluctuations influencing your mood and vitality. Plot progress with achievable milestones and seek guidance from healthcare professionals when necessary.
  • Redefine ‘getting your body back’ as functional, strong, and well. Celebrate the non-scale victories and embrace long-lasting habits that respect both your post-baby body and yourself.

Why it’s okay to desire your pre baby body. It typically comes from missing old fitness, clothing fit, or energy. There are natural physical changes after pregnancy and that’s okay.

You can work towards realistic goals like slow fitness, good nutrition, and doctor visits when necessary. A defined plan and gentle self-messaging establish consistent strides while maintaining health and time requirements in perspective.

Validating Your Desire

Desiring your pre-baby body is a natural, reasonable response to the deep cracks that pregnancy and childbirth have introduced. Your body is impacted by physical shifts, hormonal shifts, sleep loss, and daily role shifts that reshape how you look and feel. This section deconstructs why that desire is important and how to frame it to support health, identity, and long-term well-being.

1. Identity

Your sense of self frequently feels altered post-pregnancy. What was once second nature—how you dressed, moved, or felt in your body—can feel lost, and that loss counts. Taking back pieces of your pre-baby body can re-establish a sense of wholeness in who you are, not eliminate the mother identity.

Motherhood caves in identity; it doesn’t peel away earlier layers of you. Use simple self-reflection exercises: list three things you enjoyed before pregnancy and small ways to bring them back. It connects your past and present selves in a pragmatic way.

2. Health

Concentrate on being healthy instead of losing weight quickly. Good nutrition and careful, incremental stretching and exercise encourage recovery of pelvic floor strength and function. Track mental wellness.

Existing poor body image or a background of disordered eating increases the likelihood of postpartum upset. Postpartum can activate eating disorders or exacerbate anxiety, so be alert to symptoms such as obsessive restriction or body-checking and pursue expert care as necessary.

Have regular postpartum checkups to monitor healing and receive personalized recommendations on activity levels.

3. Control

Achievable goals, in other words. A brief daily walk, kegels, or half an hour of relaxing yoga thrice a week – whatever floats your boat. These are confidence builders.

Rituals offer tangible victories and minimize anxiety. No crash diets or quick fixes, because they wreck the physical and emotional healing. Sustainable habits, consistent sleep when you’re able, balanced meals, and incremental strength work establish real agency over your body and mood.

4. Familiarity

Old clothes, old habits, and old activities provide solace. A favorite top, a beloved hobby revisited, or pre-pregnancy exercises reintroduced can make you feel ‘at home’ in your skin once more.

That nostalgia for the former body can be a longing for predictability and an easy life. Give yourself time to adjust and honor your gut feel. Sometimes, even a small step towards what’s familiar can make the new body feel less alien.

5. Confidence

Celebrate small milestones: more strength, better sleep, or improved mood. Buy clothes to fit today’s body and increase comfort.

Practice self-talk that defies mean inner critics. Validate your longing by surrounding yourself with people or collectives that champion sensible, body-positive objectives, not thin ideals. Validating self-care and self-love helps shift focus from appearance to function and resilience.

External Influences

Outside pressures inform how new moms feel about their post-pregnancy bodies. They are the forces of media images, societal expectations, other people’s comments, and the comparison habits that arise from encountering polished lives online. Knowing how each operates empowers you to identify influence, compare it to reality, and select answers that defend your well-being and identity.

Media Portrayals

Photos of slim postpartum bodies and “snapback” culture inundate magazines, feeds and ads. Those images typically depict women who had trainers, nutritionists, and occasionally surgical or cosmetic assistance, yet they portray the outcome as natural and instantaneous. Real postpartum recovery includes variable timelines.

Some bodies take months or years to change, and factors such as breastfeeding, sleep loss, hormonal shifts, and mode of birth change how weight and shape evolve. Many myths recur in media: that you must cut calories drastically to lose baby weight, that exercise alone will restore pre-pregnancy skin tone, or that all women should resume previous clothing sizes within weeks.

These assertions dismiss medical nuance and increase risk for disordered eating or unsafe behaviors. In a similar vein, avoid feeds that guilt or shame. Unfollow accounts selling quick solutions. Follow reliable sources — health services, postpartum physiotherapists, peer support groups — that demonstrate diverse, truthful recovery journeys.

Social Comparison

External influences comparing yourself to other moms is natural. It’s a surefire way to wear down your confidence when the comparisons depend on select glimpses. Pay attention when you compare your progress to pictures or deadlines instead of health-based markers such as energy, mobility or mood.

Each pregnancy, delivery and recuperation is unique. Genetics, pre-pregnancy fitness, age, diet and rest all factor in. Set goals about your own health, not about external deadlines. Shift attention to measurable, non-appearance goals: improved sleep routines, pelvic floor strength, or returning to low-impact exercise.

Create a checklist of achievements that do not revolve around body shape: healed perineum, consistent breastfeeding or feeding routine, establishing support routines, returning to work gradually, connecting with parent groups. Identify types of external influences and for each, write why it is important and a quick check-back time period.

Partners and social networks often help. Encouragement to exercise for mood, practical help with childcare, and positive comments all matter. School and support systems mitigate damage from cultural insistence to ‘snap back’. Look for community.

When you hear them, name the myths and select information that prioritizes sustainable health over instant aesthetic transformation.

Postpartum Realities

Postpartum is a marathon with physical and emotional waves that occur over months, not days. Anticipate continued fluctuations in strength, mood, energy, and shape. Prepare for unpredictability: stretch marks, loose skin, pelvic floor issues, soreness, swelling, and surgical scars all show up in varied ways and timelines.

Postpartum Realities — prioritize rest and realistic goals while tracking small wins.

Hormonal Shifts

Hormones drop and rebound after childbirth, which impacts your mood and body composition. These transitions alter appetite, energy, and metabolism. Some moms experience hunger surges or sluggish energy for weeks.

Mood swings, postpartum blues, or anxiety can be associated with these hormone shifts. Clinical depression affects up to 15% of new mothers, so keep an eye on symptoms and seek assistance if necessary. Track sleep, appetite, and mood in easy notes to catch patterns.

Support balance by sleeping in regular blocks where you can, eating protein-heavy meals and whole grains, and employing stress tools such as short walks, breath work, or quick check-ins with a clinician or therapist. Small, consistent habits keep hormones calm.

Physical Changes

  • Stretch marks (affect up to 90% during pregnancy)
  • Loose abdominal skin and diastasis recti
  • Pelvic floor weakness and pelvic organ prolapse can be very common.
  • Caesarean section scar and changes to abdominal fascia
  • Breast size and shape changes, including milk-related swelling
  • Soreness, swelling, itchiness, or healing from tears or episiotomy

Certain transformations might be irrevocable. Caesarean scars typically require more than six weeks to heal, and abdominal fascia could regain less than 60 percent of original strength.

Belly binders or supportive garments can help alleviate pain while you heal. Delicate, directed movement can help reconstruct abdominal muscles and pelvic floor strength. Begin with light load pelvic floor contractions and slow core re-engagement under the guidance of a physiotherapist.

Recognize that the pressure to “prove” nothing changed is unrealistic and confidence-sapping.

Recovery Timelines

TimelineTypical milestones
0–6 weeksWound healing, bleeding reduces, basic mobility returns
6–12 weeksGradual strength gain, breastfeeding patterns stabilize
3–6 monthsNoticeable energy and strength improvements, many symptoms lessen
6–12 months+Continued body remodeling, some permanent changes remain

Let’s track how you are doing week by week regarding strength, sleep, mood, and pain. Don’t compare, particularly to celebrities whose postbirth rebound is anything but average.

Check postpartum protocols and with a physician prior to resuming intense exercise or heavy lifting to minimize risk and safeguard long-term health.

Mind-Body Connection

Giving birth is gruelling and healing can take months or years. That reality is important when you want your pre-baby body back. Recovering involves tissue repair, hormonal shifts, and relearning how your body moves. The pelvis can tilt and widen, on average 2.5 centimeters during pregnancy, and abdominal fascia and muscles don’t bounce right back.

Six weeks post-caesarean, the abdominal fascia has recovered less than 60 percent of its strength. Diastasis recti impacts approximately 60 percent of postpartum women. Pelvic organ prolapse impacts up to 90 percent of postpartum individuals. These statistics explain why listening to the body is indeed an actionable step, not a beauty pageant.

Cultivate mindfulness to be in touch with your body’s requirements and messages. Mindfulness assists you in observing pain, tightness, fatigue, and emotional triggers without judgment. That knowledge directs more cautious workout decisions and improved sleep.

For instance, experiencing shortness of breath during a run can lead to switching to lower impact training that still builds fitness. By noticing pelvic pressure during specific moves, you can swap or modify those moves and seek pelvic floor therapy. Mindfulness aids in monitoring incremental improvements, whether in strength, range of motion, or pain reduction, keeping progress tangible and attainable.

Leverage yoga, meditation, or breathing exercises to alleviate stress and encourage healing. Breath work decreases stress hormones and can help relax muscle tension. Gentle restorative yoga improves posture, core reconnection, and pelvic alignment.

Meditation manages the guilt and shame generated by pressure to “bounce back.” That pressure can make new parents feel they need to demonstrate that pregnancy didn’t change them, which frequently induces destructive diet or exercise habits. These short daily practices, such as five minutes of diaphragmatic breathing, ten minutes of guided body-scan, or a brief pelvic-floor cueing session, provide consistent benefit without significant time overhead.

Here’s a table outlining the various mindfulness methods and effects.

TechniqueWhat you doKey benefits
Diaphragmatic breathingSlow deep breaths filling the bellyLowers stress hormones, eases pelvic tension
Body-scan meditationMentally sweep attention over the bodySpot pain/tight spots, guide rehab choices
Gentle yogaSlow poses with pelvic and core focusImproves posture, reconnects abdominal muscles
Pelvic-floor cueingLight contractions and releasesSupports bladder/bowel control, reduce prolapse risk
Guided imageryVisualize healing and strengthReduces shame, supports mental resilience

Take care of your mind along with your body. The mind-body connection is important. Taking shame and unrealistic expectations into consideration lowers your risk of injury and facilitates consistent progress.

A New Approach

A new approach reframes the goal not to race back to a pre-pregnancy look but to restore health, strength, and daily function. This perspective places equal emphasis on physical recovery, mental wellbeing, and social support. It acknowledges that bodies recover at their own pace and that momentum is built through incremental change, not quick solutions.

The remainder of the section provides practical action steps in nutrition, movement, and goal-setting that align with that mindset.

Gentle Nutrition

Opt for nutrient-dense whole foods that help your body lactate and repair tissue. Focus on lean protein, legumes, whole grains, dark leafy greens, and fruits, along with healthy fat sources such as nuts and seeds. These provide steady energy and improve mood.

Steer clear of rigid, low-calorie schemes that eliminate food groups. Such diets can damage your milk supply and increase stress. Instead, follow hunger cues and eat intuitively: eat when you feel hungry and stop when satisfied.

Plan easy balanced meals and snacks to keep blood sugar stable. For example, a midday plate with quinoa, roasted vegetables, grilled fish, and a small yogurt. Snack options might be a banana with nut butter or hummus with carrot sticks.

Drink fluids throughout the day, more if you are nursing or in post-operative recovery. Keep a refillable bottle within reach and create subtle reminders if necessary.

Cook, or come up with meals that are doable, not perfect. Batch-cook your grains and proteins, have ready-to-eat snacks on hand, and enlist the community kitchen for meal prep. This cuts down on decision fatigue and keeps nutrition consistent on busy days.

Functional Movement

Concentrate on functional movement that simplifies daily chores. Functional movements such as squats, hip hinges, and rows develop the strength required for lifting, carrying, and bending. Rebuild your deep core and pelvic floor with light, graduated work approved by a clinician or pelvic-floor physical therapist.

Breath-centric core activation and modified planks are great warm-ups. Ease into activity with stroller walks, restorative yoga, or light resistance bands. Many women are now opting for a slow return to exercise instead of high-intensity workouts.

Because these sessions are short, ten to twenty minutes, they can fit into busy schedules and reduce the risk of injury. Rest when your body tells you to. Rest is training too, particularly postpartum.

Use social support: join a local postpartum exercise group or an online community to share tips and stay motivated. Groups alleviate isolation and frequently offer practical signals for secure advancement.

Realistic Goals

  1. Break a large goal into three clear steps with timeframes and measures: For example, the goal is to regain baseline strength in six months. The steps are (1) daily 10-minute core work for four weeks, (2) strength sessions a week for eight weeks, and (3) follow up with a physiotherapist at month three.
  2. Track progress with simple markers: improved sleep, less back pain, more energy, or being able to lift a toddler without discomfort.
  3. Set different expectations depending on birth type, complications, and how fast your body recovers. We all have our own journeys.
  4. Mark milestones. Even one solid night’s sleep or a hassle-free stair climb does wonders for morale.

Redefining “Back”

Redefining “back” means changing what we expect from postpartum bodies and naming what really matters: strength, confidence, and well-being. Instead of a fast reset to a former form, seek core and pelvic strength that underpins living, mental stability that smooths stress and insomnia, and bodily ease that softens common pain.

Strength can feel like lifting your car seat with no pain, carrying your child upstairs, or sitting without pelvic pressure. Confidence might mean feeling comfortable in clothes you select, new or vintage. Well-being encompasses sleep, mood, and care access.

Come to terms with the fact that your post-partum body may never be your pre-baby body, and that’s okay. Pregnancy affects tissues, fat, and hormones in ways that can be long lasting. Some women end up with pelvic floor issues that stick around for years and require continued assistance from physiotherapists or medical professionals.

Scars, stretch marks, and changed breast shape are par for the course. Attempting to push yourself to ‘bounce back’ to a previous appearance can create tension and body resentment, particularly when the phrase ‘bounce back’ implies quickness and stealth, not slow recovery.

Own the new stretch marks, scars, or shape—a testament to motherhood and strength. They can be seen as visible reminders, artifacts, proof of what your body did rather than a ‘flaw’. For instance, a Caesarean scar can be a remnant of a narrative of medical intervention that protected mother and child.

Stretch marks are reminders of growth and transformation of tissue. Address these marks with pragmatic care—hydration, SPF, massage—and with mindful care by redefining the narrative you have around your body. Post photos or words among trusted friends to normalize all the different postpartum looks!

Let’s inspire other moms to share their post-pregnancy journeys and collectively create a more truthful story. Online pressure to ‘bounce back’ can transmit unrealistic norms and shame. When mothers publish raw truths—tales of pelvic rehab, chronic soreness, and victories as minor as a 10-minute walk—they assist in recalibrating folks’ expectations.

Practical tips matter: short daily stretches to release the neck and shoulders from feeding positions, gentle pelvic floor exercises, 10 to 15 minutes of walking, and seeking professional help when pain persists. Allow the body the space and time to heal. Long-term recovery usually surpasses quick fixes.

Postpartum is individual and complex, which is why honest communal dialogue supports us all in making informed decisions about care and aspirations.

Conclusion

Wanting your pre-baby body makes sense. The desire connects to remembrance, habit, and the feel of your body in its former state. You can hold that desire and still love your body. Small moves add up: short walks, meals with protein and vegetables, and sleep when you can. Chat with your trusted clinician about safe steps. Make goals that suit your life. A photo, not strength, from years ago. Observe changes in how you feel, how clothes fit, and energy shifts. Express frustrations with friends or a group that understands. Give an easy program a shot for eight weeks and record one obvious success each week. If you’d like more tips or an easy starter plan, just ask and I’ll send one.

Frequently Asked Questions

Why is it normal to want my pre-baby body back?

Not Sorry for Wanting My Pre-Baby Body Back Pregnancy shifts your hormones, your shape, your energy. This desire is often more about comfort, identity, and falling back into old rhythms. It doesn’t make you selfish or unrealistic.

How can I pursue my pre-baby body safely?

Focus on gradual, sustainable steps: balanced nutrition, gentle exercise, adequate sleep, and medical clearance. Check with your doctor before hardcore exercise or diets. Safety minimizes damage and sustains long-term success.

When should I expect to see physical changes after childbirth?

Each body is different. Some recovery is measured in weeks and postpartum changes can take months to a year. These consist of delivery type, breastfeeding, age, and pre-pregnancy fitness. Be patient and mark the little victories.

Can wanting my pre-baby body harm my mental health?

It can, if expectations are inflexible or comparative. The unrealistic timelines may cause stress. Pair the goals with self-compassion, realistic plans and support from professionals or peers to safeguard your mental health.

How do I balance body goals with caring for a newborn?

Set tiny, stretchy goals that conform to your day. Make sleep, short workouts, and nutrient-rich meals a priority. Enlist husbands or nannies. Micro habits accumulate without space-hogging.

Is it okay to use cosmetic procedures or weight-loss programs postpartum?

Thought about them, but let your body heal and consult with a good doctor first. Talk about risks, nursing, and realistic results. Focus on safety and science.

How can I redefine “back” to a healthier standard?

Redirect the goal from how you looked exactly before you got pregnant to how you want to feel—functional, strong, and comfortable. Celebrate gains in energy, mobility, and confidence. It encourages both sustainable health and body love.

7 Habits to Ensure Smooth, Long-Lasting Liposuction Results

Key Takeaways

  • Know that liposuction is a body contouring procedure, not a weight-loss method, and have realistic expectations considering your health, anatomy and skin quality.
  • Select a board certified surgeon with demonstrable experience, flip through before-and-after pictures, and talk about the particular techniques and technology they use to make smooth and even results a priority.
  • Get the best possible results from liposuction by getting in shape first. Prepare your nutrition, hydration, skin, and medications, and stop smoking early.
  • Adhere to post-op care religiously. Wear your properly fitted compression garments, schedule lymphatic drainage, drink lots of water, and begin gentle movement as soon as you’re able to both reduce swelling and smooth the contour.
  • Preserve your results with stable weight, regular exercise, and continued skin care to maintain your contours and encourage long-term satisfaction.
  • During consultation, document your goals, ask about complications and revision rates, request a written plan, and confirm the facility’s safety standards to make an informed decision.

How to get smooth results from liposuction is a series of measures that enhance contour and recovery post surgery. The secret to getting smooth results from liposuction is selecting an experienced surgeon, exacting treatment planning, consistent post-op compression, and a slow return to activity.

Steady skin and scar care and follow-ups reduce lumps and unevenness. Realistic goals and time allow swelling to settle and tissues to adapt before it’s possible to judge final shape.

Understanding Liposuction

Liposuction sculpts body contours by suctioning out selected fat accumulations underneath the skin. It’s a contouring tool, not a weight-loss fix. It serves individuals closer to their target weight who possess hard-to-budge deposits of fat.

Patient health, skin quality, and body shape all strongly impact the smoothness of results. Expectations should be realistic: improvements in contour and proportion are common, while perfect symmetry is not guaranteed.

The Procedure

Stages usually encompass consultation, marking, anesthesia, small incisions, fat loosening and suction, and closure. Anesthesia can be local with sedation or general, depending on the extent. Surgeons insert thin cannulas to disrupt and remove the fat.

Commonly treated areas include the abdomen, flanks, thighs, arms, neck, and under the chin. Recovery depends on how many areas are addressed. One or two areas lead to a shorter recovery than an all-over approach.

  • Pre-op assessment and markings
  • Administration of anesthesia
  • Tumescent fluid was injected to minimize bleeding and numb the area.
  • Fat is loosened using manual or energy-assisted methods
  • Suction of fat through cannulas
  • Incisions closed and compression garments applied

Adhere to the pre- and post-op instructions. Discontinue blood-thinning medications if recommended, refrain from smoking, and organize transportation and recovery. Anticipate soreness, pain, or a burning sensation for a couple of days.

A compression garment worn for a few weeks decreases swelling, alleviates pain, and assists the skin in adjusting to new contours. Recovery time varies according to the technique and how much was done.

The Technology

Conventional liposuction still depends on manual cannulas and trained surgeons. Newer options add energy sources: laser-assisted (LASER), ultrasound-assisted (UAL), and power-assisted liposuction (PAL). These can help free fat and might tighten skin better than suction on its own.

  • Less tissue trauma with energy assistance
  • Potential for better skin retraction in some areas
  • Shorter procedure time for large areas with power devices
  • Reduced bleeding and bruising in certain techniques

Laser or ultrasound tech may be more appropriate for thinner-skinned regions or areas requiring minimal skin tightening, like the neck or lower abdomen. Bigger, tougher regions such as outer thighs or hips can sometimes be amenable to power-assisted methods.

When selecting a surgeon, simply inquire which technology they utilize, why it suits your anatomy, and see before-and-after photos of similar cases.

The Goal

Our focus is sleek, natural looking contours not theatrical weight loss. I find that subtle change often produces more long-term satisfaction than aggressive re-shaping. Perfect symmetry is almost never possible; a little asymmetry is natural.

Tissue still settles and tightens anywhere from 3 weeks to a year with a big jump at about 3 weeks. Liposuction does not address intra-abdominal fat, which has separate health risks that should be managed medically.

Surgeon Selection

Choosing your surgeon is the most critical step in achieving smooth, natural liposuction results. Choose a good, board-certified plastic surgeon who has experience with body sculpting. Check credentials, examine clinic accreditation, and ensure that the facility adheres to established safety standards.

Verify that the surgeon operates on a variety of body types. Elite surgeons in multiethnic locations are exposed to all shapes and sizes and know how to customize their approach to different physiques.

Experience

Choose surgeons who perform a lot of body contouring. Inquire about their liposuction caseload and demand exact figures for the procedure you desire. Ask for complication rates and find out their revision policy.

Surgeons who keep a record of and share their outcomes tend to be more dependable. Make sure they are aware of multiple newer techniques, such as power-assisted, ultrasound-assisted, and laser-assisted, and when each is optimal.

In areas with a cutting-edge practice, such as large metropolitan centers, surgeons tend to utilize more elaborate tools that provide more precise control and more even end results. Experience means they can set realistic expectations and know how to steer clear of typical blunders like over-resection or uneven liposuction.

Technique

Talk about the surgeon’s preferred method and why it fits your goals. Ask for a clear rationale: which cannula size, energy device, or tumescent protocol they plan to use and how those choices reduce surface irregularities.

See if they tailor step-by-step plans for your body instead of taking a cookie-cutter approach. Ask about their techniques to prevent contour irregularities, such as melting fat gently, staged removal, conservative heat liposculpting on borders, and careful treatment of fibrous regions.

Confirm they emphasize skin smoothness through proper undermining, selective fat equalization, and postoperative compression. Inquire how their ‘natural look’ philosophy directs placement and volume caps so results complement your frame and appear organic.

Consultation

Bring a concise list of objectives, pictures of styles you like, and your priority concerns. Review the surgical plan in detail: target zones, estimated fat volumes, incision sites, and expected timeline for seeing final results.

Be up front about desires and boundaries. Upfront planning minimizes surprises down the road. Get the lowdown on what to expect, including things like swelling timelines and scar expectations.

Ask for a written summary of the consult and plan to refer back to later. The best surgeons will describe what appears natural for your body and will ensure you comprehend probable results prior to signing consent.

Your Body’s Canvas

Your body’s canvas refers to your physical body as the beautiful medium for transformation when designing liposuction. It’s not just a shopping list of zones to pamper. It’s skin, fat, muscle, scars, and a healing system that does its own thing.

Good planning looks at all those parts together, and the recovery phase shapes the final picture. Swelling and bruising peak around 48 hours, compression garments help control fluid, and most visible settling happens over weeks but can take months.

Skin Quality

Determine skin elasticity to anticipate skin fitting capabilities post liposuction. Pinch tests, clinical photos, and occasionally ultrasound provide an idea of recoil. Firm, elastic skin tends to redrape smoothly, whereas lax skin may fold or ripple.

Look for signs of damage: deep stretch marks, sun-damaged skin, or previous incisions change how skin heals and can reduce smoothness. Prehabilitating your skin can help! These range from topical retinoids and medical-grade moisturizers to radiofrequency or laser skin tightening and even targeted exercise to build underlying tone.

These steps won’t substitute for lost elasticity, but they can increase the chances of a more sculpted outcome. Observe the skin during healing. Texture can shift as swelling subsides. Minor unevenness frequently smooths out with massage and patience.

Persistent dimpling after three to six months should be re-evaluated and could potentially benefit from adjunctive therapies such as fat grafting or noninvasive tightening.

Body Composition

Evaluate fat distribution and muscle tone before picking sites for liposuction. Areas with localized, pinchable subcutaneous fat respond best. Liposuction removes subcutaneous fat, not visceral fat around organs.

Abdominal contour depends on both layers and underlying muscle condition. Maintaining weight pre and post surgery is critical. Big weight swings change proportions and can undo sculpting.

Use body composition, such as bioimpedance, DEXA, or caliper measures, to guide realistic goal-setting and customize treatment to the patient’s fat distribution. Tone matters: stronger muscle under thin fat can show better contours.

Embed strength work in pre- and post-op plans. Anticipate the majority of shifting to occur in the first three weeks, but don’t be surprised if it doesn’t completely settle until a few months. Nutrition, hydration, and rest are pragmatic components in this phase.

Genetic Factors

Genetics determine where you carry fat and how your skin responds to injury. Some of us store fat preferentially in hips or under the chin, while others keep it around their waist. These patterns influence what areas will give smooth results and what areas require conservative treatment.

Family history hints for scarring, keloid, or pigment changes after incisions. If family scars heavily, design in smaller entry points and think about prophylaxis. Certain areas refuse to be sculpted no matter how many times you try.

Acknowledge limitations and establish objectives that complement genetic predispositions. Tweak expectations accordingly. Consult a reasonable outcome with the surgeon, and map out adjunctive measures such as skin tightening or staged procedures when genes predict poor skin recoil.

Pre-Operative Preparation

Pre-Operative preparation for liposuction mitigates risk and enhances the likelihood of smooth, even results. Read and follow your surgeon’s instructions carefully. Organize logistics, finalize tests, and prepare your home so healing begins without unnecessary stress.

1. Optimize Nutrition

Consume a nutrient-dense diet with plenty of vitamins and minerals, which help in tissue repair and combat infection, for a minimum of two weeks before your surgery. Focus on whole foods: leafy greens, colorful vegetables, berries, lean proteins like fish and poultry, legumes, and whole grains.

An antioxidant-rich, water-rich pre-operative diet enhances the skin’s elasticity and helps tissue take to contouring. Up your protein to heal. Shoot for 1.2 to 1.5 grams of protein per kilogram of body weight with your surgeon or nutritionist’s blessing.

Think Greek yogurt, eggs, tofu, and beans. Plan meals for the first week after surgery. Soft, protein-forward options such as broth-based soups, mashed vegetables with shredded chicken, and smoothies with protein powder make eating easier while you rest.

Stay away from processed foods and added sugar, which increase inflammation that can exacerbate swelling. Trade in the candy bars for nuts, fruit, or whole-grain crackers. Keep convenient, easy-to-eat, nutrient-dense snacks close to your recovery zone.

2. Enhance Hydration

Get a lot of water in the days before surgery. Hydration helps with circulation and flushing the anesthetic agents out post-op. They usually have to fast 6 to 8 hours before surgery, but stay well hydrated leading up to it.

Reduce caffeine and alcohol, particularly within 24 hours of surgery, and cut out alcohol specifically for at least a week ahead to enhance results. Monitor urine color as a simple hydration check. Pale straw color usually indicates adequate hydration.

Schedule phone reminders to sip throughout the day and have a water bottle within arm’s reach during recovery.

3. Prepare Skin

Soften your skin to be more able to stretch and bounce back. Moisturize daily with a mild, fragrance-free lotion. Stay out of the sun and tanning beds prior to surgery. Sun-damaged skin takes longer to heal and reveals more imperfections.

Avoid aggressive exfoliants, retinoids, or other irritants for a few days prior. Arrange for any waxing or hair removal well ahead of time to prevent skin irritation in the surgical area. For surgery day, wear loose, comfortable clothing that is easy to get off and leave all jewelry, accessories, makeup, and skin care at home.

4. Manage Medications

Be upfront with your surgeon about all the medications and supplements you take, including over-the-counter medications, vitamins, and herbs. Cease blood thinners and anti-inflammatory drugs as directed because they increase bleeding risk.

Herbal supplements such as ginkgo or high-dose fish oil should be avoided unless cleared as well. Set up a clean medication schedule for post-op pain management and antibiotics. Arm yourself with a list for your pre-op visit and use a med-helper in the first 24 to 48 hours post-surgery.

5. Cease Smoking

Stop smoking weeks prior to surgery as nicotine inhibits blood flow and healing. Substitute smoking with better methods of stress relief, such as a quick walk, deep breaths, or a chat with a friend.

Follow your progress and celebrate smoke-free milestones. Organize your ride home and support from a friend or family member for the initial 24 to 48 hours.

Post-Operative Care

Right post-operative care paves the way for easy, durable liposuction results. Post-Op Care: Follow surgeon instructions to the letter, monitor for red flags, and track your recovery with notes to help inform tweaks. Here are targeted zones to control swelling, promote healing, and accelerate the shift into results showing territory.

Compression Garments

Always wear the provided compression garments to help minimize the swelling and pain. They assist in contouring treated areas and support skin contraction. Many patients don them for weeks.

Make sure it doesn’t fit too tightly, causing any indentations or uneven pressure. A garment that is too tight puckers the skin, while one that is too loose won’t control swelling. Fresh clothes must be washed by hand with a gentle soap and dried flat between every wear.

Step down wear time based on your surgeon’s recommendations, generally from full time to nights-only over weeks. Regular compliance is associated with improved contour results and decreased pain.

Manual Lymphatic Drainage

Arrange for professional lymphatic drainage massages post-op. A number of surgeons support beginning the day after surgery and continuing a few times a week for approximately two months.

These treatments circulate stagnant fluid and chip away at hardness, particularly during the initial three-week period when bruising and swelling are at their worst. Discover soft self-massage to assist the pros. Small, slow strokes toward lymph nodes are fine to do at home.

Avoid deep or vigorous rubbing. Record decrease of swelling and firming in your recovery journal to impress your therapist. Don’t overdo massage because volatile tissues have a tendency to break down and spread pain.

Hydration and Diet

Keep drinking water regularly, at least eight glasses, around 2 liters, a day and more during hot weather or with exercise. Hydrate well, as small amounts of hydration support circulation and assist the body in clearing fluids post lipo.

Focus on nutrient-dense foods to support tissue repair: lean protein, colorful vegetables, and healthy fats. Avoid salt since it will swell you up. Plan some light meals for the first few days after.

Soups, smoothies, and simple grilled fish make a lot of sense when you’re low on energy.

Movement and Activity

Start light walking once your surgeon clears you. As you heal after surgery, you’ll need to take short, frequent walks to reduce the risk of blood clots and help circulation.

Refrain from intense workouts until completely recovered. While most resume higher-intensity efforts after a few weeks, follow your clinician’s instructions. Add some light stretching to keep you flexible and loose.

Ease back into your normal routine to encourage circulation and muscle tone. Low-weight, high-rep-type exercises, such as Pilates, can help skin contract and tighten more quickly as tissues continue to heal over the next year, with a big jump at about week three.

Watch for pain, tenderness, or burning and report any sudden changes.

Long-Term Maintenance

Liposuction long-term maintenance emphasizes habits that solidify your contour modifications and aid your skin and tissues in settling. Long-term upkeep involves establishing consistent habits with weight, exercise, skin care, hydration, sleep, and check-ins so minor fluctuations do not affect surgical outcomes.

Stable Weight

Stay at a consistent weight, or you will have the uneven fat shifts that show after liposuction. Even minor improvements can accumulate in unattended spots and alter balances. Weigh weekly to observe trends instead of daily noise.

Keep a food diary or app to track meals and identify patterns. Aim for a balanced diet full of whole foods, lean protein, and a balance of complex carbs and healthy fats. Mindful eating, such as pausing before snacking, checking in with your hunger levels, and avoiding eating emotionally, keeps your intake stable.

Reward milestones, like three months of weight maintenance or six months of diligent food journaling, with nonfood prizes like a massage or new exercise clothes.

Consistent Exercise

Establish a workout routine that includes a minimum of 150 minutes of moderate-intensity exercise weekly and a couple of strength training sessions. Cardio burns calories and encourages circulation, while resistance work maintains lean muscle and sculpts tone beneath the skin.

Schedule workouts like appointments: set three to five weekly slots and protect them. If you’re coming back, start slow and ramp over months, not days. Modify tasks as your physique adjusts—replace running with biking or swimming if joints demand decreased impact.

Establish modest, explicit objectives, such as incorporating 10 minutes weekly or incrementally enhancing squat load by 2 to 3 kilograms monthly. Monitoring progress keeps motivation strong.

Skin Health

Apply moisturizers and broad spectrum sunscreen daily to shield and keep skin pliant. Hydration matters: drink at least 8 glasses of water daily to flush toxins and support elasticity.

Collagen and elastin power skin rebound; they decline with age, so introduce collagen-encouraging habits like ample protein and vitamin C. Keep an eye on texture and elasticity. Photograph yourself every month to capture the subtle shifts.

About long-term maintenance, arrange for a yearly skin check with your dermatologist or surgeon for early intervention should laxity emerge. Swelling can mask those final contours for months, and the final result may not appear for several months to years.

Product typeExample ingredientsBenefit
MoisturizerHyaluronic acid, ceramidesHydrates, restores barrier
SunscreenZinc oxide, SPF 30+Protects from UV damage
Topical firmingRetinoids, peptidesStimulates collagen over time
Gentle exfoliantAHA, PH 3–4Improves texture, boosts product uptake

Revisit routines every few months and adjust for seasons, sleep variations, or life transitions. Shoot for 7 to 9 hours of sleep each night to help with healing and weight control. Tiny, incremental decisions cause outcomes to endure.

Conclusion

Liposuction delivers a genuine transformation if you strategize well and collaborate with an experienced surgeon. Choose a board-certified physician with transparent before-and-after images and consistent patient testimonials. Get your body ready with consistent rest, quality nutrition, and reduce smoking. Follow your surgeon’s pre-op and post-op steps for fewer bumps, less swelling, and smooth skin. Wear compressions as directed, stay active with easy walks, and care for scars gently. Maintain weight and muscle tone to keep lines crisp over time. Tiny decisions in the before and after frame the ultimate appearance. Want clearer advice for your case? Schedule a consultation with a board-certified surgeon and come armed with questions.

Frequently Asked Questions

What can I expect for skin smoothness after liposuction?

For most patients, better contour and smoother results are dependent upon skin elasticity, the amount of fat removed, and the technique. Final smoothness generally emerges by three to six months as swelling abates.

How does surgeon choice affect smooth results?

A skilled, board-certified plastic or cosmetic surgeon minimizes the risk of unevenness. Request before-and-after photos, technique information, and complication rates to confirm skill.

Can pre-operative preparation improve outcomes?

Yes. Staying at a healthy weight, quitting smoking, and optimizing nutrition and hydration assist healing and skin quality. Pay close attention to your surgeon’s pre-op recommendations.

What post-operative care helps prevent lumps or ripples?

Wear recommended compression garments, lymphatic massage or manual therapy if recommended, and follow-up visits. Good wound care and smart activity progression minimize irregularities.

Does body type or skin quality matter for smooth results?

Yes. The firmer, more elastic your skin is, the smoother your results. Older age, major weight loss, or low elasticity raises the risk of loose skin or unevenness. Talk about alternatives such as skin tightening or excision.

When should irregularities be addressed surgically?

Wait at least 6 to 12 months for full healing before considering revision. Early touch-ups can be ineffective while swelling persists. A qualified surgeon can evaluate timing and options.

How do I maintain smooth results long-term?

Keep your weight steady, eat a balanced diet, exercise, and stay out of the sun. Regular check-ins with your surgeon allow you to identify problems early and maintain contour.

Male Body Sculpting Recovery: Timelines, Tips, and What to Expect

Key Takeaways

  • Recovery falls in well-demarcated stages from the initial 48 hours to greater than three months, and time along with diligent following of provider directions enhances the outcome and minimizes complications.
  • Follow your surgeon’s instructions to the letter, including wearing compression garments, taking prescribed medications, and positioning strategically to control swelling, manage pain, and protect surgical sites.
  • Ease back into activity with short walks and light stretching. Refrain from heavy lifting or contact sports until approved. Monitor recovery with photos or journaling.
  • Support healing with nutrition and hydration. Eat a diet rich in protein, fruits, vegetables, and whole grains. Drink plenty of water and avoid processed foods and excess salt.
  • Schedule pragmatic lifestyle modifications like organizing assistance at home, refraining from smoking and alcohol, prioritizing seven to nine hours of sleep, and implementing relaxation methods to aid your mental health.
  • Be on the lookout for any warning signs such as worsening pain, developing a fever, excessive bleeding, sudden swelling, or changes in color or sensation. Contact your provider right away if you experience these.

Male body sculpting recovery refers to the period of healing following fat-reduction and muscle-contouring procedures. Recovery times depend on the technique, but most men are able to resume light activity within one to two weeks and full activity by six to eight weeks.

Typical protocols involve compression garments, light exercise and provider follow-up. Pain, swelling and bruising are normal and subside with routine care and rest.

The Recovery Timeline

Recovery following male body sculpting is relatively straightforward with a predictable timeline. It still varies by procedure and patient health. Here is an uncomplicated recovery timeline outlining what to expect and what to do as you navigate typical changes.

Adhere to your provider’s recommendations rigorously to minimize risk and maximize outcomes.

1. The First 48 Hours

Rest as much as possible and minimize movement to decrease swelling and bleeding. Minimize activity, avoid prolonged standing or sudden twists. Apply cool compresses to treated areas as instructed to reduce discomfort and minimize swelling during the initial 24 to 48 hours.

Keep an eye out for undue pain, bleeding, or pallid symptoms and reach out to your surgeon if fever, spreading redness, or heavy bleeding develops. Pain meds are frequently given, but most men transition to over-the-counter pain relief within a few days.

Keep surgical dressings clean and dry. Changing them precisely when instructed aids in infection prevention.

2. The First Week

Increase light activities as tolerated without straining the body. Brief walks in the home or around the block enhance circulation and reduce clot risk. Ensure you go to all follow-up appointments for wound checks to make sure drains and dressings are removed on time.

Compression: Still wear your compression garments as directed. Most patients wear them 24/7 for two to four weeks to control swelling and to assist the skin in conforming to new contours.

Refrain from strenuous exercise, lifting, or bending that could potentially increase the swelling or cause wound complications. Most men are back to desk work within one to two weeks following abdominal or flank liposuction.

3. Weeks Two to Four

Resume low-impact activities such as walking in order to encourage circulation and preserve basic fitness. Begin light stretching only if your provider gives the OK. This aids in regaining range of motion without taxing healing tissues.

Look out for delayed healing or continued swelling. Some soreness and bruising do hang around. Wear compression garments regularly if advised.

This is the critical time to contour your outcome. This is when the majority of patients start feeling back to normal and wean off their pain meds.

4. The First Three Months

Follow along with photos or journal to keep an eye on the progress and to detect subtle contour changes. Gradually resume routine exercise per your physician’s guidance. The majority resume exercise after four to six weeks and increase intensity over time.

Anticipate residual swelling and occasional minor numbness to ease, with most swelling gone by about the three-month mark. Concentrate on health—nutrition and exercise—to maintain these results.

Final results of liposuction may take up to six months to manifest.

5. Beyond Three Months

Enjoy final results as swelling completely dissipates and contours continue to define while remaining mindful of upkeep. Maintain a balanced fitness regimen to retain a chiselled look and arrange regular check-ups to evaluate contentment.

Watch for late complications or new changes and promptly report concerns.

Managing Discomfort

Your recovery following male body sculpting will typically involve soreness, swelling, and altered sensation. Knowing common causes of pain and how to treat them establishes expectations and promotes an easier recovery trajectory. Here is detailed, actionable advice about handling pain.

Compression

Wear compression garments as instructed to manage swelling and assist molding of final contours. Regular application, usually most of the day during the initial weeks, helps decrease fluid accumulation and may reduce pain when paired with gentle exercise.

Make sure that the clothes are close enough so they don’t rub, but not so tight that they pinch the skin. Poor fit can lead to chafing or pressure imprints. Stick to the schedule your provider prescribes. Some suggest full-time wear for two weeks, then part-time for several more.

Keep your clothes clean to avoid skin infections and keep them supple. Handwash with a gentle soap and air dry if you can. Small shifts, like cotton liners under the garment, can add comfort when sensitivity is elevated.

Medication

Use painkillers and antibiotics as prescribed. For most patients, non-opioid dosing of 400 mg every four hours, as advised by the clinician, manages moderate pain.

Steer clear of NSAIDs or supplements that make you bleed more unless given the all-clear by your surgeon. Monitor schedules using an alarm or app to prevent skipped doses and to time pain meds before activity.

Watch for side effects: nausea, rash, increased heart rate, or signs of allergy require prompt contact with your provider. If pain suddenly intensifies or takes on a sharp, localized nature, have it reviewed by a doctor.

A persistent fever or heavy bleeding also requires medical attention. Record responses so downstream teams can titrate treatment securely.

Positioning

Sleep with the upper body elevated to reduce swelling in treated areas, employ pillows or a wedge to maintain support. Do not sleep in positions that put direct pressure on incisions or sculpted areas.

Sleep on an unaffected side or your back when instructed. Move around as much as possible throughout the day to minimize stiffness and improve circulation. Short walks are beneficial.

Prop with pillows and keep legs aligned, which helps decrease incision strain and can alleviate soreness. Light manual massage, once approved by your provider, can increase circulation and decrease pain by roughly 44% in affected regions.

Be patient: numbness may last up to 12 weeks, while redness and stiffness often fade sooner. Make follow-up visits to monitor healing, modify treatment, and detect complications early.

Swelling and bruising usually peak on day 2 and then gradually subside. Complete healing may take months, so schedule activity and work accordingly.

Lifestyle Adjustments

Male body sculpting recovery requires intentional lifestyle adjustments that assist tissue to heal, reduce swelling and preserve surgical or non-surgical results. Make defined, tiny goals and anticipate incremental victories. Building a new habit takes roughly three weeks.

Instead, customize lifestyle adjustments to your objectives and context, not a cookie-cutter scheme.

Nutrition

  • Lean poultry (chicken, turkey)
  • Fish (salmon, cod, tuna)
  • Eggs and low‑fat dairy (yogurt, cottage cheese)
  • Legumes (lentils, chickpeas, black beans)
  • Tofu and tempeh
  • Nuts and seeds (almonds, chia, flax)
  • Protein powders (whey, pea) as needed

Add in fruits, vegetables, and whole grains for balanced nutrition. These foods provide vitamins, fibers, and antioxidants that help tissue repair and the immune system. Minimize processed foods and added salt to control swelling because too much sodium can extend water retention and pain.

A simple sample day includes breakfast: Greek yogurt with berries and a spoon of chia; lunch: grilled salmon, quinoa, and mixed greens; snack: an apple and a handful of almonds; dinner: turkey chili with beans and brown rice. Adjust portion sizes to your energy needs and recovery phase.

Hydration

Make sure to drink lots of water during the day to flush toxins and stimulate circulation. Dehydration impedes recovery and can add to your fatigue. Avoid sugary beverages and limit caffeine, both of which can dehydrate or disrupt sleep.

Watch urine color: pale straw usually means adequate hydration and dark yellow suggests a need for more fluids. Employ phone reminders or a marked water bottle to maintain intake. If swelling is an issue, talk with your clinician about fluid timing and any restrictions associated with medications.

Movement

Begin with brief, mild walks to increase circulation and reduce the risk of clots. Take it easy and don’t do any high-impact exercise and contact sports for a minimum of two weeks after many procedures, longer if recommended.

Pay attention and stop any movement that causes sharp pain, new swelling, or wound bleeding. Progress through activity in steps. Start with longer walks, then light resistance work, and more intense training only after given the all clear by your doctor.

Small choices help. Take the stairs, stand during calls, or do a few bodyweight moves during TV breaks. These create habits and help with long-term impact.

Rest

Sleep: Strive for 7 to 9 hours of high-quality sleep a night to facilitate tissue repair and hormonal balance. Brief naps can be a lifesaver during fatigue, and make sure to keep them short to preserve nighttime sleep.

Reduce screen time and bright lights prior to bed. Dimming lights and having a relaxed routine go a long way. Simple steps include a fixed bedtime, a cool room, gentle stretching, and limited stimulants in the afternoon.

Treat rest as a priority and applaud the small victories as you regain stamina.

Procedure-Specific Recovery

Procedure-specific recovery differs by technique and patient, molding timelines, side effects, and daily care. Surgical body sculpting usually requires more downtime and longer aftercare than nonsurgical alternatives. Here is a quick numbered list of explicit do’s and don’ts, followed by customized notes on typical procedures, what to expect and side effects, then a last practical checklist.

  1. DO wear compression garments as directed. Don’t blow them off initially.

Compression garments minimize swelling, assist the skin to adapt, and provide contouring support. Wear them for the initial 1 to 6 weeks depending on the procedure. For liposuction, most surgeons say to wear them straight for 2 to 4 weeks, then at night only. For ab etching, anticipate more rigorous utilization for 4 to 6 weeks. Skipping garments can increase swelling and stall healing.

  1. Yes, plan rest and limit activity. Don’t go back to heavy work too early.

Rest and restricted activity for weeks is necessary. Refrain from strenuous activity for a minimum of two weeks and heavy lifting for four to six weeks post-surgery. They usually get back to desk work within a few days and return to normal light activity by two to three weeks.

  1. Yes, anticipate common short term symptoms. Don’t dismiss getting signs.

Redness, swelling and soreness are common and typically resolve in days to weeks. Watch for fever, increasing pain, or unusual discharge, which require immediate attention. Rubbing massages can increase circulation and help ease pain, decreasing discomfort by approximately 44 percent when performed properly post-clearance.

  1. Wound care and follow-up visits. About procedure-specific recovery.

Keep incision sites clean and attend scheduled reviews. Take your antibiotics or pain medication as prescribed. Don’t take NSAIDs if warned against it, as some practitioners restrict them post-op.

  1. Don’t anticipate instant final-form shapeliness.

Recovery time ranges widely: surgical options may take days to weeks or even months, with full results visible around six months. Nonsurgical options like CoolSculpting typically have minimal downtime, a few hours to a couple of days, with gradual fat reduction occurring over the course of weeks.

  1. Don’t plan generically — go procedure-specific. Don’t give all exercises equal time.

Liposuction: Expect swelling for weeks, compression for 2 to 6 weeks, and gradual return to activity. Ab etching: More precise sculpting needs closer rest, tighter compression, and careful massage. Laser or energy-based procedures: Milder downtime but possible redness and sensitivity for days. CoolSculpting: Minimal downtime, ice-like sensations, and brief swelling.

  1. Do consult Dr. Google on procedure-specific recovery. Don’t assume one for all.

Surgical techniques provide faster and more dramatic transformation. They present increased short-term danger, extended recuperation, and potential bruising or seroma. Nonsurgical procedures have less risk, less pain, and shorter recovery. They usually require several treatments and produce more nuanced effects.

Procedure-specific do’s and don’ts checklist: Wear compression. Rest for weeks. Avoid strenuous activity for a minimum of two weeks. Expect swelling and soreness. Use gentle massage when cleared. Follow wound care. Plan for up to six months for full results.

The Mental Game

Recovery from male body sculpting isn’t just about healing tissue and regaining strength. The mind has to catch up as well. Mental recovery influences pain tolerance, rehab compliance, and even long-term body image. This section provides actionable advice and examples to monitor your mood, cultivate confidence, and handle stress as you recover.

Checklist to monitor mental health and emotional well-being

Spot changes early with a brief daily checklist. Items include sleep quality (hours, restfulness), mood rating (1 to 10), pain level at rest and with movement, appetite, motivation to do rehab, social contact (minutes), and any intrusive or negative thoughts.

Supplement with a weekly entry for progress toward goals and a note if you had any setbacks. For example, note if you skipped therapy exercises two days in a row and list reasons. Whenever possible, share this checklist with a clinician or trusted friend so trends are apparent.

Frequent check-ins with support people allow athletes to talk through progress, roadblocks, and goals, and this facilitates mental recovery.

Practice positive self-talk and celebrate small milestones

Swap in clean, blunt lines to stop the damaging self-talk. Instead of ‘I’ll never look the same,’ say ‘My body is healing, I’ve made small gains.’ Use present-tense, little phrases you can repeat before rehab or daily tasks.

Celebrate small wins: one more set of exercises, reduced swelling, or improved range of motion. Note these down on a calendar or in your checklist. Morning visualization can be useful: spend five minutes picturing a specific success, like completing a workout with good form.

Positive self-talk and visualization combine to accelerate confidence building.

Set realistic expectations for body image changes

Figure out what to expect and when. Swelling, bruising, and temporary shape shifts are expected for weeks to months. An athlete’s mind can lag far behind their body in recovery from a sports injury and body-sculpting results, too.

Get common timelines from your surgeon or therapist and record them. Interval photos help you track slow change instead of remembering. If it seems like it’s taking forever, you’re not alone. Measure, don’t mirror at a badly lit moment.

Engage in stress-reducing activities like meditation or hobbies

Easy rituals reduce strain and boost concentration. Experiment with five to ten minutes of guided breathing, a brief mindfulness practice, or some light stretching every morning.

Activities like reading, nature walks, or the arts refocus distress from return-to-sport or appearance worry. Post-injury anxiety plagues up to 75% of athletes after major injury. Stress management kills that fear.

A holistic strategy combining physical rehab with sports psychology methods yields better results and accelerates the mind’s recovery to keep pace with the body.

Warning Signs

Male body sculpting recovery typically progresses as expected. Some symptoms demand immediate action. Be on the lookout for any changes in shape, skin, sensation, or overall health that deviate from anticipated healing. Acting early can avoid complications and increase long-term outcomes.

Document sudden changes in swelling, color, or sensation. Take photographs at regular intervals under similar lighting and note the date, time, and activity level when each photo was taken. Mark differences in contour, new areas of bruising, or changes in skin tone. This record helps your surgeon judge progression and decide whether to intervene.

If you see signs of infection or blood clots, act fast. A temperature over 38, spreading redness, foul odour drainage, warmth at the incision, or sudden increasing pain are all infection warnings. Blood clots can appear as limb swelling and pain or chest pain or shortness of breath. Go to emergency care for clot symptoms. For suspected infection, call your surgical team right away. Early antibiotics and wound care decrease the chance of deeper issues.

Lumps and bumps, uneven contours and asymmetry may be signs of uneven fat removal or surgical technique. Lumps that do not soften after a few weeks or contour lines that remain sharp might require revision or targeted massage and ultrasound therapy. Loose and sagging skin could develop if too much tissue was taken out or if the skin was not tightened.

Non-surgical skin tightening can occasionally assist, however surgical revision is often necessary for advanced sagging. Persistent pain and numbness can indicate nerve impingement. Anticipate some numbness and soreness for weeks, but intense or increasing pain, burning, or persistent loss of sensation needs to be evaluated.

Timely neurology or surgical consultation can diagnose reversible causes and coordinate nerve-directed treatment. Severe seroma is a pocket of fluid under the skin that doesn’t go away or gets bigger. Minor seromas are common and may resolve, but large or recurrent seromas typically require drainage in clinic to minimize infection risk and discomfort.

Skin infection or necrosis is rare but serious. Watch out for darkened, non-blanching patches, increasing pain, or tissue breakdown. Prompt evaluation is important to save tissue and prevent systemic infection.

Table of red flags and actions to take:

  • Red flag: Fever greater than 38°C, spreading redness, foul discharge. Action: Contact surgeon, start antibiotics as prescribed, seek emergency care if systemic signs occur.
  • Red flag: Sudden leg swelling, chest pain, shortness of breath. Action: Seek emergency services for possible clot.
  • Red flag: Rapid increase in swelling or hard, tense fluid pocket. Action: Clinic drainage of seroma and follow-up.
  • Red flag: Persistent lumps, uneven contour, asymmetry. Action: Document with photos and schedule surgical review for massage, imaging, or revision.
  • Red flag: Darkening skin, increasing pain, tissue breakdown. Action: Urgent surgical review for infection or necrosis.

Conclusion

Recovery after male body sculpting takes its own course. Anticipate a gradual decrease in swelling and soreness for weeks. Follow precise care instructions, get sufficient rest, and consume nutritious meals to facilitate tissue recovery. Employ light walks and a gradual return to exercise to maintain blood flow and strength. Be alert for fever, excessive bleeding, or acute pain. Get assistance quickly if any arise. Mental strain and sleep shifts are par for the course. Chat with a coach or pal and maintain little goals. For surgery types such as lipo or ab work, adhere to whatever pace your provider has set. Choose the route that suits your lifestyle and wellness. If you want a personalized recovery plan, request one from your clinic or hit me up for a checklist.

Frequently Asked Questions

How long does recovery from male body sculpting usually take?

Recovery is different for each procedure. Most patients experience significant improvement at one to three weeks and almost full recovery at four to eight weeks. More invasive surgeries may require months to achieve final results.

Will I need pain medication after body sculpting?

Yes, short-term pain relief is common. Doctors usually prescribe or suggest over-the-counter pain medications for the initial few days. Follow their directions to stay out of trouble.

When can I return to work and exercise?

Light work can usually restart within a few days to two weeks. Refrain from intense exercise and heavy lifting for four to eight weeks, based on the procedure and your surgeon’s recommendation.

What lifestyle changes help speed recovery?

Maintain a balanced, protein-rich diet, stay hydrated, rest, and avoid smoking and alcohol. Adhere to wound care and compression garment guidelines to minimize swelling and aid recovery.

How do I manage swelling and bruising after the procedure?

Follow your surgeon’s recommendations for compression garments, apply cold packs in the early days, and elevate the treated area whenever you can. Swelling and bruising typically resolve within 1 to 6 weeks.

Are scars permanent after male body sculpting?

Scars develop and generally fade within 6–12 months. Surgeons place incisions strategically to minimize visibility. Adhere to scar-care instructions to optimize the long-term appearance of the scar.

What warning signs require immediate medical attention?

Get assistance if you have heavy bleeding, severe pain that is not controlled by your medication, a fever above 38°C, spreading redness or pus, or sudden shortness of breath. These can be a sign of complications.

When Can I Return to Exercise After a Body Sculpting Treatment?

Key Takeaways

  • Respect a phased recovery timeline and gradually reintroduce exercise to preserve treated areas and facilitate optimal fat loss and healing.
  • Rest and gentle motion are crucial within the initial 48 hours. Light cardio and walking are added in week one to increase circulation without exacerbating swelling.
  • Between weeks two and four, gradually add in low-impact cardio and light strength work, using pain, swelling, and tenderness as your guide.
  • Postpone high-impact activities, heavy lifting, and any exercises that put direct pressure on treated areas until you are fully healed to prevent complications and lumpy results.
  • Mix up consistent cardio work and strength training, stay hydrated, and eat a protein-rich diet to maximize and maintain body-sculpting results.
  • Pay attention to your body, halt for sharp or intensifying pain, monitor symptoms and healing with photos or measurements, and reach out to your provider if your recovery veers off its typical course.

Exercise after body sculpting is getting back to working out safely after cosmetic fat-reduction or contouring treatments. Depending on the procedure, recovery timelines vary with mild activities such as walking being permitted within days and intense workouts deferred for weeks.

Incision healing, swelling, and your provider’s advice all influence this timing. Simple, progressive plans preserve results and minimize complications. Below, we discuss average timelines, signs you’re ready, and practical advice for return to exercise.

The Recovery Timeline

Recovery post body sculpting is dependent on the procedure, treated area and each individual’s healing response. The timelines below outline typical stages for CoolSculpting (noninvasive) and surgical options like liposuction and provide specific guidance on how and when to reintroduce movement to preserve results and promote recovery.

StageCoolSculpting (noninvasive)Liposuction (surgical)
0–48 hoursRest, avoid impact, expect numbness, mild swelling and tendernessRest, low movement, compression garment, moderate pain control
48–72 hoursGentle walking, cold compresses, light moisturizer for rednessShort walks, avoid heavy lifting, monitor drainage or bruising
1 weekContinue light activity; avoid gym and high-intensity exerciseGentle walking, gradual reduction in pain meds, keep compression on
2–4 weeksStart low-impact cardio (stationary bike), light strength work if no painIncrease low-impact activity, light resistance, watch for fluid retention
4–6 weeksOften cleared for normal exercise if comfortableReturn to full workouts depending on surgeon clearance
4–12 weeksResults more apparent; final contouring continuesContour evens out; swelling reduces but may persist subtly
Up to 6 monthsFinal results developFinal results develop; monitor long-term symmetry

1. The First 48 Hours

Regardless of whether it’s CoolSculpting or surgery, rest and short, gentle walks to get blood flowing and limit swelling should be your priority.

Steer clear of impact activities and anything that stresses treated areas to avoid extra inflammation. Apply cold packs for 10 to 15 minutes, multiple times a day, and gently moisturize any patches of mild redness.

This calms skin post-CoolSculpting or surgery. Be on the lookout for abnormal signs such as severe pain, spreading redness, or extensive bruising and reach out to your provider if you notice any.

2. The First Week

Resume light walking and gentle stretches to alleviate stiffness and promote circulation.

Do not hit the gym or work out hard. Intense exercise can exacerbate swelling or lead to lopsided healing. Enjoy a nutritious diet and stay hydrated.

Protein and fluids aid tissue repair. Monitor soreness, numbness, or the usual CoolSculpting tingling and adjust activity if symptoms worsen.

3. Weeks Two to Four

Slowly increase activity with low-impact cardio and light resistance if there is no pain.

Rest or decelerate with any swelling, escalating tenderness, or new bruising. Complement with mobility work such as simple yoga stretches.

Maintain a consistent schedule specific to treated regions and steer clear of intense strain on recently treated thigh or abdominal zones.

4. One Month Onward

If recovering, return to normal cardio and resistance training with provider clearance.

Tone and endurance will really show off your sculpting. Pay attention to body cues to prevent pushing too hard and creating irregular topography.

Set realistic fitness goals to keep results and confidence going long term.

5. Procedure Considerations

CoolSculpting typically permits quicker return to activity than liposuction, with sculpsure and similar options in between.

Liposuction has more swelling and inconsistent fluid retention that can persist for weeks. Individualize plans to the treated location.

Thighs may require a different pacing than upper arms. Final results can take as long as six months, with the majority of change observed between weeks four and twelve.

Enhancing Your Results

Consistent workouts supercharge fat loss and maintain your carved contours for a longer period of time. Exercise boosts metabolism, aids in calorie burn, and promotes elimination of treated fat cells. By working targeted muscles, you build new muscle mass, which makes the treated areas look firmer.

Think of combining CoolSculpting with strength sessions or even CoolTone-type treatments for an extra boost of both fat loss and muscle tone. Proper diet and hydration are critical. A calorie-controlled eating plan focused on whole foods preserves lean mass and limits regain.

Additionally, avoiding alcohol during the first week after CoolSculpting prevents inflammation that can hamper results.

Boost Circulation

Aerobic work like walking or cycling briskly enhances blood flow and accelerates healing after surgery. Light aerobic sessions 48 to 72 hours post-procedure are generally safe, but steer clear of intense cardio a few days after to let the tissues settle.

A gentle massage encourages lymphatic drainage and can reduce swelling. Do not massage or exfoliate treated areas for the first 24 hours. Alternate activity with rest. To prevent fluid accumulation, short walks, standing breaks, and gentle movement promote circulation without straining healing tissues.

Support Drainage

Yoga and focused stretching promote natural drainage and prevent fluid buildup in treated areas. A few simple chest-opening, leg-lengthening poses help lymph flow. Hold stretches lightly and avoid deep twists directly over recent treatment areas.

Elevate legs or treated areas while resting to assist lymphatic return and relieve swelling. Drink lots of water to assist in flushing cellular debris and aid the healing process. Hydration helps the body as it clears damaged fat cells. Choose soft movement instead of hard workouts while drainage is in play.

Maintain Tone

Regular strength training for your core, glutes, or arms maintains muscle tone and offsets carved-out fabrics. Utilize dumbbells or resistance bands to gently introduce load without stressing healing tissues. Low reps with good form do the trick.

Once approved by a clinician, incorporate core exercises such as planks and controlled crunches to build midline tone. Arrange workouts that combine moderate cardio and toning workouts. For example, two strength days and three aerobic sessions per week keep your composition balanced and deliver results.

Long-Term Success

Implement consistent exercise to avoid weight gain and defend results. Reconsider fitness and body composition every now and then to align with your evolving goals and tweak calorie intake or training volume.

Remaining in the vicinity of a stable weight prevents the undoing of fat loss results from surgeries. Make exercise and whole-food nutrition lifelong habits. This sustains your confidence and sculpts the most optimal long-term results.

Recommended Activities

Post body sculpting, opt for activities that reduce strain on treated areas while encouraging circulation and movement. Use your clinician’s timeline, begin with low intensity movement, and increase load gradually. Monitor sessions and symptoms to pace advancement and prevent backsliding.

  1. Secure suggestions for quick healing.
    1. Short paced walks (5–20 minutes) several times daily to prevent stiffness and promote lymph flow.
    2. Easy spinning at low resistance for 10–20 minutes once standing becomes comfortable.
    3. Elliptical, low incline, slow pace to keep impact down.
    4. Mild pool walking or mild water movement once incision sites or skin are completely healed.
    5. Seated leg lifts, ankle pumps, and shoulder circles to stimulate circulation without exerting treated tissue.
    6. Fundamental mobility drills and posture to avoid compensation.

All these choices seek to reduce direct tension on healing tissues and maintain a low total effort load throughout while facilitating recovery. Begin brief and unhurried, then increase duration as ease permits.

Gentle Cardio

Brisk walking is the easiest option and frequently safe the very same day if you’re feeling up to it. Most patients wait 48 to 72 hours for convenience. Keep initial sessions to just short walks – no hills, no rushing.

Elliptical and stationary cycling provide low-impact substitutes. Keep resistance low and workouts under 20 minutes initially. Don’t do hard cardio the morning of a CoolSculpting session. Light cardio elevates metabolism and aids persistent fat loss, but steer clear of high heart-rate sprints until you have more explicit approval from your physician.

Light Strength

Start with body-weight moves exclusively. Squats to a chair, wall push-ups and glute bridges strengthen without heavy load. Stay away from barbells and weight machines until you’re fully healed.

Many surgeons recommend that you wait as long as three months before you really hit the weights again. Use high repetitions and low resistance to work endurance and tone. Alternate muscle groups — upper one day, lower the next — to distribute strain. Use sets and perceived exertion to inform slow increases.

Flexibility Work

Daily stretching maintains range of motion and reduces the risk of stiffness. Target light stretches and yoga postures that don’t put direct pressure on treated tissue, such as supine hamstring stretches, cat-cow, and seated side bends.

Brief stints, five to fifteen minutes, are usually sufficient early on. Incorporating this work into your routine can reduce soreness, facilitate recovery, and enhance posture and movement quality in general. Drink plenty of water during and after sessions to keep your tissues happy and hydrated.

Exercises to Pause

Following body sculpting, transient alterations in the treated tissues and the body’s elimination of impaired fat cells necessitate attention. Skip exercises to prevent the risk of bleeding, swelling, or result disturbance. Light activity like easy walking is recommended within 24 hours to increase circulation and lymphatic drainage, but very vigorous exercise should be avoided for several days.

Keep an eye on redness, swelling, tingling, and any pain. Cease activity that aggravates these symptoms and adhere to your provider’s guidelines for return to more intense labor.

High-Impact Movement

No jogging, plyometrics, or other repeat impact activities that load healing tissues. Running, jumping, or box jumps induce shear and compressive forces that can exacerbate swelling and pain and can disrupt fat-cell extraction. Delay athletics or group fitness classes with a lot of sudden starts, stops, twists, or contact — think basketball, soccer, CrossFit-style metcons and jump-laden dance classes.

Substitute low-impact options while you recover: stationary cycling at an easy pace, swimming once cleared by your clinician, and elliptical machines set to low resistance. These options save your heart without the impact. Watch swimming if you’re dealing with skin irritation and hold off until redness or broken skin clears.

High-impact movement too early risks injury and can interfere with the local inflammatory process the treatment depends on, potentially leading to patchy results. Resist the temptation to do more, except for light walking and gentle stretching if you’re up to it. Don’t push through discomfort in that first 24 to 48 hours.

Heavy Lifting

No heavy weight lifting or intense core work that pulls on abdominal or treated muscles. Deadlifts, heavy squats, and barbell hip thrusts create intra-abdominal pressure and local strain. Wait until tenderness and swelling have resolved before returning to these loads.

Begin with lighter strength training, such as bands, light dumbbells, or bodyweight exercises, to keep muscles toned and your blood pumping without overwhelming your tissues. Slowly add weight and volume over weeks, not days, monitoring for the reappearance of pain or swelling.

If any lifting causes acute pain, cease and seek your provider. A staged return helps avoid herniation, strain, or healing setback.

Direct Pressure

Steer clear of exercises that put direct pressure on treated areas, like crunches following abdominal sculpting or prone hip presses following flank work. Compression by bodyweight on a sensitive spot can inhibit recovery and lead to asymmetrical outcomes.

Modify positions: perform standing core work or supine bridges with careful padding. Use supportive mats or cushions during floor-based moves. Wait 24 hours to massage the area and don’t exfoliate the skin for 24 hours after treatment.

Use additional cushioning and change position to eliminate pressure points. Be sure to stay well hydrated to aid in lymphatic destruction of damaged fat cells and follow your post care instructions to a ‘T’.

Your Body’s Signals

Your body will provide obvious, actionable signals during recuperation. Listen to your body and note any sensations or changes from one day to the next in order to align exercise intensity with healing. Use straightforward logs, photos, or apps to record pain, swelling, bruising, energy level, dizziness, shortness of breath, and sleep quality.

These data points guide you to either rest, step down, or push activity forward and make discussions with your clinician more productive.

Pain vs. Discomfort

  • Checklist to tell pain from discomfort:
    • Sharp, shooting, or burning pain in treated areas — probably damaging and must cease.
    • Deep, aching soreness that responds to rest — typically normal following a procedure.
    • Pain that rouses you or intensifies over hours — red flag to get treatment.
    • Localized numbness with tingling beyond expected timelines — notify clinician.
    • Pain that radiates or is associated with fever — immediate work-up indicated.

Discontinue any activity that triggers acute, lingering, or increasing pain in treated regions. Use a simple 0 to 10 pain scale: 0 means no pain, 1 to 3 is mild, 4 to 6 is moderate, and 7 to 10 is severe. Activity is acceptable when pain is 3 or less and does not increase with movement.

If pain reaches a 4 or above, take a break and reach out to your care team if it remains above 4 after rest or medication. Mild soreness should be anticipated as muscles and tissue get accustomed. Anticipate this soreness to be like post-foreign workout soreness but localized and fading within a few days.

Severe pain is not normal and means you need to stop and get checked.

Swelling and Bruising

Pay close attention to swelling and bruising as you become active again. Pay attention to size, color transitions, and if one area is hotter or harder than another. Light movements and low-impact workouts keep the blood flowing without taxing the tissues.

Please don’t take hot baths or saunas in early recovery because heat can exacerbate swelling. Record any increase in swelling or new bruising. Take pictures at the same time each day, tape measurements if helpful and note symptoms.

If swelling subsides over weeks, that generally indicates healing is on track. If swelling or bruising is spreading, increasing in pain, or is accompanied by fever, see a doctor.

When to Stop

Stop exercising if you experience severe pain, new skin changes, or abnormal symptoms. Red flags are sudden increased tenderness, spreading redness, raised warmth, dizziness, nausea, or shortness of breath. Defer workouts and rest, then re-evaluate after 24 to 48 hours.

If symptoms persist or worsen, see your surgeon or physician. Listen to your body and focus on healing rather than a rapid comeback. Each recovery is different and can last for months.

Too soon can cause additional swelling and pain or a setback. Slow, incremental activity escalations, informed by your body’s signals and professional guidance, promote strength and sustainability.

The Mind-Body Connection

Body sculpting changes shape, and the real payoff is when mental focus and body awareness are elements of recuperation and maintenance. Your mental state really does influence movement quality, pain perception, and exercise compliance. Studies indicate more than 80% of individuals experience improved body-image satisfaction post-contouring, and around 70% report increased confidence within half a year.

As many as 30% may experience regret or anxiety, and some report an emotional disconnect with their mind lagging behind their new body. This intricacy implies post-sculpting mental care is equally as essential as physical care.

Mindful Movement

Try slow, careful movements to develop awareness and reduce injury. Slow squats, controlled hip bridges and deliberate shoulder rolls allowed you to feel where tissue felt tight or tender. Concentrate on calm breaths and an erect posture.

Breathing activates the deep stabilizer muscles and eases soft tissues to be gently massaged during exercise.

Via The Mind-Body Connection, employ mindfulness to identify boundaries early. If pain acuity or one side feels different, pause and reevaluate. A guided meditation or brief relaxation session post a light workout can reduce stress hormones that impede healing.

Incorporate a five- to ten-minute guided body scan or breathwork session to cooldowns. This supports recovery and helps avoid burnout without sacrificing gains.

Nutritional Synergy

Good nutrition and movement heal tissue and expose muscle tone. A sufficient protein and micronutrient diet facilitates swift repair and preserves lean mass while losing fat. The mind–body connection matches your calories to your activity level.

Too little can blunt your recovery. Too much processed food can limit your definition. Stay away from excess sugar and refined carbs during recovery. They encourage inflammation and fluid retention.

Try to have meals at regular intervals that sustain even energy levels and maintain a healthy weight.

Key nutritional components that support tissue repair and muscle definition include:

  • Lean protein, such as fish, poultry, and legumes, helps repair muscle and connective tissue.
  • Vitamin C-rich fruits and vegetables for collagen synthesis.
  • Zinc and iron for immune support and tissue healing.
  • Omega-3 fatty acids to reduce inflammation.
  • Adequate hydration to support lymphatic drainage and skin quality.

Patience and Perspective

Results emerge over weeks and months, and dramatic transformation is seldom immediate. Celebrate wins big or small — more mobility, tighter muscle tone, better sleep. These markers not only help sustain motivation but are connected to enhanced mental health following surgery.

Studies demonstrate that as many as 80% experience a decrease in depression within six months. Have reasonable expectations for the rate of fat loss and muscle gain.

These long-term habits, mindful eating, movement, and sleep, matter more than quick fixes. Emotional support matters as well; counseling or peer groups are essential if obsession or anxiety sets in.

Others experience improved day-to-day functioning and reduced anxiety, with studies observing up to a 40 percent increase in performance reviews by their employers.

Conclusion

Body sculpting recovery progresses in defined stages. Rest first, then exercise. Little walks stimulate blood circulation and reduce edema. Gradual strength work helps keep tone without stress. Light stretches loosen hard places and accelerate recovery. Avoid heavy lifts, intense cardio and deep core drills until your squad gives you the green light. Keep an eye out for increasing pain, fever, or strange discharge and contact a professional if you encounter them.

Example: a 30-minute slow walk on day seven, light resistance bands by week three, and a 20-minute low-impact bike ride in week six. These moves keep you moving and shield your results. For a plan tailor-made to your life, consult your surgeon or therapist and begin gently.

Frequently Asked Questions

How soon can I start light exercise after body sculpting?

Most providers permit light walking and gentle movements within 24–48 hours. Regardless, listen to your surgeon’s directions. Walking decreases swelling and blood clot risk.

When can I resume cardio and higher-intensity workouts?

Wait at least 2 to 4 weeks for low-impact cardio and 4 to 6 weeks for high-intensity or impact workouts, based on your procedure and healing. Obtain written clearance from your provider.

Are there exercises I should avoid during recovery?

No heavy lifting, intense core work, high-impact cardio or anything that strains treated areas until cleared. These may cause swelling, bleeding or impact results.

How will I know if I’m overdoing it?

Be on the lookout for excessive pain, swelling, bruising, drainage or lumps. If symptoms worsen or you develop a fever, suspend activity and call your provider immediately.

Can exercise improve my final results?

Yes. Gradual, sanctioned movement promotes circulation, de-puffs, and preserves contour. Pair with scar care, compression garments, and follow-up visits for optimal results.

Do compression garments affect exercise choices?

Compression heals but can hinder some activity. Wear as directed when active. Modulate the intensity so you remain comfortable, not so tight that you cause pain or numbness.

When should I contact my provider about exercise-related concerns?

Call your provider for sudden increased pain, bleeding, fever, persistent numbness or changes in treated areas following exercise. Prompt follow-up catches issues and guards outcomes.

Lower Back Sculpting After Tirzepatide Body Contouring Guidance

Key Takeaways

  • Tirzepatide encourages significant fat loss and appetite suppression that can eliminate lower back fat. Everyone’s regional fat loss patterns differ based on genetics and starting body composition.
  • Pair tirzepatide with resistance training and sufficient protein to maintain muscle mass for a more sculpted lower back appearance.
  • Rapid weight loss can result in lower back skin laxity. Think about noninvasive tightening, surgery, or consistent skincare and hydration as you evaluate next steps.
  • Recommend waiting until weight has been stable for at least six months and be sure to complete a thorough medical evaluation before scheduling body-contouring procedures to reduce complications and improve outcomes.
  • Mentally and practically prepare by setting expectations, recording your weight and medication history, and planning for post-procedure recovery and long-term maintenance.
  • Trade off benefits and risks by exploring procedure options, anticipated recovery, and possible complications with experienced providers to select the safest and most effective sculpting strategy for your circumstances.

Lower back sculpting after tirzepatide means strategic fat reduction and muscle definition in the lower back region post-tirzepatide use. Patients notice less fat and enhanced contour as pounds fall away.

While targeted resistance work and progressive overload develop spinal erector and oblique power, ongoing nutrition with sufficient protein sustains lean mass.

They include workouts, exercise plans, and best recovery tips for safe, sculpted, measurable shaping results.

Tirzepatide’s Impact

Tirzepatide is a dual GLP-1/GIP-1 agonist that drives large weight loss and shifts body composition by specifically lowering fat mass. Clinical data show weight losses closing in on 25% of baseline body mass at 18 months. In a phase 3 trial at Week 72, pooled doses produced a mean fat-mass change of −33.9% versus −8.2% with placebo, with an estimated treatment difference of −25.7% (95% CI: −31.4, −20.0; p < 0.001).

These changes directly influence how lower back and flank fat behave during therapy.

1. Fat Mobilization

GLP-1 receptor agonists like tirzepatide promote fat mobilization by lowering insulin spikes and improving insulin sensitivity, which reduces the drive to store fat. Visceral adipose tissue shows a strong response in many trials. Subcutaneous fat, including lower-back deposits, shrinks but at variable rates across individuals.

Fat-cell size decreases and some adipocytes undergo death or reduced lipid storage, which lowers overall volume and can refine contours. Increased resting metabolism and better glucose handling help sustain fat loss. For example, patients with baseline insulin resistance often lose visceral fat faster.

Genetics, sex, and starting body mass affect regional patterns, so some people see dramatic lower-back changes while others lose more centrally or at the thighs.

2. Muscle Sparing

Tirzepatide does result in some lean-mass loss. Relatively speaking, most of the weight lost is fat. Trials report mean lean-mass change of negative 10.9 percent with tirzepatide versus negative 2.6 percent with placebo, with an estimated treatment difference of negative 8.3 percent and a p-value of less than 0.001.

About 75 percent of total weight loss is fat and 25 percent is lean tissue. Medication combined with resistance exercise is the magic combination to maintain muscle tone and contour the lower back. Progressive weighted training and sufficient protein consumption minimize lean loss.

Monitor changes with DEXA or bioimpedance to inform titration. Preserved muscle helps you look more toned once the weight comes off.

3. Skin Laxity

Rapid or significant weight loss can result in loose skin, particularly across the lower back where skin is stretched over the flanks. Risk increases with higher weight loss, older age, longer obesity duration, and reduced skin elasticity.

Light sag can sometimes be addressed with firming treatments, radio frequency, or targeted strength exercises. Intense surplus typically requires surgical elimination. Hydration, protein, and topical care support elastin production yet won’t help significantly with large folds.

4. Hormonal Influence

Tirzepatide affects insulin secretion and glucagon inhibition through GLP-1 and GIP, normalizing blood sugar and reducing hunger. These hormonal changes suppress appetite and decrease proinflammatory adipokines, enhancing lipid metabolism and metabolic health.

Improved hormonal support leads to long-term maintenance and less lower-back fat reaccumulation when lifestyle measures persist.

5. Regional Fat

Tirzepatide’s regional fat loss can mirror surgical weight-loss patterns, even in the high reduction tertiles, and compares with bariatric surgery outcomes. Love handles may still stick around and require targeted exercise, localized treatments, or body-contouring procedures.

Enumerating common residual sites, such as the lower back, suprailiac rolls, and inner thighs, assists in mapping out follow-up sculpting tactics.

Sculpting Avenues

Lower back sculpting options post tirzepatide range from lifestyle modification to noninvasive devices to surgery. Selection is based on objectives, timeline, skin texture, and acceptable downtime. Below are concrete avenues, their advantages and constraints, and advice on mixing approaches for consistent, persistent shape shifts.

Exercise

Resistance work and core training are the main drivers of back contour post-weight loss. Concentrate on upper-body weightlifting such as rows, deadlifts, and lat pulldowns. Targeted posterior chain moves like Romanian deadlifts and back extensions sculpt muscle below loose skin.

Include some anti-rotation core work such as the pallof press and bird dogs to enhance posture and tightness while minimizing flab. Consistency involves three to four sessions each week that combine strength and mobility.

For those stubborn fat zones, mix heavy lifts with high-intensity interval training twice a week to boost total energy expenditure. Monitor progress with photos, girth measurements in centimeters, and strength records. Tiny weekly victories foreshadow long-term contour.

Post-weight-loss patients typically shed about 60 percent fat and 40 percent lean mass, so safeguard muscle with training and eating enough protein. Straighten up with everyday reminders — chin in, blades back — so your progress pops in profile.

Nutrition

A clean diet maintains fat loss and muscle retention. Aim instead for a reduced 500 kcal per day deficit combined with increased activity to bias fat loss while minimizing lean mass loss. Prioritize 1.4 to 2.0 grams of protein per kilogram of body weight for lifters, fiber-rich veggies, whole grains, and good fats like olive oil and nuts.

Hydration and micronutrients, such as vitamin C, zinc, and collagen-supporting nutrients, assist skin elasticity and wound healing post-procedure. Apply the same portion control and food log tactics to identify where cravings and target drift are sneaking in.

Simple daily records can expose patterns quickly. Give yourself a few weeks to months of consistent changes as your body composition adjusts.

Procedures

Noninvasive options: Emsculpt Neo (muscle stimulation and fat heating) and CoolSculpting cryolipolysis both reduce fat and can add tone without surgery. Benefits include low downtime and lower risk. Limits are modest fat loss per session and variable results by age and skin laxity.

Surgical options: Liposuction removes fat directly. Body lifts or skin excisions remove loose skin following massive weight loss. When sculpting avenues for women, extended abdominoplasty and flank skin removal address those dreaded lower back folds.

Surgeries require anesthesia, extended recovery of weeks, and risk of infection, contour asymmetry, and seroma.

Checklist — Pros and Cons:

  • Liposuction: immediate volume loss, limited skin tightening.
  • Body lift: best for excess skin, longer scars.
  • Emsculpt Neo: builds muscle, no incision, incremental change.
  • CoolSculpting: noninvasive fat reduction, needs multiple sessions.

Combine methods: diet, exercise, and targeted procedures give the best lasting contour. Results depend on age, sex, and starting composition. Visceral fat can fall markedly, sometimes by about 40 percent with treatment.

Ideal Candidacy

Lower back sculpting after tirzepatide is optimal when weight and metabolic status are stable and overall health permits elective surgery. This quick context illuminates why timing, medical review, and realistic expectations are important prior to any contouring treatment.

Weight Stability

We do not want you losing weight for six months after discontinuing or on a maintenance dose of tirzepatide. Significant quick weight loss or continuing swings alters fat placement and can reverse surgical sculpting. Even minor movement shifts tension on incisions and can exacerbate scar or contour issues.

Follow weight trends week to week and plot them over months to validate a plateau. Record milestones like three and six month stable points, which help the surgeon time the procedure and justify proceeding. For instance, a patient that shed 20 kg and has maintained plus or minus 2 kg for 6 months is a stronger candidate than someone who is still shedding 8 to 10 kg over 2 months.

Weight history matters: Tirzepatide candidates often start with a BMI of 30 kilograms per square meter or 27 kilograms per square meter with weight-related conditions. Most trial participants had an average weight of about 102.5 kilograms and a BMI close to 38 kilograms per square meter. Those who achieve a stable, lower weight post-therapy are prime surgical candidates.

Medical Evaluation

A full medical checkup should come before any sculpting. Measure metabolic health, fasting glucose or HbA1c, lipid panel and blood pressure. Uncontrolled diabetes, poorly managed hypertension or persistent significant gastrointestinal side effects from GLP-1-based drugs can be contraindications.

Pay special attention to medications — drugs that alter clotting, immune response or wound healing alter perioperative risk. Previous bariatric surgery changes your anatomy and absorption so be sure to record previous procedures and your nutritional condition. Compile preoperative tests: CBC, CMP, coagulation studies, HbA1c and, when indicated, ECG. Present this list to the provider to circumvent eleventh hour procrastination.

Realistic Goals

Establish realistic goals that align with skin quality, fat distribution, and muscle tone. Liposculpting defines form and eliminates fatty deposits, but it cannot completely undo deeply stretched skin or advanced cellulite. Those with good skin elasticity and concentrated fat pockets in the lower back observe the most reliable result.

Set expectations by showing photos of comparable body types and talking about what’s realistic — how much we can take in the waist, how tight we can pull the skin, etc. Use a simple goal worksheet: current measurements, target changes, non-negotiables, and recovery priorities. This makes it clear if we need a sequence of minor surgeries or an integrated approach.

Checklist for Ideal Candidates

  • Stable weight for ≥6 months with documented milestones.
  • BMI and medical workup are consistent with previous tirzepatide use and indicate safe surgical risk.
  • Controlled metabolic markers and cleared pre-op tests.
  • No active contraindicating conditions or unstable meds.
  • Reasonable skin elasticity and realistic cosmetic goals.
  • Understanding consent regarding recovery and possible staged procedures.

Procedural Timing

Show lower back sculpting after tirzepatide timing due to tissue reaction, skin laxity, and metabolic plateau. Strive for a time when your weight is stable and any weight-loss medications are discontinued before surgery. Here are some working timelines and considerations to help you plan with safety and reasonable expectations.

Post-Medication

Delay procedures until all weight loss medication has been discontinued and weight stabilized. Most surgeons suggest having a stable weight for at least 6 to 12 months. This minimizes the possibility of additional weight fluctuation changing the surgery outcome. Be within approximately 22 kg (50 lbs) of your desired weight prior to a body lift or wide sculpting to optimize fit and sculpt.

Medicines ongoing can impact healing and end results. GLP-1–class drugs might modify appetite, skin laxity secondarily, and metabolic responses. Certain teams recommend stopping GLP-1 drugs about a week prior to surgery to minimize anesthesia risk. This is case-by-case and should be determined in conjunction with your prescribing clinician.

At risk for side effects or metabolic shifts post-medication. Record when you come off medicine and when your weight flattens out. Use those dates to establish a procedural timeline that fits within the 6 to 12 month stability window.

Pre-Consultation

  • Medications:
    • GLP-1 Agonists: * Ozempic: Started January 2022, Stopped June 2022 * Wegovy: Started July 2022, Ongoing
    • Supplements: * Garcinia Cambogia: Started March 2021, Stopped September 2021 * Green Tea Extract: Started October 2021, Stopped April 2022
  • Previous Surgeries:
    • Gastric Bypass: Performed March 2019
    • Lap Band: Removed January 2020
  • Chronic Conditions:
    • Type 2 Diabetes: Diagnosed September 2018
    • Hypertension: Diagnosed January 2017
  • Non-Surgical Devices:
    • Orbera Balloon: Inserted February 2020, Removed August 2020
  • Weight Loss Results:
    • Ozempic: Helped with initial weight loss, but effects diminished after stopping.
    • Wegovy: Currently seeing positive results.
    • Supplements: Minimal impact on weight loss.
    • Non-surgical devices: Provided temporary weight loss, but not sustainable.

Collect weight histories, food diaries, and workout compliance. Time photos and clinic weight charts assist surgeons in determining stability. Bring a list of specific questions: expected recovery timeline, complication rates, and likely scope of contouring.

They should be aware that certain medications and supplements must be discontinued weeks in advance of surgery to reduce bleeding risk. You’ll meet your surgeon on the day of surgery, go over procedure information, receive surgical markings and have any last questions answered.

Recovery Period

Standard downtime for lower back sculpting ranges anticipate a few days of inactivity and a few weeks until you can return to something more substantial. A body lift can take a few hours depending on coverage. Patients typically need to have a driver home and remain for 24 hours post-op.

Adhere to post-op care, which will support skin tightening and healing. Typical side effects are swelling, bruising, and temporary numbness, which tend to subside over weeks. You need these follow-up visits. Your surgeon will schedule these to monitor healing and intervene if complications arise.

Recovery checklist: Pre-op medication stops, arrange a support person, day-of surgical review and markings, expect multi-hour surgery, early wound care, activity limits, scheduled follow-ups, and clear milestones for return to routine.

The Mental Shift

With a serious physical transformation after tirzepatide — including, yes, sculpting the lower back — come psychological consequences that merit preparation and attention. Anticipate changes in self-perception, behaviors, and interpersonal reactions. Knowing about these changes makes adjustment smoother and helps you avoid backslides.

Body Image

As a lot of people experience after significant weight loss, there are mixed emotions. Loose skin or folds around the lower back can be infuriating even after significant fat loss. Others watch the scale go down but look unhappy in mirrors or photos. Toast the obvious victories—diminished pain, increased mobility, optimized lab results—but pinpoint what continues to bug you so it can be tackled.

Whether it’s to the other women or to photoshopped perfection on the internet, this almost never assists. Have reasonable expectations for aesthetic results and consult with an experienced surgeon or dermatologist about what can be achieved. Develop a brief mantra you can recite when the negativity creeps in, like “My body is healing” or “I deserve this shift.

These assist in pivoting attention from imperfection mining to consistent advancement. Studies say weight loss frequently reduces depression and anxiety for some. The connection is complicated. Others on weight loss pills experience anxiety, depression, or suicidal ideation. The FDA is investigating these reports, so track mood carefully and inform your physician of any concerning shifts.

New Habits

About that mental shift — new daily routines that sustain lasting change. Build simple, repeatable habits: 30 minutes of mixed movement most days, a protein-rich breakfast, and two check-ins per week on portions. Record weight, food, and activity to identify patterns before they turn into issues.

Support services can assist in maintaining results. Some lymphatic drainage massage or med spa treatments can help your skin look its best and recover after contouring. Behavioral aids such as habit trackers, reminders, or quick therapy sessions assist in solidifying new routines.

Anticipate backsliding and schedule small corrective actions, not everything or nothing moves. Some data connects tirzepatide to significant shifts in body composition, so observation is imperative. The mental shift is as crucial as any clinical follow-up. New coping mechanisms, such as mindful eating, stress-busting walks, and peer groups, make relapse less likely.

Long-Term Vision

Think past the process. Plan a roadmap with medical check-ins every three to six months, metabolic labs once or twice per year, and physical training to develop core and posterior chain strength to support your lower back shape. Add cosmetic touch-ups if required.

See cosmetic procedures as part of a broader strategy that involves mental care, nutrition, and movement. Research indicates that self-compassion facilitates sustainable achievement. Sprinkle self-care into your strategy. If mood sinks, grab a therapist or weight loss communities for solidarity and advice.

Risk Assessment

Lower back sculpting post-trizepatide demands a meticulous risk evaluation informed by data on rapid weight loss, body composition changes, and surgical or minimally invasive procedure risks. Rapid fat loss can alter tissue planes and skin integrity, increasing the risk for wound-healing complications.

For some perspective, big weight loss studies demonstrate that approximately 75% of the lost mass is fat and 25% is lean. A gastric bypass cohort that lost 15% or more of total body weight lost a mean of 18.4%, which is 24.6 kg, with 76% of that in fat mass. These shifts result in less subcutaneous padding over the lumbar and can place greater tension on sutures or clips post sculpting, leading to risks such as delayed healing and skin necrosis.

The risk of infection increases when the soft-tissue envelope is compromised. A lower back incision or energy-based device can allow bacteria into deeper layers if perfusion is compromised. Spots with remaining thin fat or old cellulite can exhibit sluggish circulation.

Comorbidities like diabetes, smoking, and poor nutrition inhibit immune response and delay repair. For instance, patients experiencing rapid, large-scale weight loss on tirzepatide typically require months of nutritional guidance to make sure they’re consuming sufficient protein and micronutrients to maintain lean mass and healing.

Skin laxity and stretching alters how much correction is safe. When skin has lost its elasticity after massive volume loss, basic liposuction can leave behind redundant folds of skin that require surgical excision. That adds operative time and complexity and brings increased risks of seroma and delayed wound closure.

Rapid waist reductions observed with tirzepatide, one study reported an 18.1 cm change compared to 3.4 cm with placebo, mean the lumbar contour can shift unpredictably, so staging procedures is often safer.

When considering treatment options, it is essential to compare the pros and cons of each. Noninvasive therapies have less risk of infection and necrosis but may not satisfy aesthetic goals if marked skin laxity is present. Surgical excision provides a predictable shape but comes with higher short-term morbidity and longer recovery.

Patient selection matters: prior weight history, current body composition data, and medical status inform timing and modality choice. Clinical trials with weekly tirzepatide dosing, for example, applied strict eligibility and lifestyle support for safety, and similar rigor helps in practice.

Potential RisksLikelihood (context dependent)Expected Benefit
InfectionModerate with poor perfusion/comorbiditiesImproved contour if controlled
Delayed healingModerate–high after rapid weight lossLong-term shape with staged care
Skin necrosisLow–moderate with thin tissue or tensionPossible with aggressive excision
Seroma/hematomaModerate with extensive dissectionResolvable with drainage/management
Unsatisfactory contourModerate if skin laxity presentCan be minimized with proper planning

Conclusion

Lower back sculpting after tirzepatide can help contour stubborn areas that are slow to respond to weight loss. Tirzepatide reduces fat and manages insulin levels. Sculpting techniques including liposuction, ultrasound fat melt, and fat grafting respond beautifully after weight has plateaued for a minimum of 3 months. Good candidates demonstrate consistent weight, consistent health, and consistent goals. Expect swelling, healing time, and ongoing follow-up to maintain results. Mind preparation is as important as the body. Real results come from a consistent strategy, transparent schedule, and decisions that suit individual requirements.

Need a customized plan? Schedule a consultation with a board-certified clinician who understands tirzepatide results and local sculpting possibilities.

Frequently Asked Questions

Will tirzepatide reduce fat in my lower back (love handles)?

Tirzepatide promotes overall weight loss, which can reduce lower back fat for many people. Spot reduction is not guaranteed. Individual fat loss patterns vary by genetics, sex, and starting body composition.

How long should I wait after stopping tirzepatide before body contouring procedures?

Wait at least 3 months post-trizepatide and once weight is stabilized. This assists the surgeons in planning accurately and reduces the risks of complications. Confirm timing with your surgeon and prescribing provider.

Can I have liposuction while still taking tirzepatide?

Most surgeons will have you stop weight-loss medications and be at a stable weight before lipo. This reduces the risk of wound healing complications and irregular outcomes. Consult medication plans with your surgeon and prescriber.

What non-surgical options help sculpt the lower back after tirzepatide?

Non-surgical options include cryolipolysis, radiofrequency, ultrasound fat reduction, and targeted strength training. These can hone contours when weight loss plateaus and produce more subtle results than surgery.

Who is an ideal candidate for lower back sculpting after tirzepatide?

The best candidates have hit a plateau, are near their goal weight, have realistic expectations, are in good overall health, and have no uncontrolled medical conditions. Consultation with our board-certified plastic surgeon will determine candidacy.

Are there special risks for surgery after tirzepatide use?

Risks mirror standard surgical risks: infection, bleeding, and contour irregularities. Weight-loss medications can impact metabolism or healing, so a comprehensive medical evaluation is required to customize risk evaluation.

Will results last if I restart tirzepatide after a sculpting procedure?

Can be durable if weight is stable. Restarting tirzepatide can alter body fat distribution and impact the surgical result. Schedule any medication changes with your surgeon to set expectations.

How To Sculpt And Slim Your Thighs Without Surgery

Key Takeaways

  • Thigh sculpting without surgery is possible with regular strength training that focuses on the quads, hamstrings, glutes, and inner thighs using squats, lunges, deadlifts, and resistance-band exercises. Target two to four times per week and use progressive overload to notice a difference.
  • Pairing resistance training with consistent cardiovascular activity and a calorie deficit will help you lose body fat and sculpt muscle definition. Just track your metrics, like kilometres walked or minutes of cardio per week. Go for whole foods, sufficient protein, and slow calorie adjustments for long term success.
  • Adding in some mobility and flexibility work reduces injury risk and makes your movements feel better as well. Think dynamic warm ups before workouts and static stretching or foam rolling afterwards. Good recovery habits such as getting sleep and staying hydrated aid your muscles in repairing and performing.
  • With a bit of home equipment – resistance bands, adjustable dumbbells, a stable bench – you can get killer, scalable workouts that fit most budgets and spaces. Select exercises with increasing resistance and keep the routine fresh with new workouts to stay motivated and keep adapting.
  • Measure progress using unbiased metrics such as centimeter measurements of circumference, strength improvements in repetitions or load, and same condition photos to compare developments over time. Modify training, nutrition, or recovery according to these measurements every four to eight weeks.
  • A good fitness professional or physiotherapist should be consulted when in pain, with pre-existing conditions, or with complicated goals. They can consider tailored plans for pregnancy, older adults, or rehab whenever applicable for safe and effective results.

===

Thigh sculpting without surgery refers to a collection of non-invasive and minimally invasive techniques to trim fat and sculpt muscles in the inner and outer thighs.

They range from specific sculpting strength training and mindful caloric management to cryolipolysis, radiofrequency, and targeted massage or lymphatic work.

Results differ by initial body type, compliance, and treatment selection, with most experiencing a slow transformation over weeks to months.

The body discusses how, when, and what to expect.

Conclusion

Thigh sculpting without surgery is most effective with deliberate strides and concrete objectives. Pair targeted workouts, such as narrow-stance squats and side-lying leg lifts, with consistent cardio like power walking or biking. Incorporate strength work two to three times a week and consume protein-packed meals and whole foods to fuel lean muscle. Track progress with simple measures: tape at the mid-thigh, photos, and short fitness tests. Think slow, steady transformation over weeks, not rapid results.

An example plan: 30 minutes of cardio five days a week, two strength sessions, and a 20 g protein boost after each workout. Do that for eight weeks and observe the way clothes drape and your legs feel. Let’s get started! Select a habit from above and test it this week.

Frequently Asked Questions

What is thigh sculpting without surgery and does it work?

Thigh sculpting without surgery combines diet, targeted exercise, and noninvasive treatments such as radiofrequency, cryolipolysis, or laser to reduce fat and tone muscle. Results may vary. It can enhance contour but will not deliver the dramatic impact surgery can.

Which exercises best sculpt the thighs?

Focus on compound and targeted moves: squats, lunges, deadlifts, step-ups, and leg presses. Incorporate hamstring curls and inner-thigh adductor exercises. What really matters for visible changes is consistency and progressive resistance.

How long until I see results from non-surgical methods?

With reasonable workout and diet, plan on six to twelve weeks for muscle definition and minimal fat reduction. Noninvasive procedures can yield results within four to twelve weeks, frequently following several treatments. Individual factors influence timing.

Can diet alone reduce thigh fat?

A calorie-controlled, protein-rich diet supports the loss of body fat, including slimming of the thighs. Spot reduction is a myth. Pair diet with strength training for optimal thigh sculpting.

Are noninvasive treatments safe?

Generally, most noninvasive treatments are low-risk in experienced hands. Side effects may include swelling, bruising, or temporary numbness. Book a free consultation with one of the licensed clinicians to discuss risks and suitability.

How often should I train my thighs for the best results?

Work your thighs two to four times a week with a combination of strength and cardio. Give yourself 48 hours to recover from heavy sessions. Mix up intensity and exercises to circumvent plateaus.

Who is a good candidate for non-surgical thigh sculpting?

Optimal candidates are typically healthy adults with reasonable expectations and have mild-to-moderate fat or laxity. Those with dramatic excess skin or obesity may require surgery. Seek a consultation from an expert in medicine or fitness.

Back Fat Removal After Semaglutide: Body Contouring Options and Recovery

Key Takeaways

  • Semaglutide induces weight loss through appetite suppression and delayed gastric emptying. Rapid fat loss can result in loose skin and persistent fat deposits like back fat that won’t go away on their own.
  • Surgical options including liposuction, bra-line lift, and lower body lift effectively remove residual adiposity and redundant skin. These should be selected based on skin quality, degree of excess tissue, and individual goals.
  • Non-surgical treatments like ultrasound tightening or BodyTite can address mild skin laxity and minor fat pockets, but they provide more nuanced results and are not as effective for major excess skin.
  • Good candidacy means stable weight, weight-loss history, skin elasticity, fat distribution, and muscle condition to help us decide which procedure is best.
  • Recovery includes wound care, follow-up appointments, limitations on certain activities, and prioritizing nutrition and hydration to minimize swelling, bruises, and complications. It is important to maintain realistic expectations about the healing process.
  • Above and beyond surgical options, develop a comprehensive strategy that incorporates resistance training, nutritional counseling, and mental health guidance to sustain results and enhance body confidence after semaglutide weight loss.

Back fat removal after semaglutide describes techniques for addressing leftover fat on the upper and lower back after losing weight with semaglutide.

Popular methods involve targeted exercise, non-invasive procedures such as cryolipolysis, and surgical liposuction if required. Results depend on age, skin elasticity, and weight history.

Consultation with a clinician directs safe decisions and manageable expectations. The following parts contrast choices, recuperation, hazards, and anticipated timelines.

Semaglutide’s Mechanism

Semaglutide is a GLP-1 receptor agonist that mimics the natural hormone GLP-1. It binds GLP-1 receptors in the brain, pancreas, and gut. This receptor binding explains its main clinical effects: less hunger, slower stomach emptying, and better glucose control.

These activities all combine to reduce calorie consumption and improve metabolic indicators, which frequently results in fast and significant weight loss. Semaglutide suppresses appetite by targeting these brain centers. Patients experience increased satiety which results in smaller portion sizes and fewer food cravings, directly reducing daily calorie consumption.

Delayed gastric emptying extends satiety after meals and suppresses post-prandial glucose spikes. In the pancreas and liver, semaglutide enhances insulin sensitivity and reduces blood glucose, so it benefits both weight and metabolic health. They observe lower LDL cholesterol and triglycerides, reduced CRP, and modest blood pressure drops, all of which reduce cardiovascular risk.

Impact on body composition

  1. Loss of subcutaneous fat: Semaglutide tends to reduce subcutaneous fat across the body because overall calorie balance shifts negative. It frequently manifests in sleeker arms, legs, and trunk and can minimize the appearance of fat rolls such as back fat. For example, someone losing 10 to 15 percent of body weight may see a noticeable reduction in the soft, pinchable fat layer under the skin.
  2. Loss of visceral fat: Many patients lose visceral fat around the organs, which improves metabolic risk. These shifts can occur without dramatic changes in clothing size yet dramatically reduce diabetes and heart disease risk.
  3. Lean mass changes: Weight loss typically includes some lean tissue loss. With semaglutide, saving muscle necessitates resistance training and enough protein. A person who does strength training while on semaglutide will keep more muscle and have a firmer contour than someone who only does cardio.
  4. Fat redistribution and stubborn pockets: Fat does not reduce uniformly. Genetics and hormones conspire to make certain regions stubborn. Upper back fat, bra-line fat, and lower abdominal pads can linger despite massive general weight loss.
  5. Skin and connective tissue response: Rapid weight loss can outpace skin retraction, causing loose skin or changes in body shape. Advanced age, decreased skin elasticity, and significant weight fluctuations heighten this risk.

Semaglutide-induced rapid weight loss is metabolically desirable, but can generate cosmetic problems. Loose skin and changed contours can cause back fat to look more prominent even while fat volume decreases. Stubborn fat deposits often need targeted strategies: resistance training to build muscle under the area, localized body-contouring procedures, or surgical removal when skin excess persists.

Clinical follow-up should encompass both metabolic objectives and patients’ interest in their silhouette.

The Back Fat Paradox

Big weight loss on semaglutide might not shave fat uniformly. Fat loss can be patchy, and the back loves to hold on to tissue or become loose skin. New shapes can look uneven even after huge weight drops.

How semaglutide-driven weight loss can be uneven

Rapid losses from GLP-1 receptor agonists such as semaglutide and its ilk frequently rip fat from certain regions quicker than others. Your torso and limbs are slimming, but your upper and mid-back still have bulges or folds.

This is due to the fact that local fat stores are more hormonally sensitive or resistant and that skin stretched for years doesn’t snap right back. For example, someone who loses 15 to 25 kg may see a pronounced reduction around the abdomen but a persistent roll under the bra line or lateral back bulge.

The problem of excess skin and laxity

When the skin loses support after fat shrinks, it can sag. Skin laxity is most apparent where skin is thicker or tethered: the upper back near the shoulder blades, under the bra line, and along the posterior waist.

Sagging can conceal muscle tone underneath and produce the appearance of “back fat” even when subcutaneous fat is minimal. This can hinder one’s ability to wear certain clothes and impact body image. Non-surgical alternatives such as firming creams and resistance training can aid modestly, but real correction usually requires targeted procedures.

Role of genetics, history, and skin elasticity

Genetics dictate baseline skin collagen and elastin. Age, sun exposure, smoking, and previous weight cycles compound elasticity. Yo-yo dieters are more susceptible to redundant skin.

For example, two people lose the same weight. The older individual or the one with a long history of weight cycling may show more loose skin on the back. Clinical evaluations can gauge the laxity and determine if skin-only tightening will be effective or if surgical excision is required.

Interventions beyond diet and exercise

The Back Fat Paradox Exercise: Targeted resistance work can build scapular and latissimus muscle to smooth contours. Noninvasive treatments: Cryolipolysis and radiofrequency can reduce fat and tighten skin but carry risks.

Note: Paradoxical adipose hyperplasia (PAH) is a rare CoolSculpting side effect where the treated area grows fatter over eight to twenty-four weeks, producing a distinctive bulge that may persist six to nine months before softening. Early diagnosis helps plan corrective treatment.

Surgical choices: Liposuction with skin excision or a formal back lift gives the most predictable contour. Discuss expectations, risks, and recovery with a board-certified plastic surgeon and consider medical history.

Heart failure patients on GLP-1 drugs may gain exercise capacity, but body-mass links to mortality are complex and follow a U-shaped curve.

Surgical Contouring Options

Surgical contouring options can be used to treat lingering back fat and loose skin following semaglutide weight loss. The appropriate option is based on the amount of residual fat and excess skin, skin quality, overall health, and aesthetic goals. Below is a brief summary of surgical options treatments with subsequent elaboration on each.

  • Liposuction
  • Bra-line lift
  • Lower body lift

1. Liposuction

Liposuction is a refined body-sculpting method that eliminates resistant fat with tiny cuts and suction. HD liposuction can contour back deposits to both enhance torso proportions and define your waist and upper back. This is ideal for patients with nice skin elasticity.

If skin is loose, just removing fat can leave saggy skin. Most patients need stable weight and realistic expectations. Liposuction shapes but does not prevent future weight gain. The recovery is shorter than major skin excision procedures.

Plan a return to desk work in approximately 3 to 7 days and full activity by 3 to 4 weeks. Prices typically fall between $3,000 and $10,000 depending on regions targeted and devices applied. Compression garments are worn for 4 to 6 weeks and final contours may take 6 to 12 months as swelling resolves.

2. Bra-Line Lift

The bra-line lift surgically excises excess skin and rolls of fat in the upper and mid-back through the removal of tissue and tightening of deeper layers. Surgical contouring options smooth and tighten the contour and can reposition tissue for a natural appearance.

Scars are generally placed under the bra line, which is discreet for many patients. Think of the decision as a trade-off between visible enhancement and permanent scarring. For those with significant skin laxity, the contour benefits usually outweigh the scar.

Recovery generally includes compression and possibly drains for 1 to 2 weeks, with return to normal desk work mirroring abdominoplasty at around 2 to 3 weeks.

3. Lower Body Lift

The lower body lift addresses excess skin and fat on the back, flanks, abdomen, and outer thighs in a dramatic, all-inclusive procedure. It addresses skin laxity following massive weight loss and re-establishes an even shape, frequently integrating abdominoplasty, belt lipectomy, and thigh lift elements.

Candidates should be at or near their goal weight and stable. Revision rates after major post-weight-loss contouring are higher, typically 15 to 25 percent. These are longer surgeries with longer recovery.

Plan to take 2 to 3 weeks off work and 6 to 8 weeks before strenuous activity. Costs can exceed USD 20,000 for combinations.

4. Non-Surgical Methods

Surgical contouring options and mild laxity can be addressed with ultrasound tightening, BodyTite, and targeted skin-care regimens. They fit patients with minor fat pockets or who are postponing surgery.

Results are subtle and typically need repeated treatments. They do not address significant skin redundancy.

List pros and cons: lower risk and downtime versus limited tightening and modest fat loss.

Candidacy Assessment

Candidacy for back fat removal after semaglutide starts with a focused clinical review that links body changes to timing, skin quality, and patient goals. Candidates are usually near their target weight and have kept a stable weight for several months. Stability is typically defined as a variance within 2 to 5 kg for at least 3 to 6 months.

At minimum, wait six months after starting semaglutide or after bariatric surgery before planning body contouring. This pause helps define residual fat, allows skin to settle, and lowers the risk of operating during active rapid weight loss.

CriterionWhat to checkPractical threshold or note
Weight stabilityRecent weight log, scale recordsWithin 2–5 kg for 3–6 months
Timing since semaglutide/start of weight lossStart date and course lengthAt least 6 months since initiation
Skin elasticityPinch test, clinical photosGood, moderate, poor — affects procedure choice
Fat distributionLocalized vs diffuse back fatLocalized may suit liposuction; diffuse may need excision
Muscle separationPalpation, functional assessmentDiastasis or laxity may need combined repair
Nutritional statusLabs, diet history, signs of deficiencyOptimize if evidence of poor nutrition
Psychological readinessGoals, expectations, supportClear and realistic aesthetic goals

Skin elasticity, fat distribution, and muscle separation help determine the technical plan. If elastic is nice and the fat is local, liposuction alone can remold the back. If skin is lax or has redundant rolls, surgical excision or a body lift may be necessary.

Muscle separation or thoracolumbar laxity can alter scar placement and the need for fascial tightening. Use hard data and pictures to record baseline.

Please describe your weight loss history and current weight management efforts in detail. Record starting weight, all-time highs, speed of loss, relapses, and current routine, including semaglutide dose and duration, diet, exercise, and supplements.

Remember that studies indicate that 50 to 75 percent of patients discontinue GLP-1s within a year and then often regain weight. This background impacts timing and expectations and aids in forecasting future stability.

Define aesthetic goals in specific terms: how much fat reduction, preferred scar acceptance, and desired contour. Use stock images and diagrams to orient surgeon and patient. Discuss satisfaction data: studies report more than 90% satisfaction when patients are well selected, reinforcing the value of careful candidacy workup.

Evaluate nutrition and complications risk. Large cohort data links more than six months of semaglutide use pre-op with complications tied to poor nutritional status. Obtain labs and consider a nutrition consult to optimize protein, vitamins, and overall intake before surgery.

The Recovery Journey

Recovery from back fat liposuction is a multi-stage process that usually spans weeks to months. Most patients return to light activities and work within 2 to 4 weeks, with full recovery, including skin settling and final contour, requiring 6 to 12 months. For those who used semaglutide or other GLP-1s, rapid weight loss can leave excess skin. Body contouring takes care of this, but the skin tends to lag behind and requires additional treatments.

Post-operative checklist for care and appointments:

  • Wound care: Keep incisions clean and dry, change dressings as instructed, and use prescribed topical ointments when advised. Observe for any symptoms of infection including spreading redness, increased warmth, or malodorous drainage.
  • Follow-up visits: Schedule the first check within 48 to 72 hours, then at one week, two to four weeks, and as recommended up to six months. Surgeons frequently observe healing at intervals to time compression adjustments and activity advancement.
  • Activity restrictions: Avoid heavy lifting and strenuous exercise for 4 to 6 weeks. A gradual return to normal exercise usually occurs by 6 to 8 weeks when swelling has mostly resolved. Recovering from breast augmentation surgery: sleep on your side or back to alleviate pressure on your incisions.
  • Medication and support: Take pain meds and antibiotics as prescribed, use cold packs for the first 48 to 72 hours to limit swelling, and consider lymphatic drainage massage when approved by your surgeon.

Common side effects and ways to minimize them:

  • Swelling and bruising is par for the course. Most swelling goes down by 6 to 8 weeks. Wear compression garments daily to accelerate resolution and support tissue.
  • Some temporary discomfort or numbness in the treated area is typical. Take your recommended pain control, don’t smoke, and keep moving gently to prevent stiffness.
  • Minor wound problems occur in a small number of cases. Follow wound-care steps and contact your clinic if you see anything unusual.

Advanced healing techniques, nutrition, and hydration:

  • Lymphatic drainage massage helps minimize fluid retention and contour the skin. Begin only after surgeon clearance.
  • Nutrition: Emphasize protein (for example, lean meats, legumes) to support tissue repair, vitamin C for collagen production, and zinc for wound healing. On the Recovery Journey, keep a steady, balanced diet if you’re planning body contouring. The best candidates have maintained their weight for 3 to 6 months.
  • Hydration: Staying well hydrated aids circulation and supports cellular repair. Strive for consistent hydration tailored to climate and exertion.
  • Skin support: Topical silicone or prescribed creams may help scar maturation. If skin recoil is slow following rapid weight loss, minimally invasive tightening procedures or staged contouring can provide better results.

A major study of over 4,000 patients who had body contouring post-semglutide revealed significant safety data and helped define recovery and complication timelines.

Beyond The Scale

Back fat removal after semaglutide is about more than just a number on the scale. Most of us discover that changes in shape, loose skin, or the way clothes fit alter our self-image as much as weight. Concentrating on body image, self-confidence, and overall well-being aids you in establishing achievable goals and keeps your choices centered around long-term health as opposed to fast solutions.

Keep in mind that significant weight loss can leave behind extra skin on the back and elsewhere, and that can lead patients to explore body contouring to complement their new frame.

The psychological aftermath of significant weight loss is prevalent and worthy of notice. Adjusting to a new body can trigger mixed emotions: relief, grief, and surprise at how clothes sit or how the face looks. Certain weight loss medications alter facial fullness, occasionally resulting in a gaunt or sunken look, which can be disconcerting.

Managing expectations is key. They should expect a period of adjustment, engage mental health professionals when indicated, and establish realistic timetables for surgery. Revision rates for post-weight loss contouring are higher than for typical cosmetic surgery, frequently 15 to 25 percent, so having the knowledge that additional procedures may be required prevents disappointment.

A lifestyle-based approach to maintaining results minimizes the risk of regain and complements surgical outcomes. Consistent strength-training exercise tones the muscles of your back and improves posture. Well-balanced diets with adequate protein and micronutrients support skin integrity and muscle mass.

Continued follow-up with a medical team, including primary care, nutrition, and possibly a bariatric or aesthetic surgeon, allows for personalized plans. Some folks who quit weight loss drugs experience fast weight regain. If you’re planning surgery, stability counts. Most authorities suggest waiting until weight has been stable for 12 to 18 months prior to elective body contouring to lower the risk of subsequent revisions.

Keep track of your progress with some solid, non-scale indicators. Before-and-after shots from the same angle, tape measurements, and clothes-fit notes paint a more complete picture than weight alone. Personal milestones, such as being able to lift a child, fit into a fitted shirt, or return to a beloved activity, are good measures of success.

When considering surgery, remember that multiple areas may need work: arms, back, abdomen, breasts, thighs, and face. It can be expensive, often ranging from USD 3,000 to 20,000 or more, so budget and talk about stages if necessary. Others show satisfaction rates over 90% for well-chosen candidates, affirming the worth of selective vetting and reasonable expectations.

Conclusion

Semaglutide can slash pounds and shed fat throughout the body. Pesky back fat can linger. Liposuction and fat removal surgery provide obvious means to back sculpting. A comprehensive exam, transparent photos, and a goals discussion guide the perfect plan. Anticipate swelling and temporary motion restrictions and several weeks of reduced pace. Combine surgery with consistent eating and activity to maintain results on display. For some, the ideal result combines medical weight care with targeted contouring. If back shape still counts after weight loss, schedule a consult with a board-certified surgeon who discusses risks, price, and recovery. Schedule a consultation to map the steps that fit your goals.

Frequently Asked Questions

Can semaglutide reduce back fat by itself?

Semaglutide can reduce overall body weight and some fat. It doesn’t specifically target back fat. Everyone loses fat in different areas and has different genetics, so back fat can be difficult to get rid of even after weight loss.

When is surgical contouring considered after semaglutide?

Surgery is when your weight is stable for three or more months and diet or exercise no longer chip away at stubborn back fat. Stable weight and realistic goals aid in providing better surgical outcomes.

What surgical options remove back fat?

Standard solutions are liposuction and body contouring procedures such as bra-line or mid-back lift. Options vary based on fat volume, skin laxity, and your anatomy as determined by an experienced plastic surgeon.

How do I know if I’m a good candidate for back-contouring surgery?

Ideal candidates have stable weight, realistic expectations, good overall health, and localized fat or excess skin that haven’t responded to non-surgical measures. A surgeon analyzes history and physique.

What is the typical recovery time after back liposuction?

The majority return to light activities in 1 to 2 weeks and full activity in 4 to 6 weeks. Swelling and bruising may persist for weeks. Stick to your surgeons’ aftercare to quicken recovery.

Will back-contouring surgery stop fat from returning?

Surgical interventions eliminate current fat cells but don’t necessarily safeguard against future new fat accumulation. By keeping up with healthy eating, exercise, and weight maintenance, you can maintain results long term.

Are there non-surgical alternatives to reduce back fat after semaglutide?

Non-surgical options include targeted exercise, skin-tightening treatments, and cryolipolysis (fat freezing). Outcomes differ and are typically more subtle than surgery. Talk to experts to select the optimal method.