Understanding J-Plasma Technology
Definition and Use
J-Plasma is a new technology used in plastic surgery and skin resurfacing procedures. It combines cold helium plasma with radiofrequency energy. This combination allows for precise skin tightening and fat removal through small incisions, often used by plastic surgeons in plastic surgery and dermal resurfacing. Surgeons use J-Plasma in plastic surgeries and aesthetic procedures to improve body contours and reduce sagging skin with minimal scarring.
Precision and Control
J-Plasma offers more precision than traditional liposuction methods. The cold plasma stream targets specific areas without affecting surrounding tissues, promoting skin contraction and resurfacing while minimizing heat and scarring. This level of control reduces the risk of uneven results and scarring in procedures involving a combination of heat. Patients often experience smoother skin and more natural-looking outcomes with fewer complications and less scarring.
Technological Advancements
Technological advancements allow J-Plasma to minimize tissue damage. The cold helium plasma cools the treatment area instantly, reducing heat exposure and complications for the patient, minimizing scarring. This cooling effect protects the skin from burns and other complications. As a result, recovery times are shorter compared to older methods.
Exploring Side Effects
Swelling and Bruising
Swelling and bruising are common after J-Plasma liposuction. Patients usually experience these effects within the first few days post-surgery. The swelling often peaks around day three or four. It gradually decreases over the next two weeks.
Bruising can vary in intensity. Some patients may see light bruises, while others might have more noticeable marks. Most bruising fades within two weeks. However, some cases might take longer to heal fully.
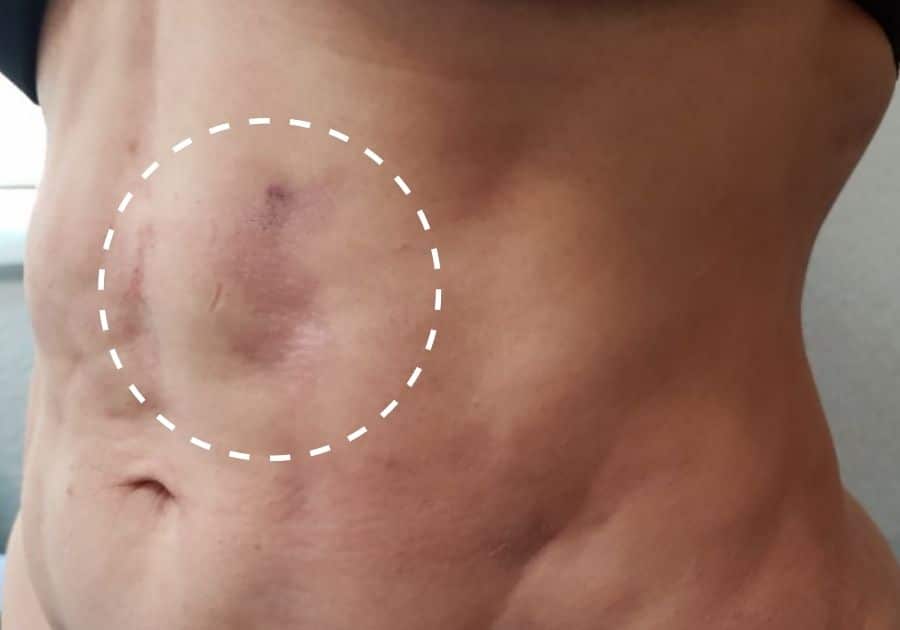
Scarring Factors
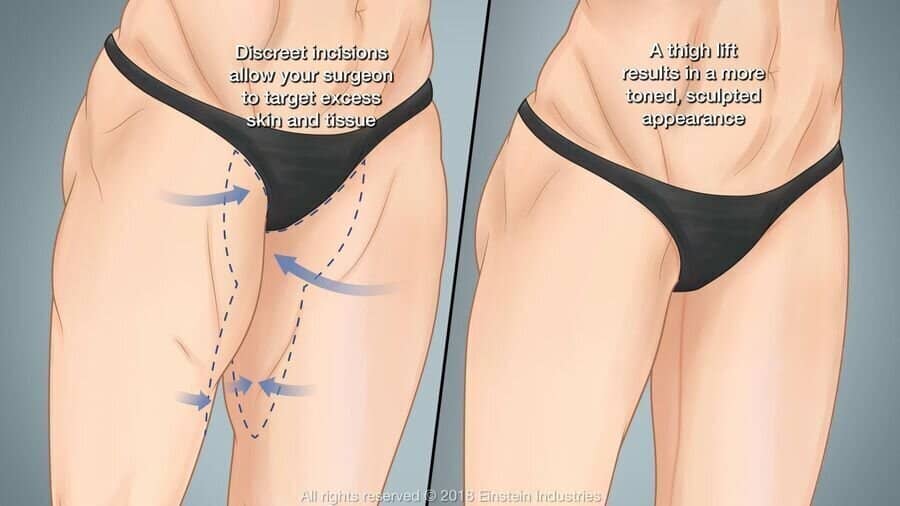
Scarring is a potential risk with any surgical procedure. With J-Plasma treatments, several factors influence scar formation. Patient’s skin type plays a significant role. People with darker skin tones may be more prone to noticeable scars.
The location of the treatment area also matters. Areas with thinner skin, like the neck, tend to scar more easily than areas with thicker skin, such as the abdomen. Surgeon’s technique is crucial too. Experienced surgeons know how to minimize scarring by making precise incisions and handling tissues gently.
Nerve Damage Risks
Nerve damage is a rare complication but can occur with J-Plasma liposuction. This risk increases if the surgeon lacks experience or uses improper techniques during surgery. Nerve damage can cause numbness, tingling, or even loss of sensation in the treated area.
Patients should watch for signs of nerve damage post-surgery. If experiencing persistent numbness or unusual sensations beyond typical recovery time, consult your doctor immediately.
Skin Discoloration
Skin discoloration is another rare but serious effect of J-Plasma treatments. This condition happens when the treated skin heals unevenly, leading to patches of different colors on the body.
Several factors contribute to this risk:
- Patient’s medical history
- Quality of aftercare
- Skill level of the surgeon
Choosing an experienced practitioner reduces this risk significantly.
Managing Common Concerns
Discomfort and Pain
Discomfort after J-Plasma liposuction is common. Over-the-counter medications like ibuprofen or acetaminophen can help. Avoid aspirin as it may increase bruising. Follow the dosage instructions on the packaging.
Applying ice packs to the treatment area can reduce pain. Wrap the ice pack in a cloth to avoid direct contact with skin. Use the ice pack for 20 minutes at a time, several times a day.
Swelling and Bruising
Swelling and bruising are normal after this procedure. Rest is crucial for recovery. Elevate the treated area when possible to reduce swelling.
Ice packs also help minimize swelling and bruising. Apply them as described earlier for best results.
Infection Prevention
Preventing infection is vital for healthy healing. Keep the treated area clean and dry. Follow your health care provider‘s instructions on wound care.
Change dressings as advised by your doctor. Avoid touching the area with dirty hands to prevent bacteria from entering the wound.
Promoting Healthy Healing
Healthy healing requires proper care of the soft tissue in the treated area. Wear any recommended compression garments as directed by your doctor. These garments support healing and reduce swelling.
Stay hydrated and eat a balanced diet rich in vitamins and minerals. Good nutrition supports tissue repair and overall recovery.
Resuming Normal Activities
Return to normal activities gradually. Light walking can promote blood circulation without straining the body.
Avoid strenuous activities or heavy lifting until cleared by your health care provider. This helps prevent complications and supports proper healing.
Monitoring Appearance Changes
Monitor changes in appearance closely during recovery. Some loose skin may remain, especially in older women or those with significant weight loss history.
Discuss any concerns with your doctor during follow-up appointments. They can provide guidance on additional treatments if needed, such as tummy tucks for excess skin removal.
Benefits of J-Plasma
Reduced Scarring
J-Plasma liposuction uses plasma energy to target fat cells. This technique minimizes damage to surrounding tissues. Traditional liposuction often results in noticeable scars. J-Plasma, however, reduces the risk of scarring significantly. The precise application of plasma energy ensures only the targeted areas are affected.
Patients experience smoother skin post-surgery. This is a major benefit for those concerned about visible scars.
Precise Contouring
J-Plasma offers more accurate body contouring. Surgeons can achieve detailed and precise results with this method. The controlled use of plasma allows for better sculpting of the body.
Traditional methods sometimes leave uneven surfaces. However, J-Plasma provides a more uniform appearance. Patients report higher satisfaction with their results due to this precision.
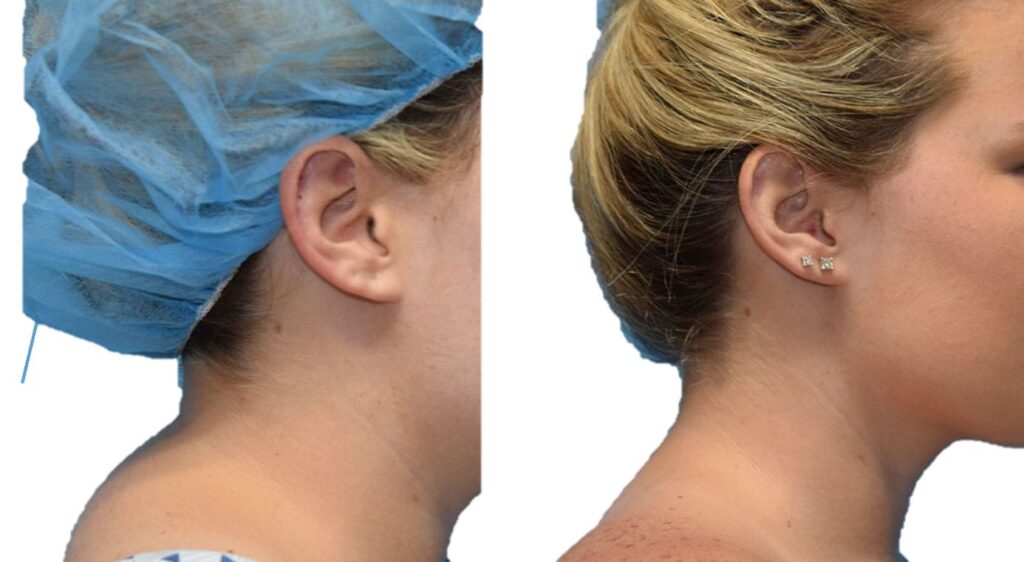
Skin Tightening
One unique benefit of J-Plasma is skin tightening. Standard liposuction removes fat but often leaves loose skin behind. Plasma energy stimulates collagen production, which tightens the skin naturally.
This added benefit means patients enjoy firmer skin after surgery. It also reduces the need for additional procedures to remove excess skin.
Enhanced Recovery
Recovery time is another advantage of J-Plasma liposuction. Patients typically heal faster compared to traditional methods. Less tissue damage means less bruising and swelling.
People can return to their normal activities sooner. This quicker recovery is appealing for those with busy lifestyles.
Long-Lasting Results
The results from J-Plasma are long-lasting. Collagen production continues even after the procedure, enhancing dermal resurfacing over time.
Patients see improvements in their body’s appearance for months post-surgery. Maintaining a healthy lifestyle can further extend these benefits.
Assessing Suitability for J-Plasma
Ideal Candidate
The ideal candidate for J-Plasma liposuction is generally in good health. They should have realistic cosmetic goals and a stable body weight. Individuals seeking tighter skin and fat reduction may benefit most from this procedure.
Candidates should be non-smokers, as smoking can affect healing. They should also not have any serious medical conditions that could impair recovery.

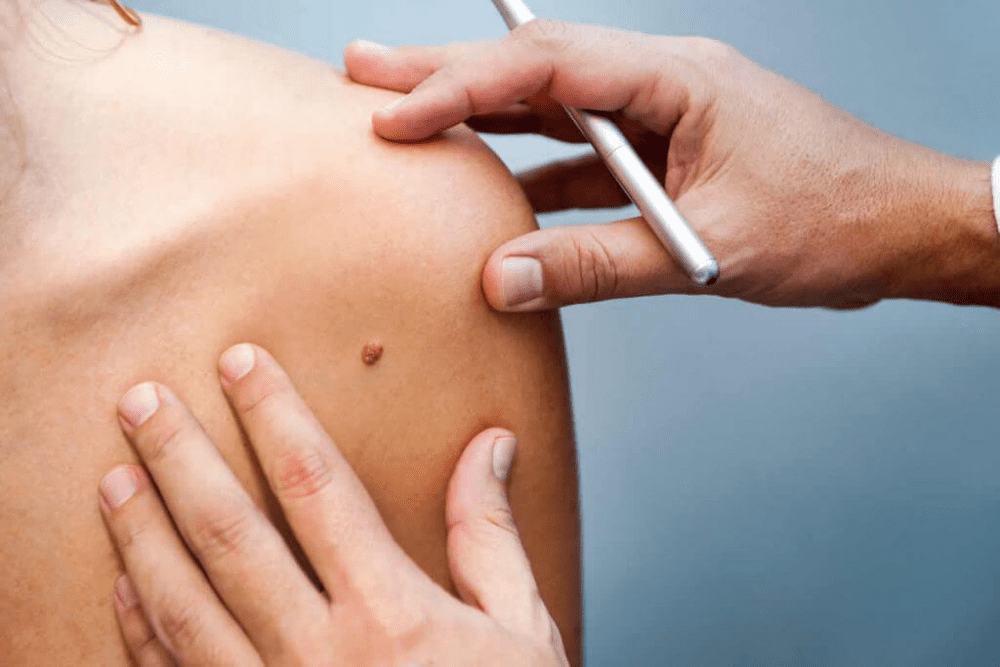
Consultation Importance
A thorough consultation with a qualified practitioner is crucial. The plastic surgeon will evaluate the patient’s health status and cosmetic goals. This helps to determine if J-Plasma liposuction is suitable.
During the consultation, the surgeon will discuss potential risks and benefits. It’s important to choose a board certified plastic surgeon for this evaluation. Certification ensures that the practitioner has met specific standards of education and expertise.
Health History Considerations
Individuals with a history of skin pigmentation disorders need careful assessment. These conditions might increase the risk of complications like hyperpigmentation or scarring.
Patients with nerve sensitivity issues should also consult their doctor thoroughly. Nerve sensitivity can lead to increased pain or discomfort during and after the procedure.
Additional Factors
Certain factors can influence suitability for J-Plasma liposuction:
- Age: Older individuals might have different skin elasticity.
- Blood vessels: Those with fragile blood vessels may face higher risks.
- Tissue quality: Poor tissue quality can affect results and recovery.
Summary
J-Plasma liposuction offers innovative technology that minimizes side effects while providing impressive benefits. Understanding the potential risks and how to manage them is key to making an informed decision. This procedure could be a game-changer for those looking for effective body contouring.
If you’re considering J-Plasma, assess your suitability with a qualified professional. Take the next step towards achieving your aesthetic goals by consulting an expert today. Your journey to a more confident you starts now.
Frequently Asked Questions
What is J-Plasma technology?
J-Plasma combines helium gas and radiofrequency energy to create a cool plasma stream. It tightens skin and removes fat with minimal damage.
Are there any side effects of J-Plasma liposuction?
Yes, possible side effects include swelling, bruising, and temporary numbness. These are usually mild and resolve quickly.
How can I manage common concerns post-procedure?
Follow your surgeon’s aftercare instructions. Use compression garments and avoid strenuous activities for the recommended period.
What are the benefits of J-Plasma liposuction?
Benefits include tighter skin, precise fat removal, and quicker recovery compared to traditional liposuction methods.
Who is a good candidate for J-Plasma liposuction?
Ideal candidates are healthy individuals with moderate skin laxity and localized fat deposits that are resistant to diet and exercise.
How long does it take to see results from J-Plasma liposuction?
Initial results are visible immediately. Full results develop over 3-6 months as swelling subsides and collagen production increases.
Is J-Plasma liposuction safe?
Yes, when performed by a certified professional. Always consult with a qualified surgeon to assess risks and ensure safety.